Set up SSO with Google
Single Sign-on via the Google Authenticator provider has been removed in Unleash v5 (deprecated in v4). We recommend using OpenID Connect instead. If you're running a self hosted version of Unleash and you need to temporarily re-enable Google SSO, you can do so by setting the GOOGLE_AUTH_ENABLED environment variable to true. If you're running a hosted version of Unleash, you'll need to reach out to us and ask us to re-enable the flag. Note that this code will be removed in a future release and this is not safe to depend on.
Introduction
In this guide we will do a deep dive on the Single-Sign-On (SSO) using Google Authentication. Unleash supports other identity providers and protocols, have a look at all available Single-Sign-On options
Basic configuration
Step 1: Sign-in to Unleash
In order to configure SSO you will need to log in to the Unleash instance with a user that have "Admin" role. If you are self-hosting Unleash then a default user will be automatically created the first time you start Unleash:
- username:
admin - password:
unleash4all
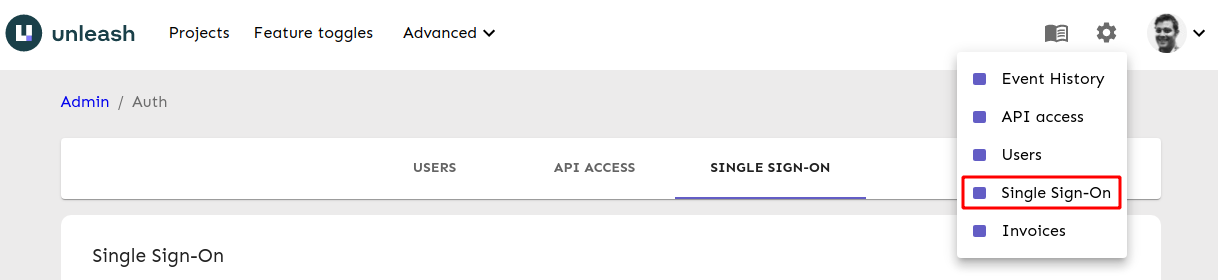
Step 2: Navigate to SSO configuration
In order to configure SSO with Google with your Unleash enterprise you should navigate to the Single-Sign-On configuration section and choose the "Google" tab.
Step 3: Google Authentication
Navigate to https://console.developers.google.com/apis/credentials
- Click
Create credentials - Choose
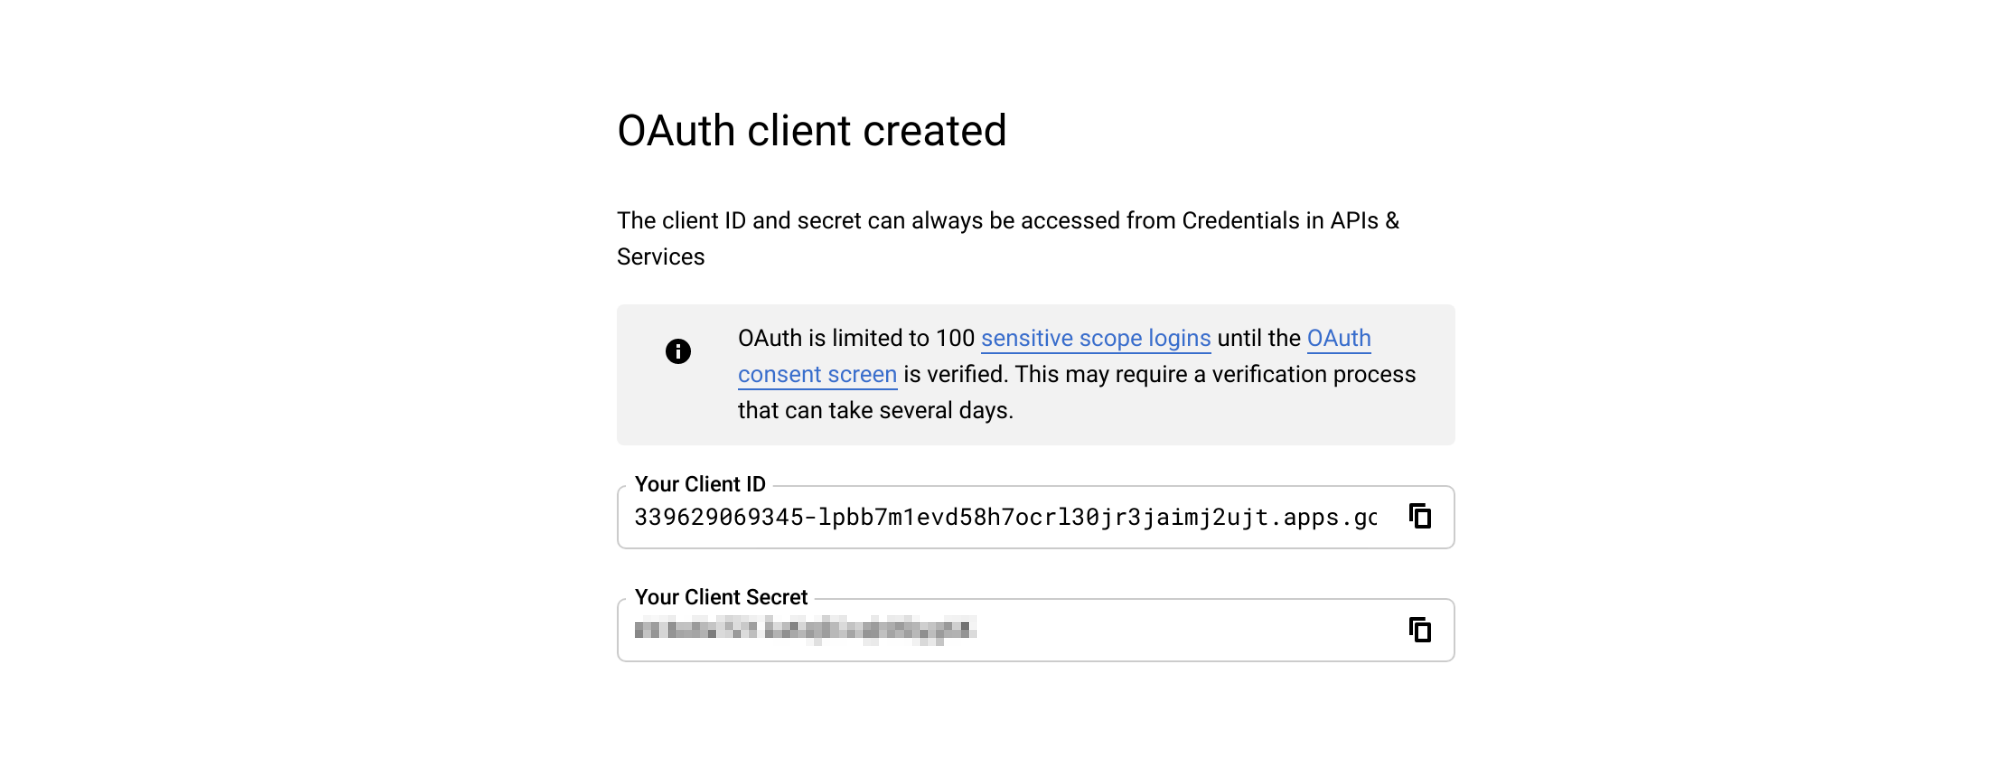
Oauth Client Id - Choose Application Type:
web application - Add https://[unleash.hostname.com]/auth/google/callback as an authorized redirect URI.
You will then get a Client ID and a Client Secret that you will need in the next step.
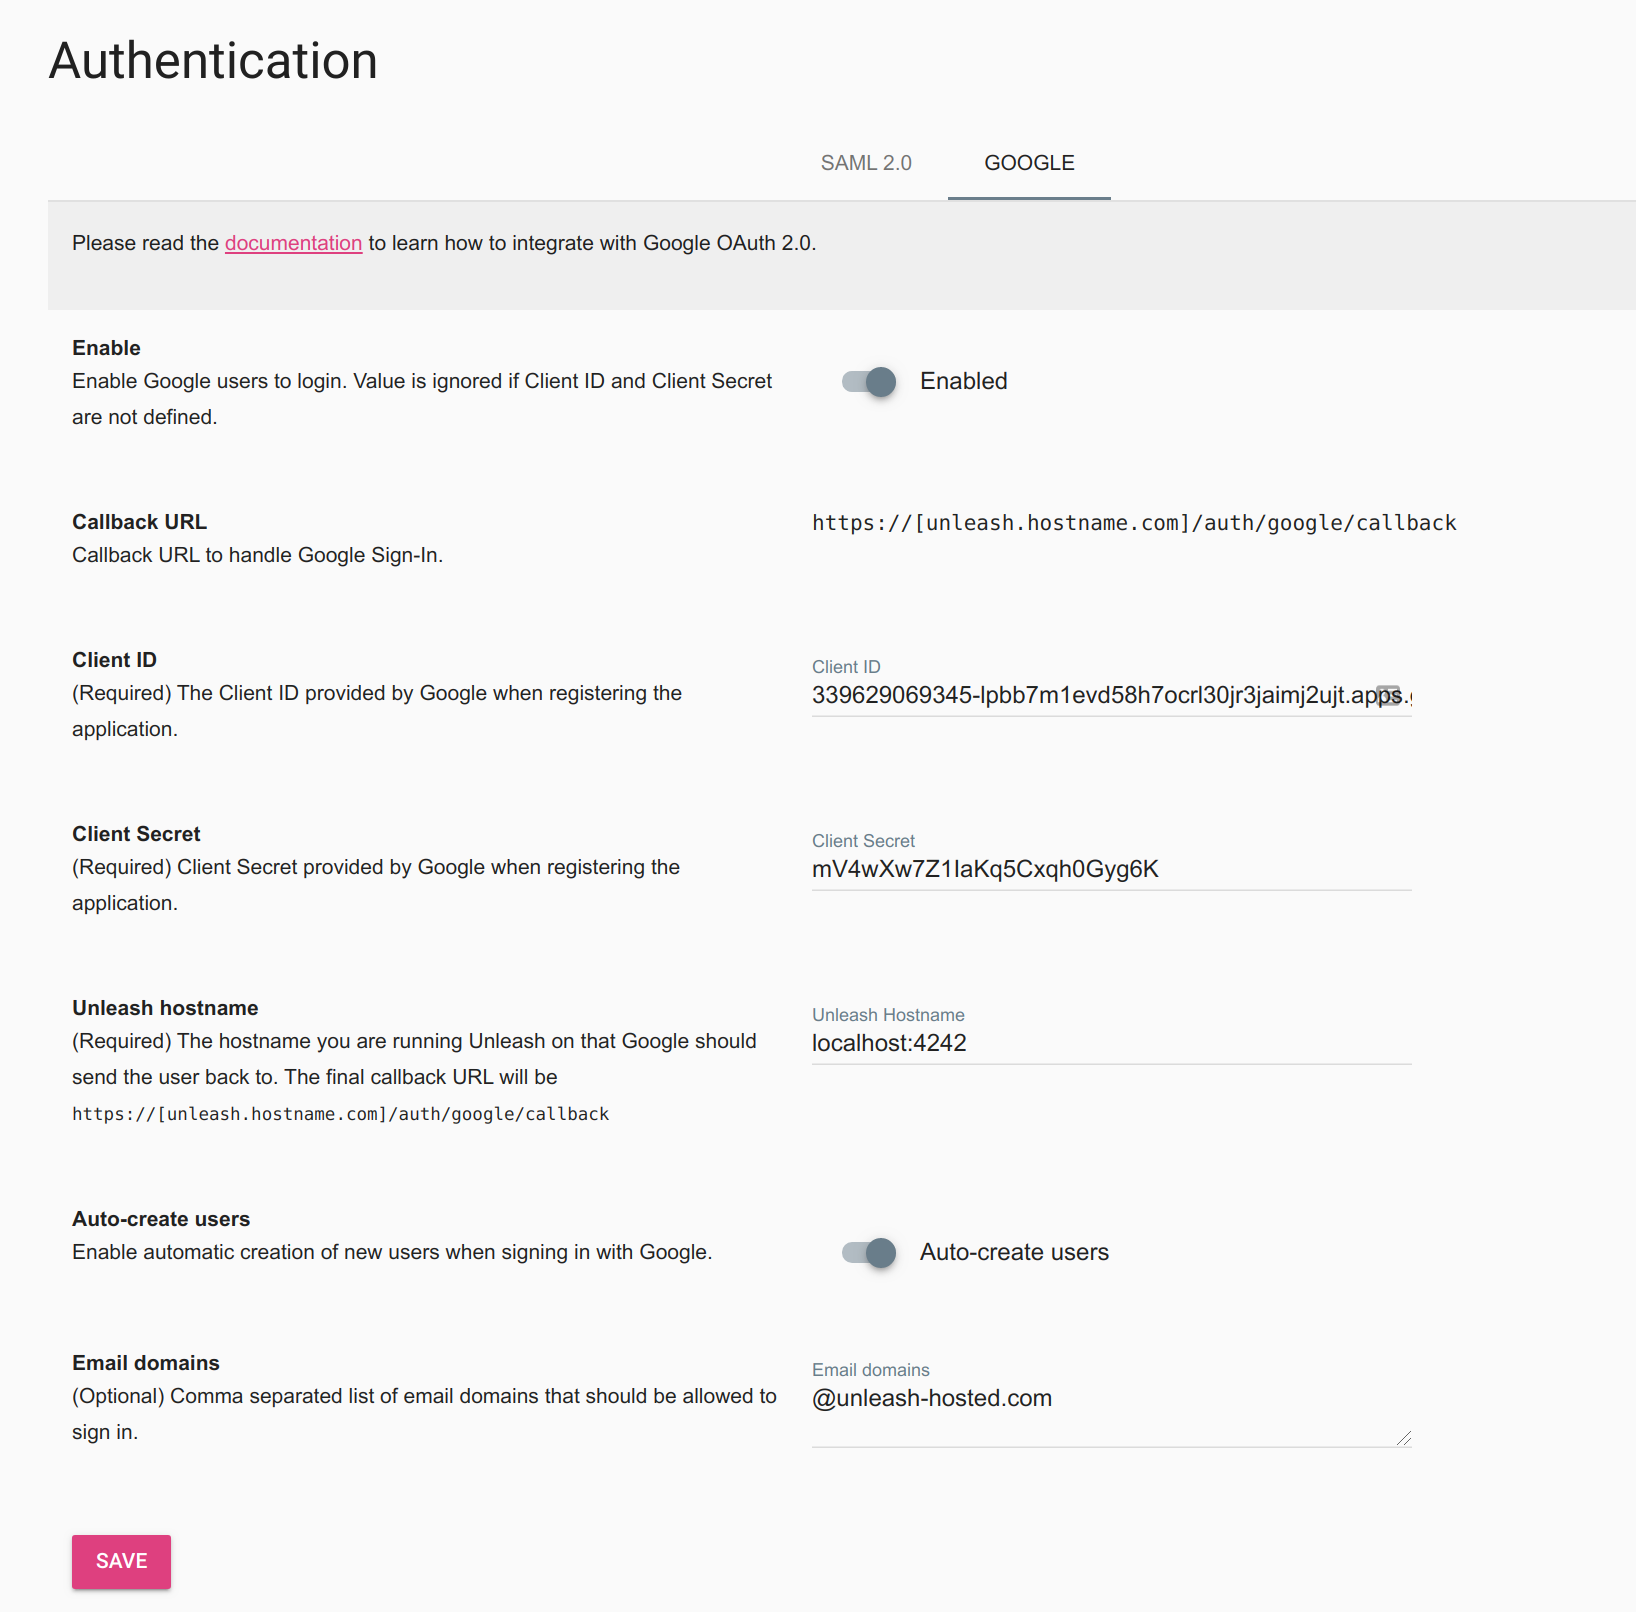
Step 4: Configure Unleash
Log in to Unleash and navigate to Admin menu -> Single-Sign-on -> Google.
First insert the Client Id and Client Secret from step 3.
You must also specify the hostname Unleash is running on. If Unleash is running on localhost you should specify the port as well (localhost:4242).
If you want to allow everyone in your organization to access Unleash, and have Unleash auto-create users you can enable this option. You should then also specify which email domains you want to allow logging in to Unleash.
Remember to click “Save” to store your settings.
Step 5: Verify
Log out of Unleash and sign back in again. You should now be presented with the “SSO Authentication Option”. Click the button and follow the sign-in flow. If all goes well you should be successfully signed in to Unleash. If something is not working you can still sign-in with username and password.
