How to Implement Feature Flags in Java
Java is an object-oriented programming language often used for mobile development and large-scale enterprise applications. Spring Boot is a popular Java framework used to get apps up and running with minimal configuration.
Leveraging feature flags allows developers to toggle new features on and off, whether you’re experimenting in your local environment, testing for QA purposes, or rolling out changes to users in production. With Unleash, an open-source feature flag service, you can use our tooling to implement feature flags into your application and release new features faster, strategically, and safely. But how can you do this in Java?
In this tutorial, you will learn how to set up and use Java feature flags with Unleash. We will use the SpringBoot Example app to log the status of a feature flag while your app is running.
Watch the video tutorial and follow along with the code from this documentation.
Prerequisites
In this tutorial, you will need the following:
- A web browser like Chrome or Firefox
- Git
- Docker
- (Optional) a code editor like IntelliJ IDEA
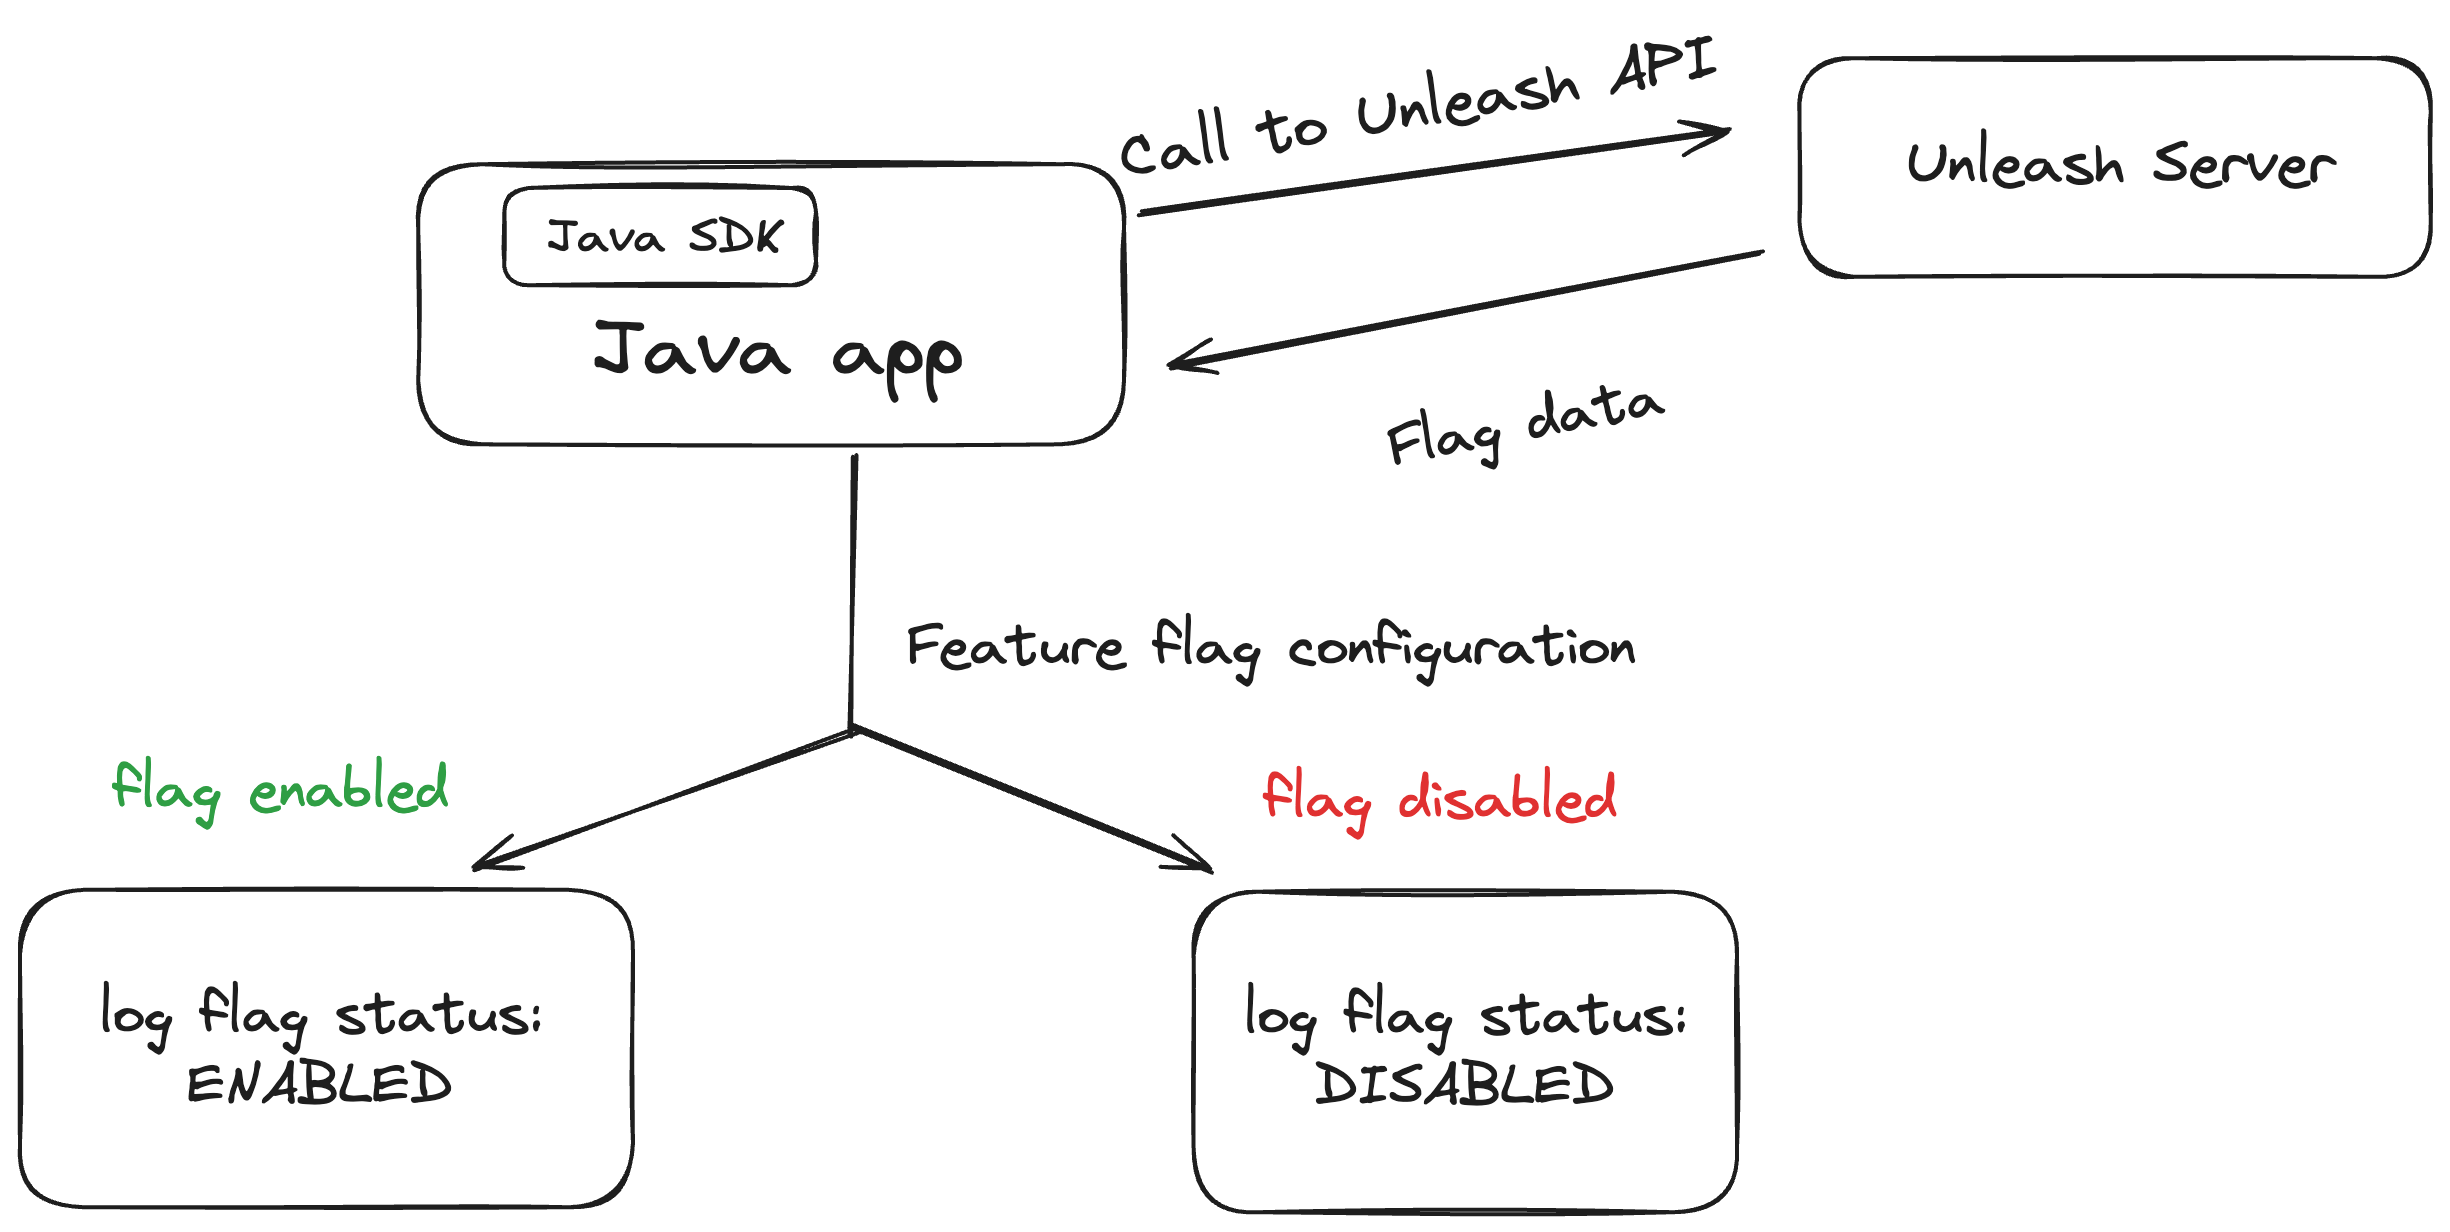
This architecture diagram breaks down how the Java app works with Unleash to control feature flags. We connect the Unleash service to your Java app using the Java SDK.
The Unleash Server acts as a Feature Flag Control Service, managing and storing your feature flags. It enables the retrieval of flag data and, particularly when not utilizing a user interface, supports the sending of data to and from the service. The Unleash Server has a UI for creating and managing projects and feature flags. There are also API commands available to perform the same actions straight from your CLI or server-side app.
1. Feature Flag best practices for backend apps
Since Java is a backend language, there are special security considerations to plan around when implementing feature flags.
Most importantly, you must:
- Limit feature flag payloads for scalability, security, and efficiency
- Improve architectural resiliency with graceful degradation
As your application scales, performance and resiliency become more critical and costly if not addressed. A feature flagging system should not be the reason your app slows down or fails. That’s why we recommend you account for this by reducing the size of your feature flag payloads. For example, instead of making one large call to retrieve flag statuses for all users as part of your configuration, group your users by specific attributes as part of your targeting rules that would be most relevant to your application.
Additionally, you can cache your feature flag configuration to help reduce network round trips and dependency on external services. You can rely on the cache if your Feature Flag Control Service is not available, which will mitigate potential failure in your application.
For a complete list of architectural guidelines, see our best practices for building and scaling feature flag systems.
2. Install a local feature flag provider
This section guides you through installing Unleash, setting up a local instance, logging in, and creating a feature flag. However, if you prefer, you can substitute Unleash with a different feature flag tool of your choice. Should you choose an alternative, you will need to modify the code to accommodate the new tool, but the fundamental steps are likely to remain similar.
Use Git to clone the Unleash repository and Docker to build and run it. Open a terminal window and run the following commands:
You now have Unleash installed onto your machine and running in the background. You can access this instance in your web browser at http://localhost:4242
Log in to the platform using these credentials:
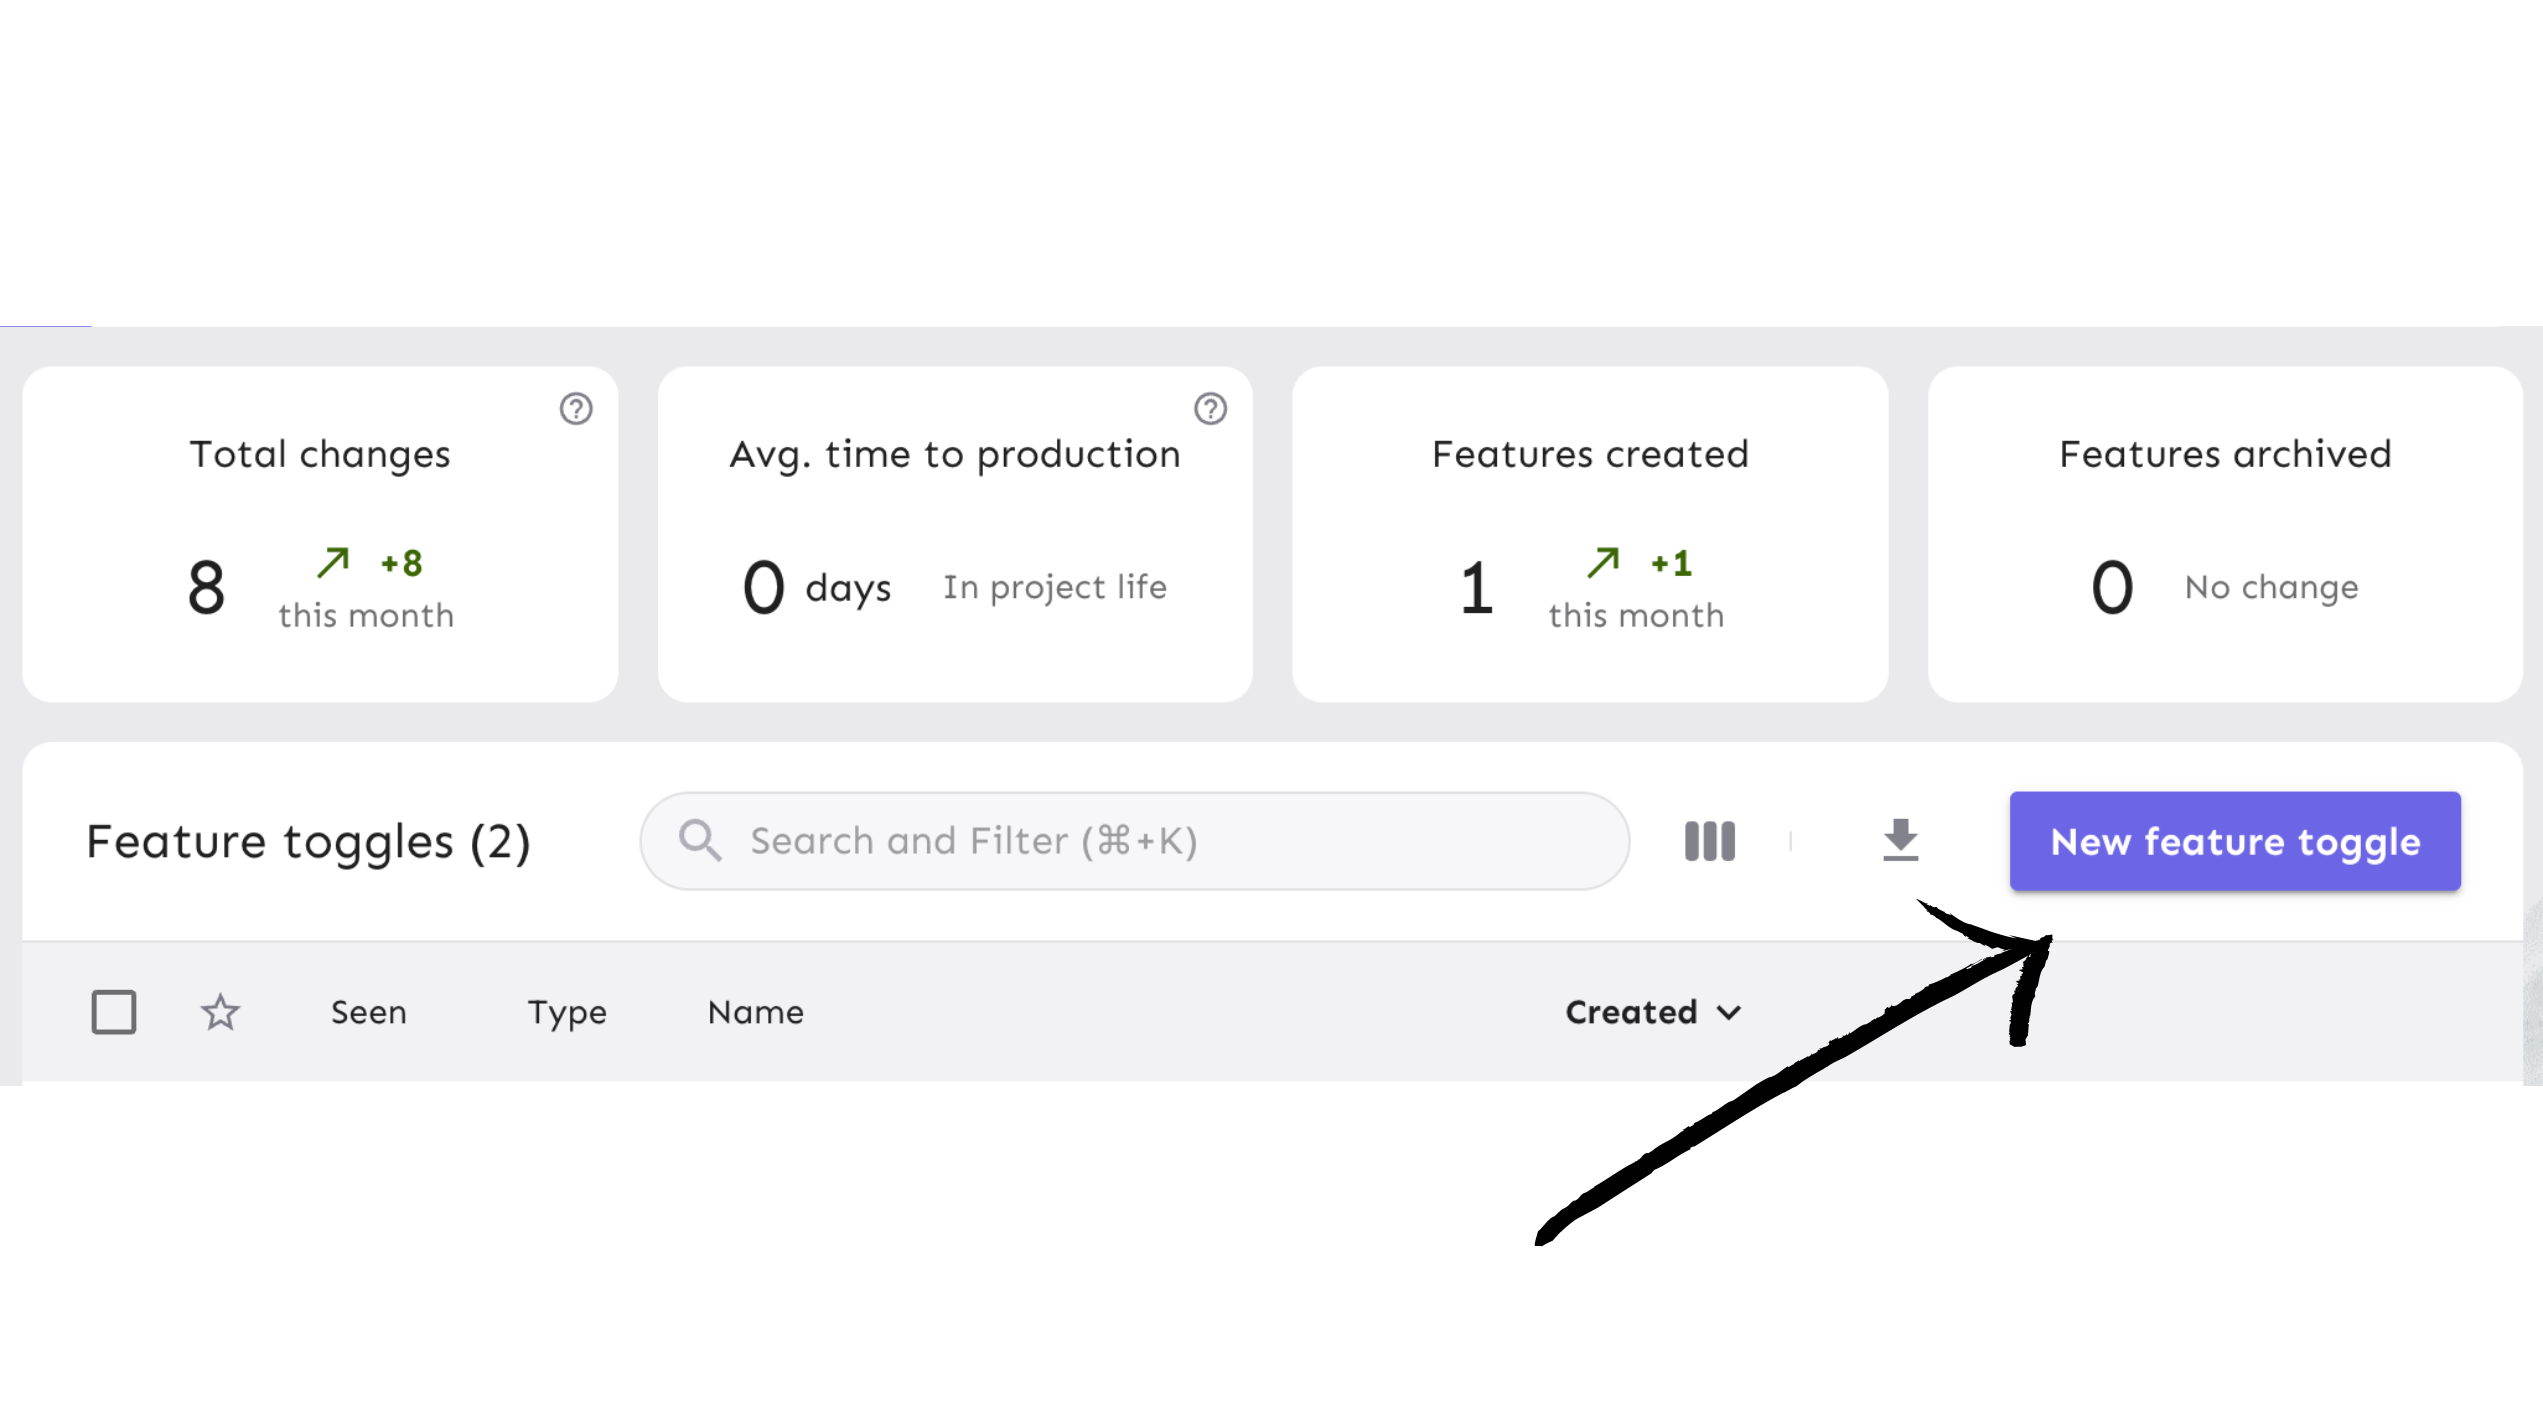
Click the ‘New feature flag’ button to create a new feature flag. Once you have created a flag, you will see it here.
3. Create and configure the feature flag
Next, you will create a feature flag and turn it on for your Java app.
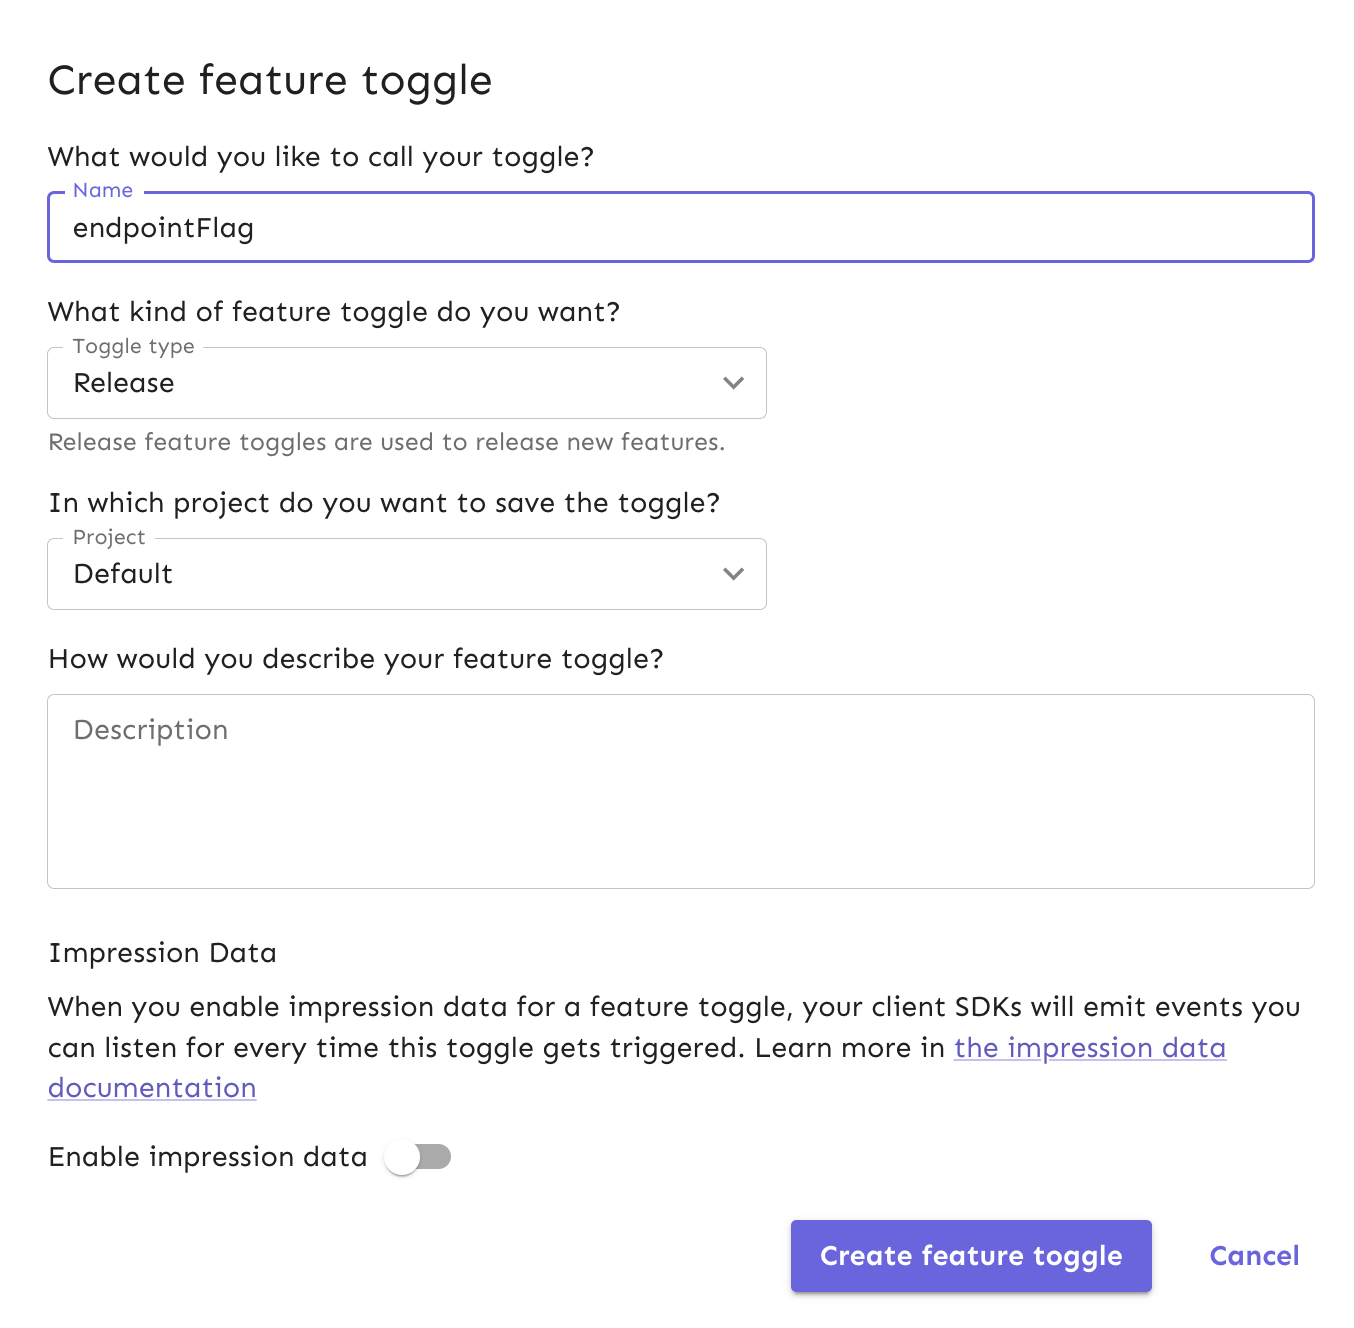
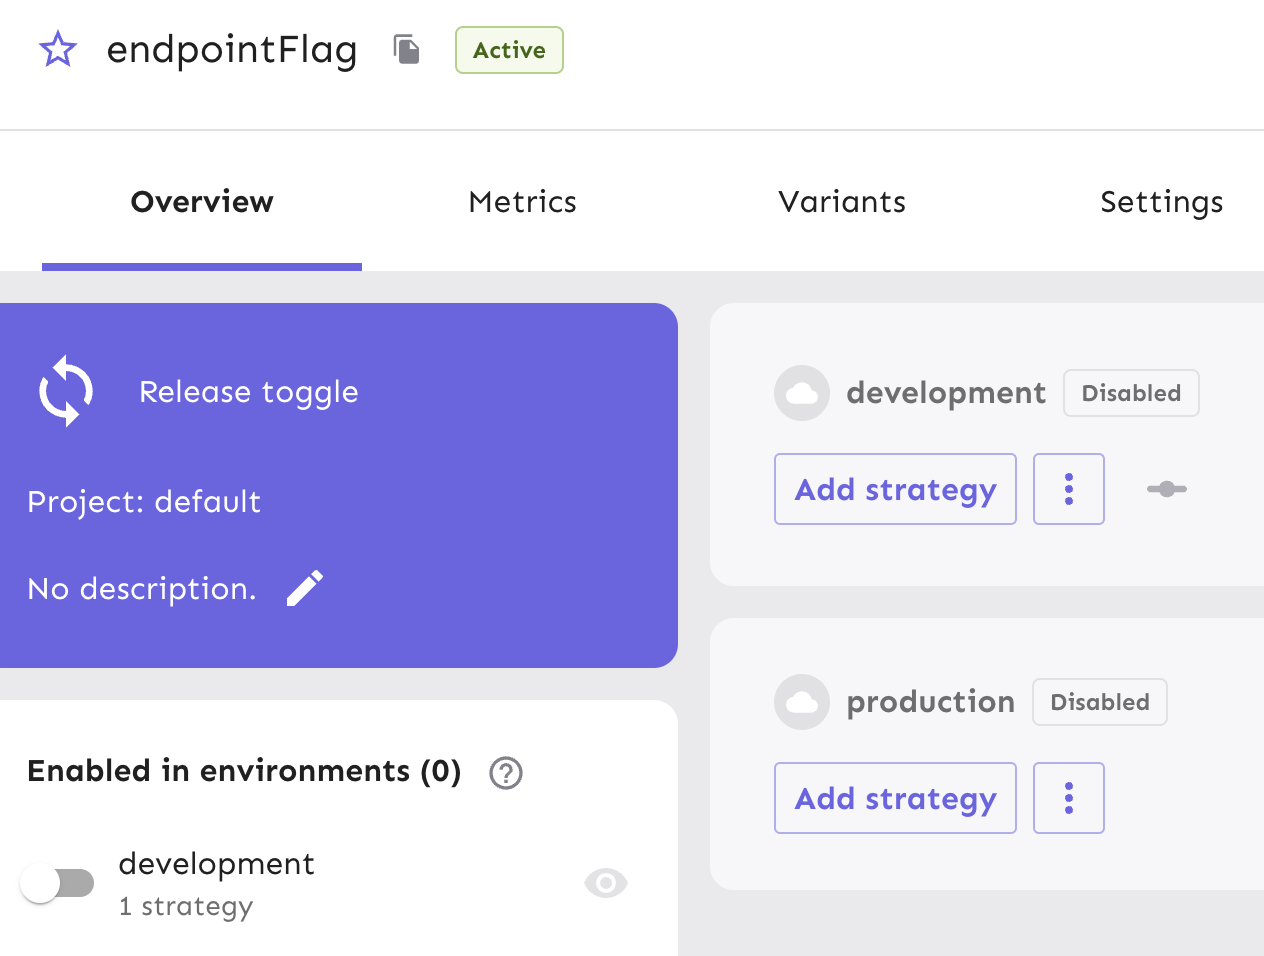
For the purpose of this tutorial, name the feature flag endpointFlag. Use the default values in the rest of the feature flag form.
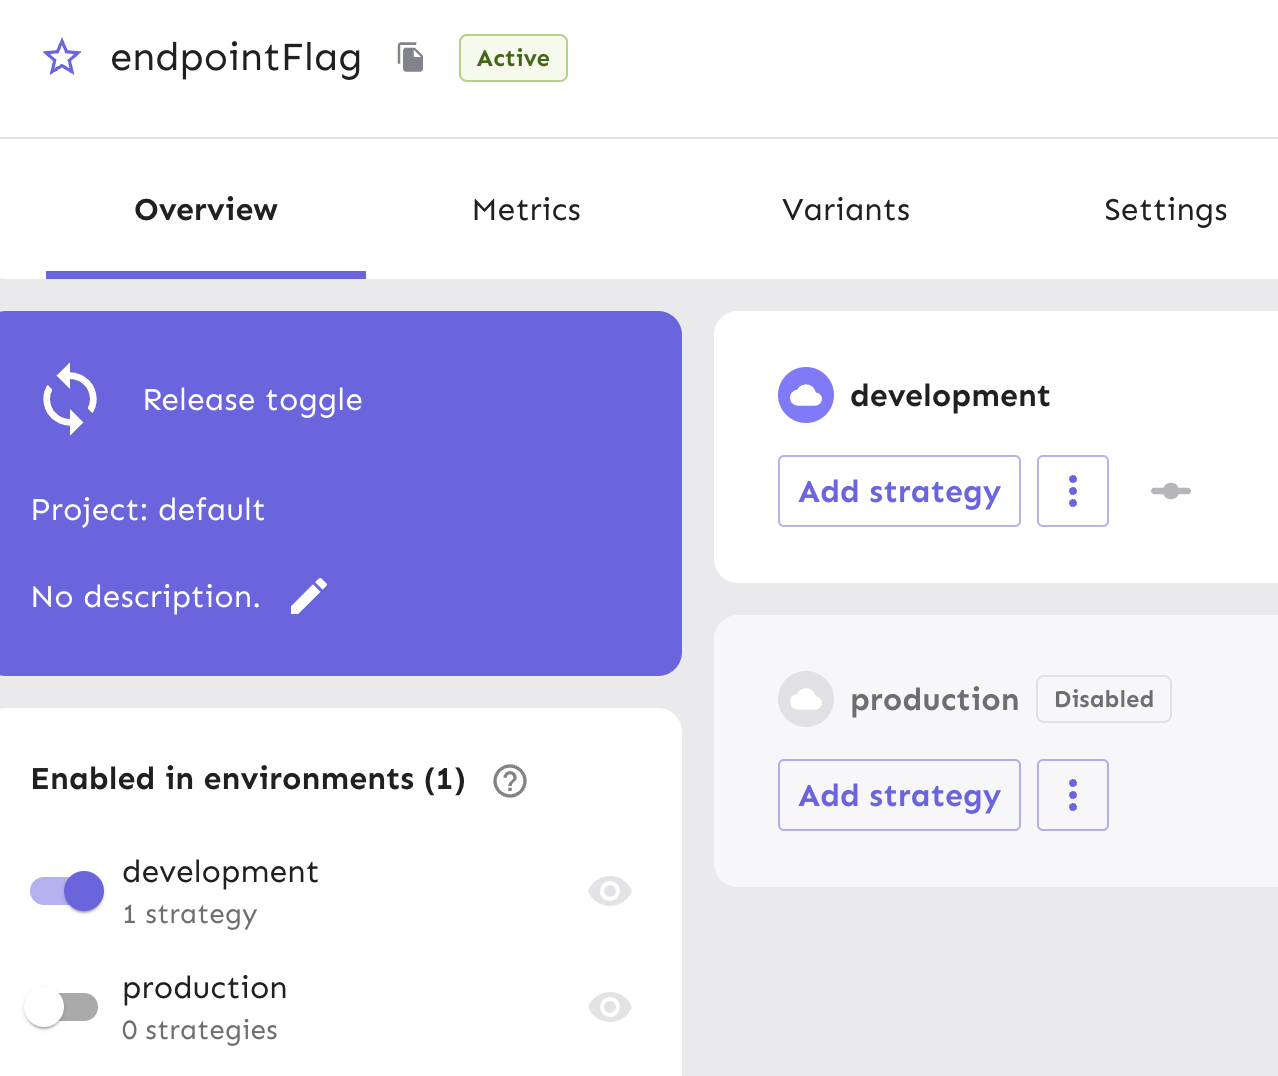
Your new feature flag has been created and is ready to be used. Enable the flag for your development environment, which makes it accessible for use in the Java app we will clone into your local environment.
Next, generate an API token to authenticate calls made to Unleash servers from your project. This API token will eventually be pulled into a configuration object within your Java application to toggle features. We require an API token as part of your flag configuration to ensure that only applications with the correct authentication can access your feature flags in Unleash. API tokens are created by users with API management access and this controls how they can be distributed to applications that need it, and by whom.
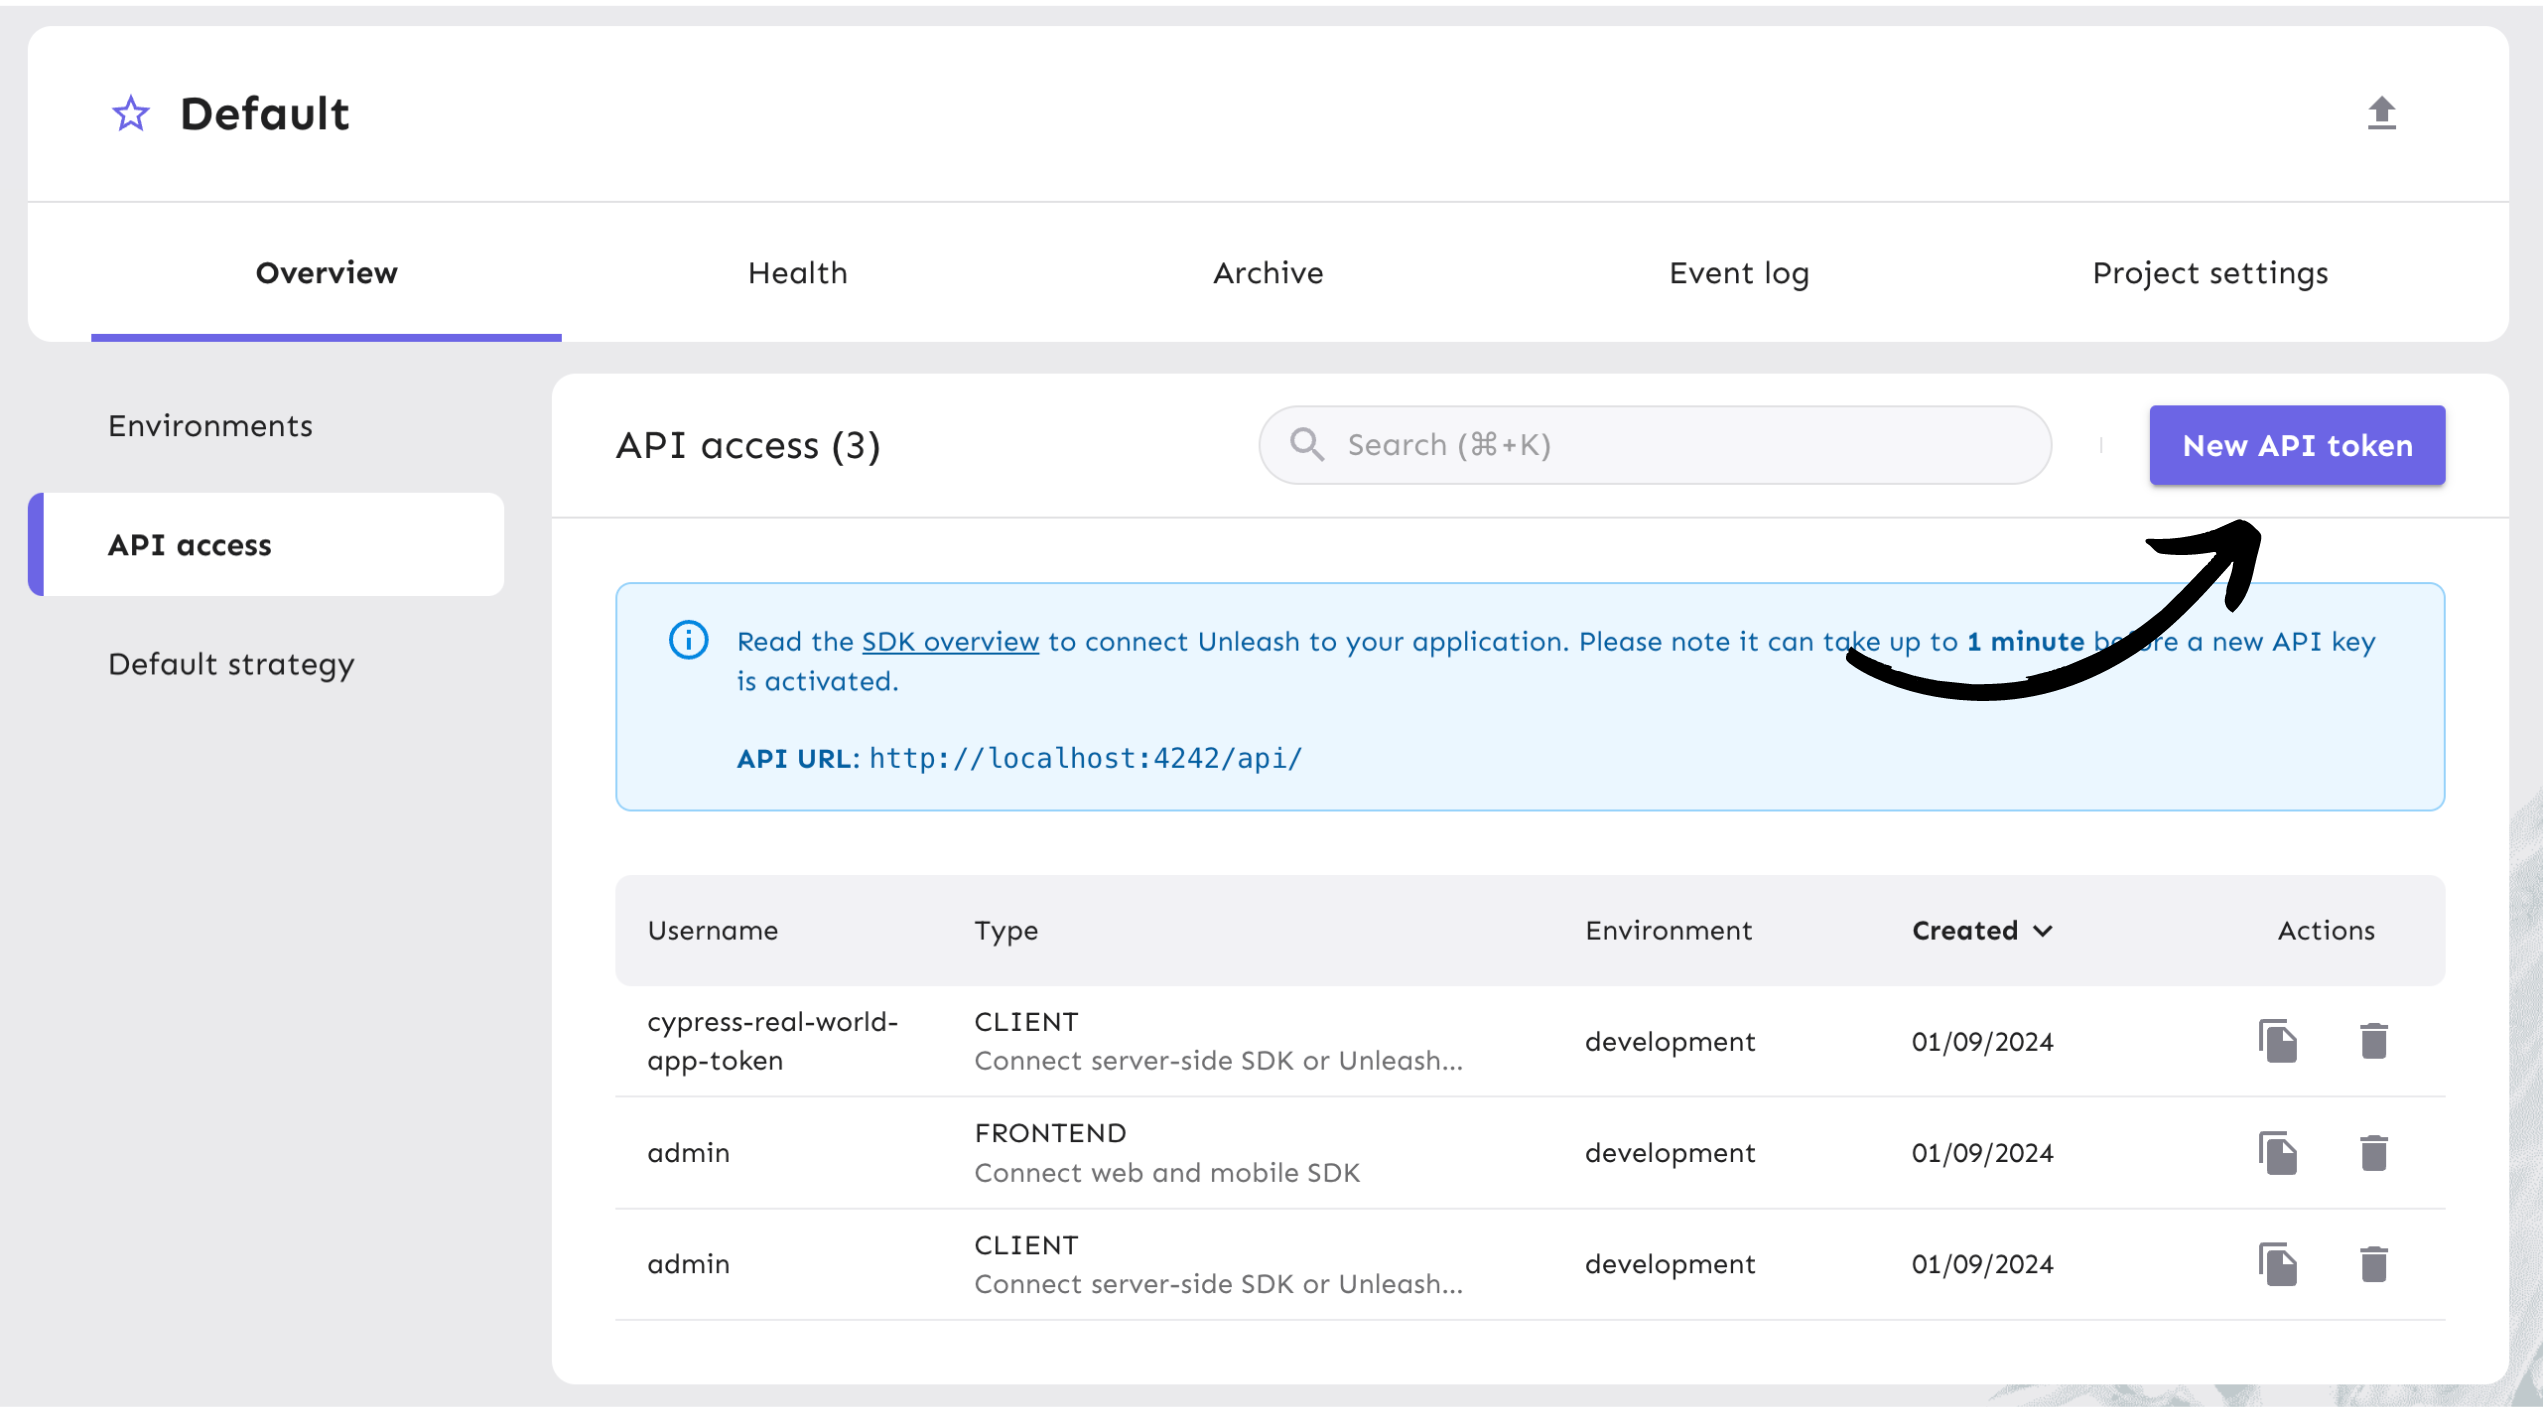
From your project view on the platform, go to Project Settings and then API Access.
Select the ‘New API token’ button.
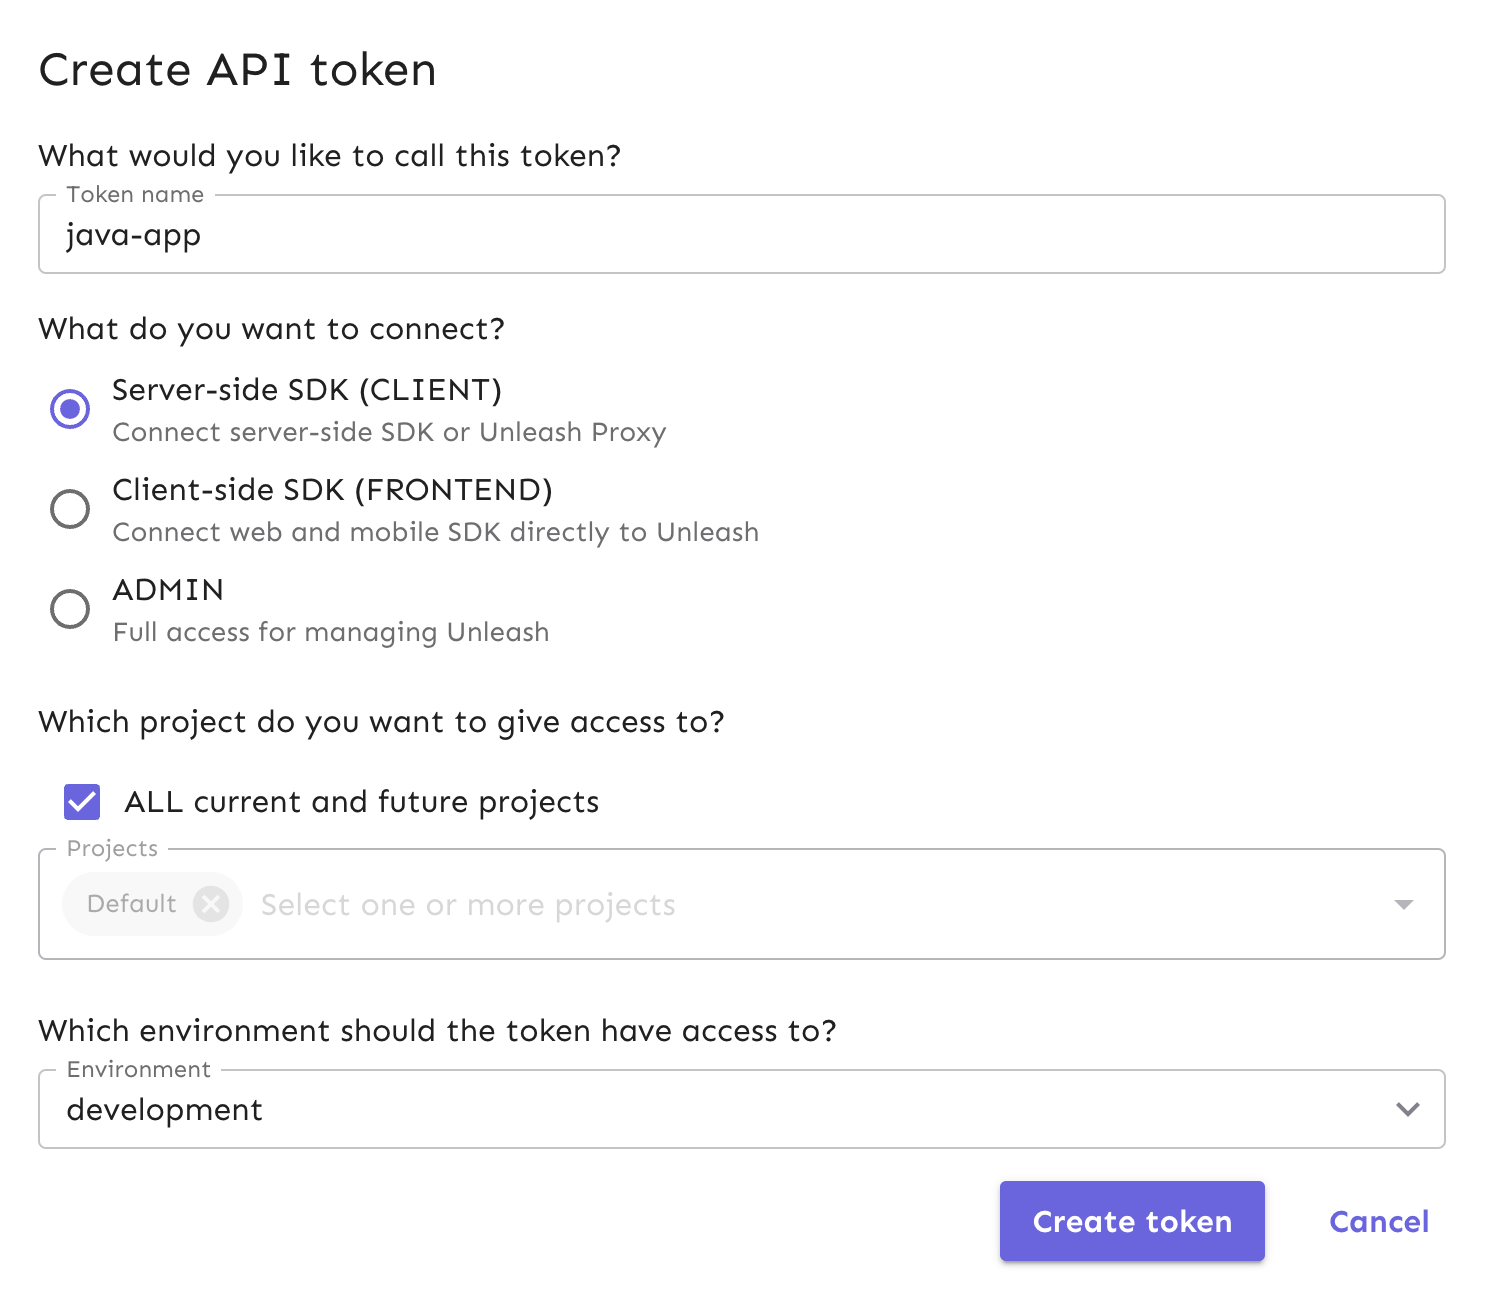
Name the API token and select the “Backend SDK” token type, since we’ll be doing our flag evaluation on the server using the Java SDK. You can read more about Unleash API tokens here: /concepts/api-tokens-and-client-keys#backend-tokens
The token should have access to the “development” environment, as shown in the platform screenshot below.
The API token you generated can be managed in the API Access view in your project settings. It will be handy in Step 4.
4. Add Unleash to a Java app
In this section, you will clone an open-source Java application called Spring Boot Java Example, which we will use to expose a metrics endpoint from its server. It uses a Jetty web container, starts HTTP and HTTPs listeners, and exposes actuator endpoints that display metrics and health statuses in the browser.
Use this command to clone the repository via your Terminal:
Next, navigate to your repository directory and check that Java 21 or later is installed. We are using Apache Maven commands to convert your Java source code into .jar files to execute. You won’t need to have Maven installed in order to run the executable command below:
Next, you will add the Unleash Java SDK to your dependencies so that your app can initialize the Unleash Client and use the feature flag we created.
In the file pom.xml on line 82, add the following code:
Next, in ExampleApp.java, import the Unleash Java SDK with this code snippet:
In the main function of that file on line 21, set up the Unleash Client configuration that will initialize when the app runs. In this tutorial, we are using synchronized initialization.
Read more on our configuration examples in our Java SDK documentation.
The unleashAPI will point your app to your local Unleash instance.
Replace the <API_KEY> string in the configuration’s apiKey with the API token we created on our Unleash instance. This will allow your app to communicate with the Unleash API to use the feature flag we created.
While the app is running, it will log the enabled status of the endpoint flag we created in our Unleash instance.
You can check our API token and client keys documentation for more specifics and see additional use cases in our Backend SDK with Java documentation.
To run the app, use the following command:
Alternatively, to run in your Docker container, run this command:
You can verify that your Java app is running by navigating to the health status endpoint in the browser:
http://localhost:8080/actuator/health
You’ll see JSON data in the browser:
5. Log feature flag status in Java app
In the real world, you can incrementally introduce new features to a select group of users by adjusting the flag’s deployment strategy.
In the context of our Java tutorial, we will log the status of the feature flag in the Terminal to confirm whether or not it is enabled for use.
In the main function in ExampleApp.java, add new conditional logic on line 33.
🚩 Note: You might receive an
InterruptedExceptionfor use ofThread.sleep(2000). To mitigate this, modify yourmainfunction line to catch exceptions like this:public static void main(String args[]) throws InterruptedException {
Your terminal will continuously update to show the status of the feature flag, reflecting the real-time responses from Unleash as the application operates.
6. Verify the toggle experience
In order to verify that your flag is enabled and your Java application is reading the status of your flag, view what is logged in your Terminal output.
With the flag on, you should see the corresponding status in this screenshot:

We will use Unleash to turn off the flag and view an updated status in the Terminal.
In Unleash, turn off the endpointFlag in the development environment.
After a few seconds, your app will update to reflect the latest flag status, which will look like this output change in your Terminal:

Conclusion
In this tutorial, we installed Unleash locally, created a new feature flag, installed Unleash into a Java app, and logged the feature flag status from Unleash to our Terminal.