***
title: Set up Entra provisioning
description: >-
Learn how to configure SCIM provisioning for Unleash using Microsoft Entra ID
to automatically manage user accounts and access.
keywords:
* SCIM
* Entra
* Azure AD
* provisioning
* SSO
* user management
'og:site\_name': Unleash Documentation
'og:title': Set up Entra provisioning | Unleash
max-toc-depth: 2
slug: provisioning/how-to-setup-provisioning-with-entra
***
## Unleash Configuration
Before you begin, ensure that you have a strategy in place to prevent being [locked out of all admin accounts](/support/troubleshooting#got-locked-out-of-an-admin-account-after-configuring-scim).
### Step 1: Navigate to Provisioning configuration
First you'll need to log in to Unleash as an admin user. Navigate to the Single Sign-On section and select the "SCIM" tab. The SCIM API URL will be shown in this section, you'll need this to configure Entra later.

### Step 2: Enable Provisioning
Enable SCIM by turning on the toggle and keep the token Unleash provides you for the Entra setup below.

## Entra Configuration
### Step 1: Navigate to Provisioning in Entra
This guide assumes you already have an SSO application setup for Unleash. If you don't already have an application configured, please see our [guide](/single-sign-on/how-to-add-sso-azure-saml) on setting up SSO.
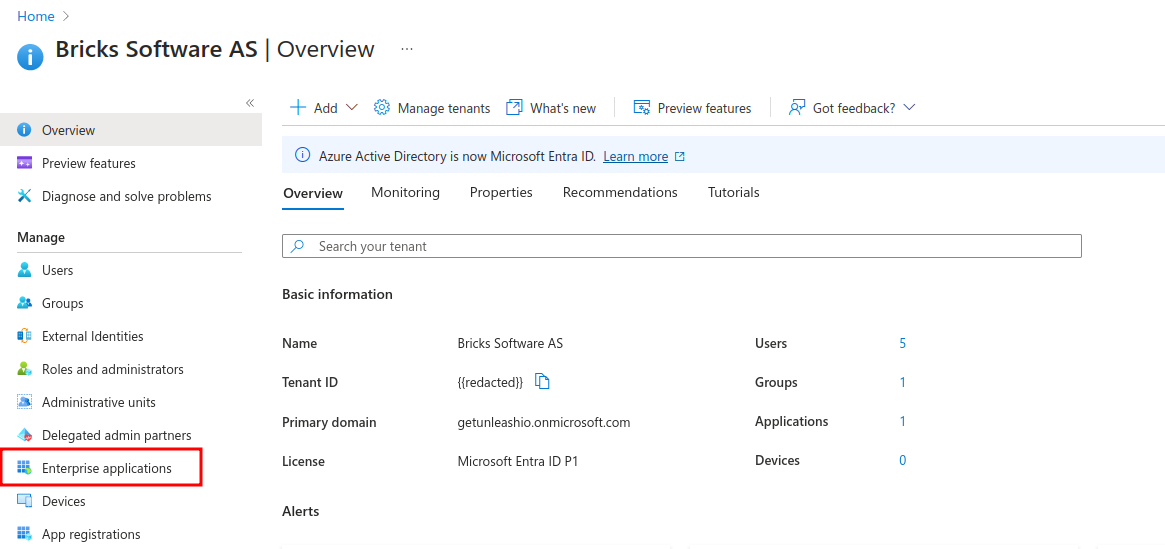
**1) Navigate to "Enterprise Applications"**
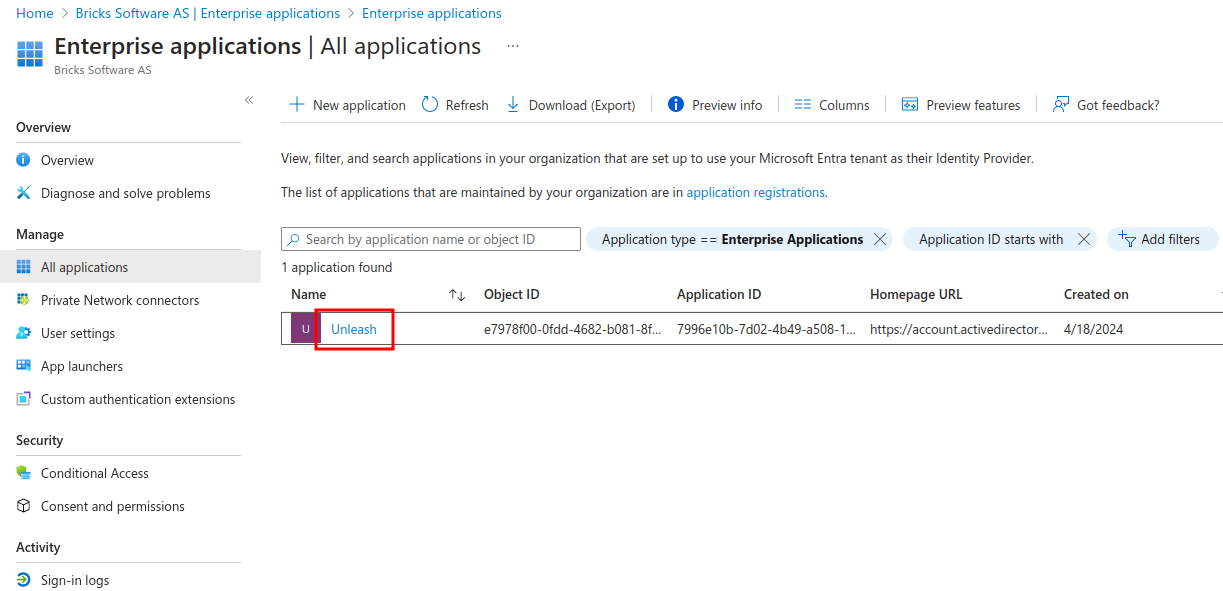
**2) Navigate to your SSO Application**
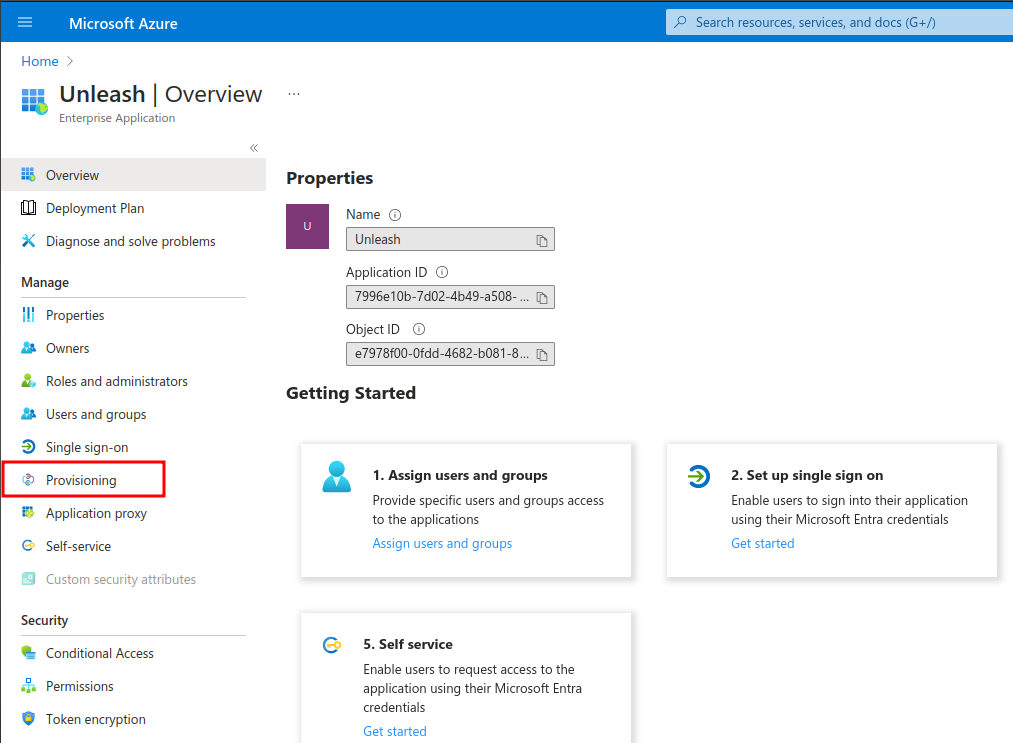
**3) Navigate to provisioning**
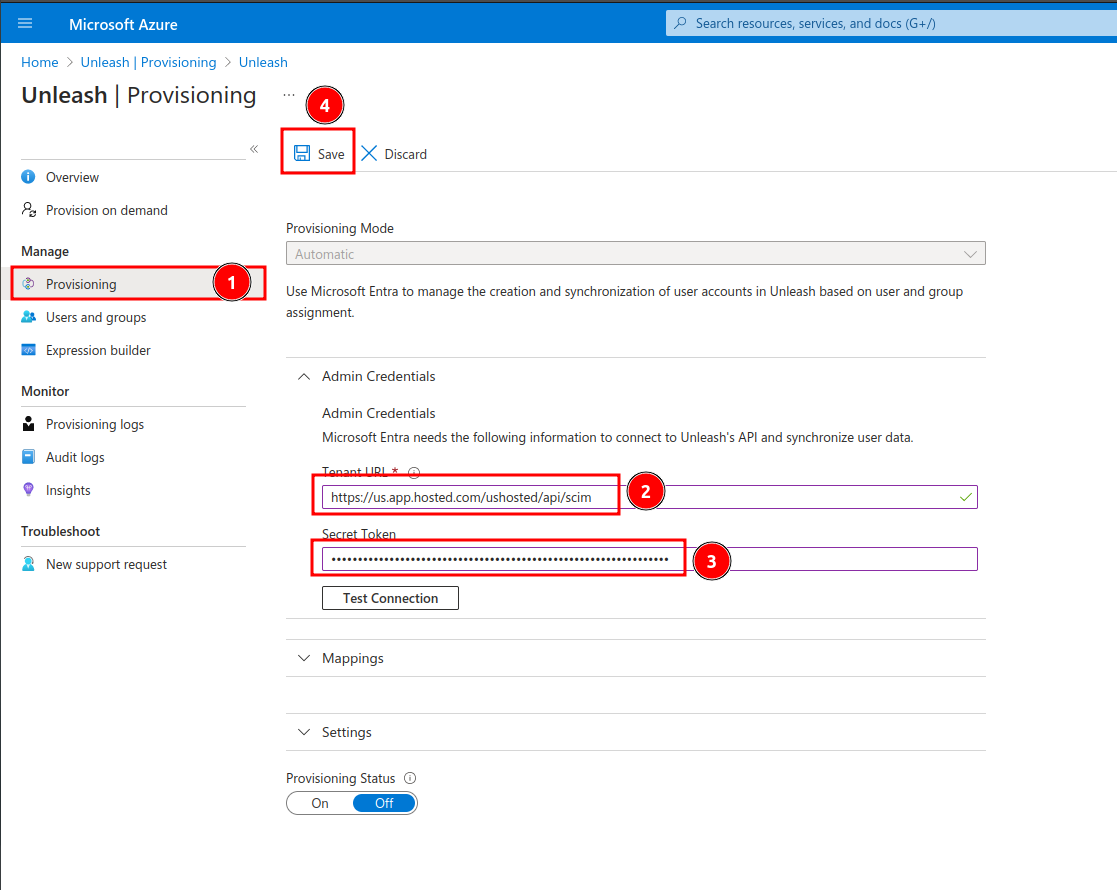
### Step 2: Connect Unleash to your Entra Application
**1) Navigate to the Provisioning overview**
**2) Set the Tenant URL**
This the SCIM API URL provided by the Unleash UI in the [configuring Unleash](how-to-setup-provisioning-with-entra#step-1-navigate-to-provisioning-configuration) section.\*\*
If you plan on deprovisioning users at any point with SCIM, you'll also need to enable the [SCIM compliance flag](https://learn.microsoft.com/en-us/entra/identity/app-provisioning/application-provisioning-config-problem-scim-compatibility#flags-to-alter-the-scim-behavior) on Entra. This can be done by appending `?aadOptscim062020` to your URL.
**3) Set the Secret Token**
This was provided by the Unleash UI in the [configuring Unleash](how-to-setup-provisioning-with-entra#step-2-enable-provisioning) section.
**4) Save**
### Step 3: Configure Provisioning
**1) Expand the mappings tab**
**2) Navigate to "Provision Microsoft Entra ID Users"**
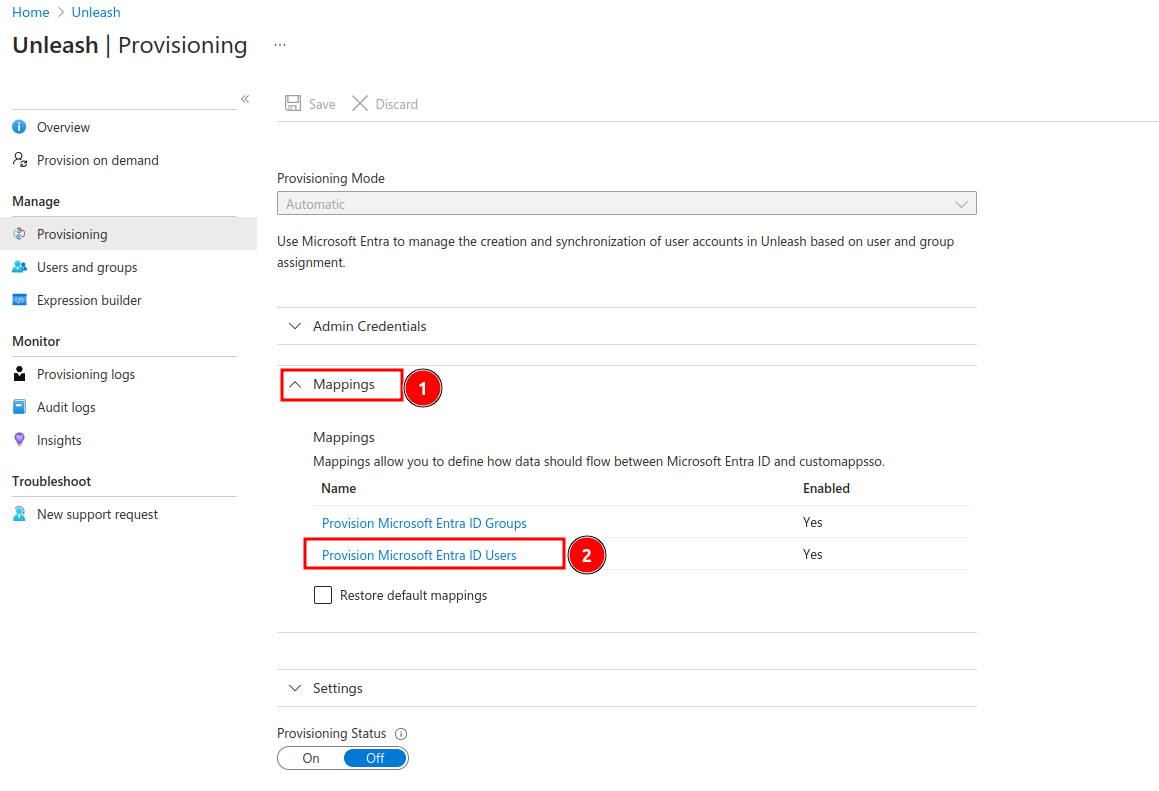
This was provided by the Unleash UI in the [configuring Unleash](how-to-setup-provisioning-with-entra#step-2-enable-provisioning) section.

**3) Remove unneeded properties**
You should remove all unnecessary properties. This ensures that Entra will reach a steady state when synchronizing. The properties that you must retain are:
* userName
* displayName
* emails
* externalId
**4) Update the email property to "userPrincipleName"**
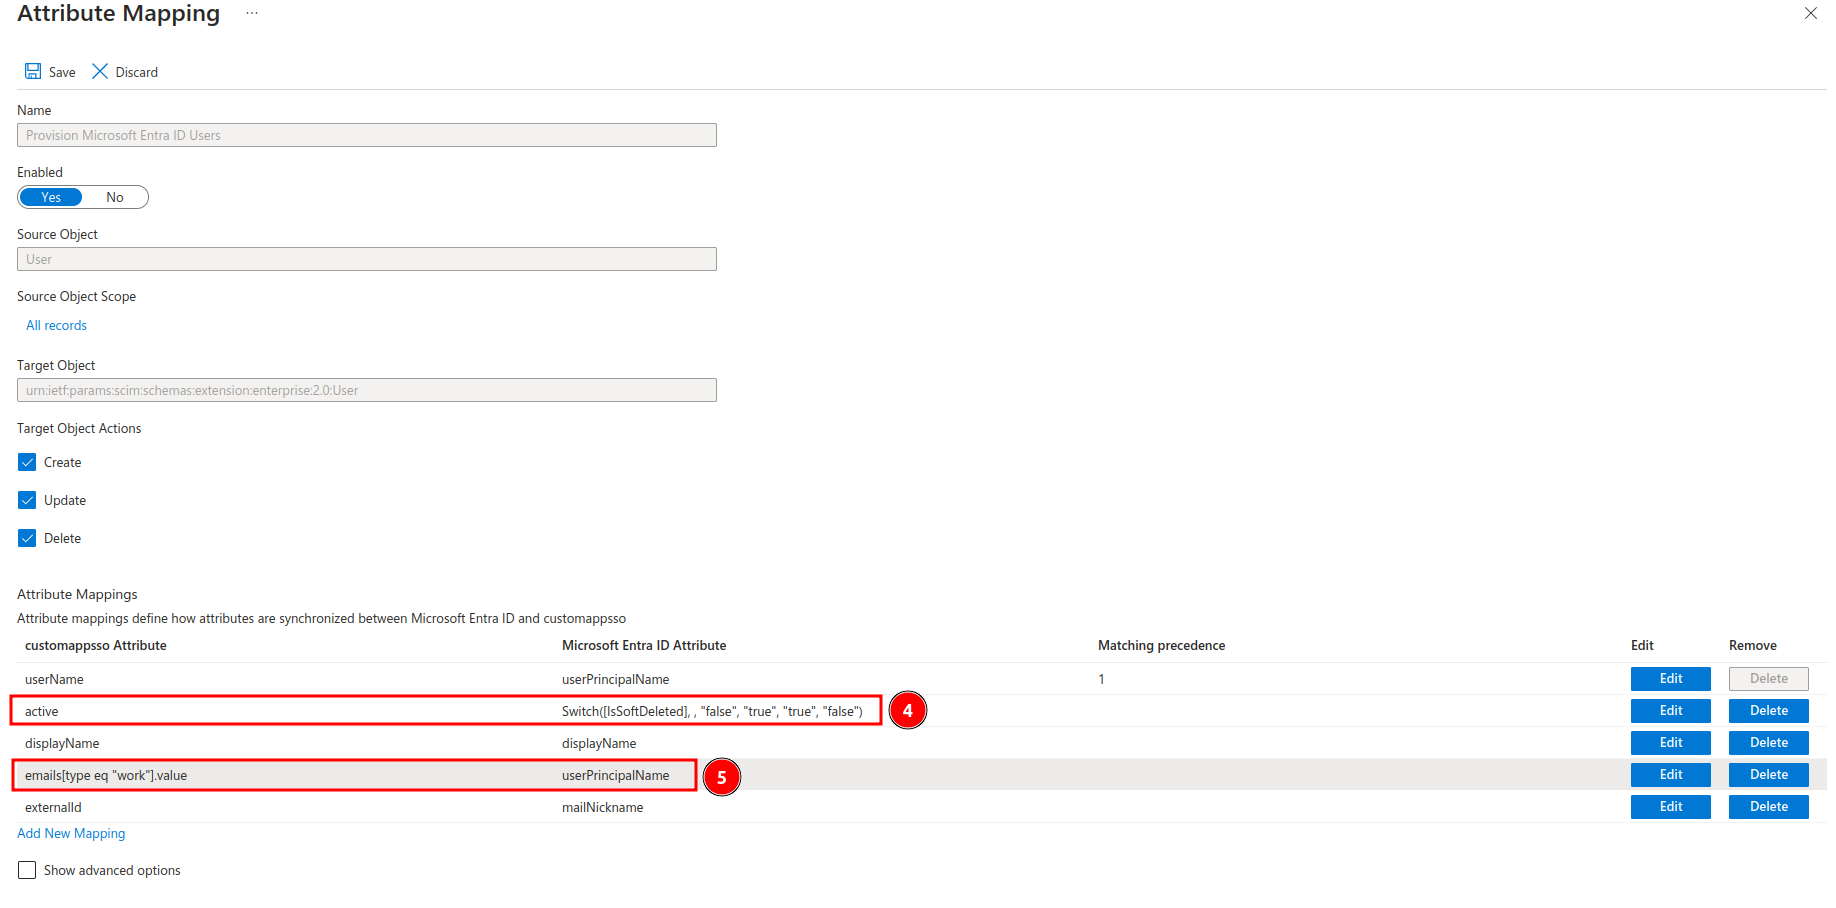
**5) Save**
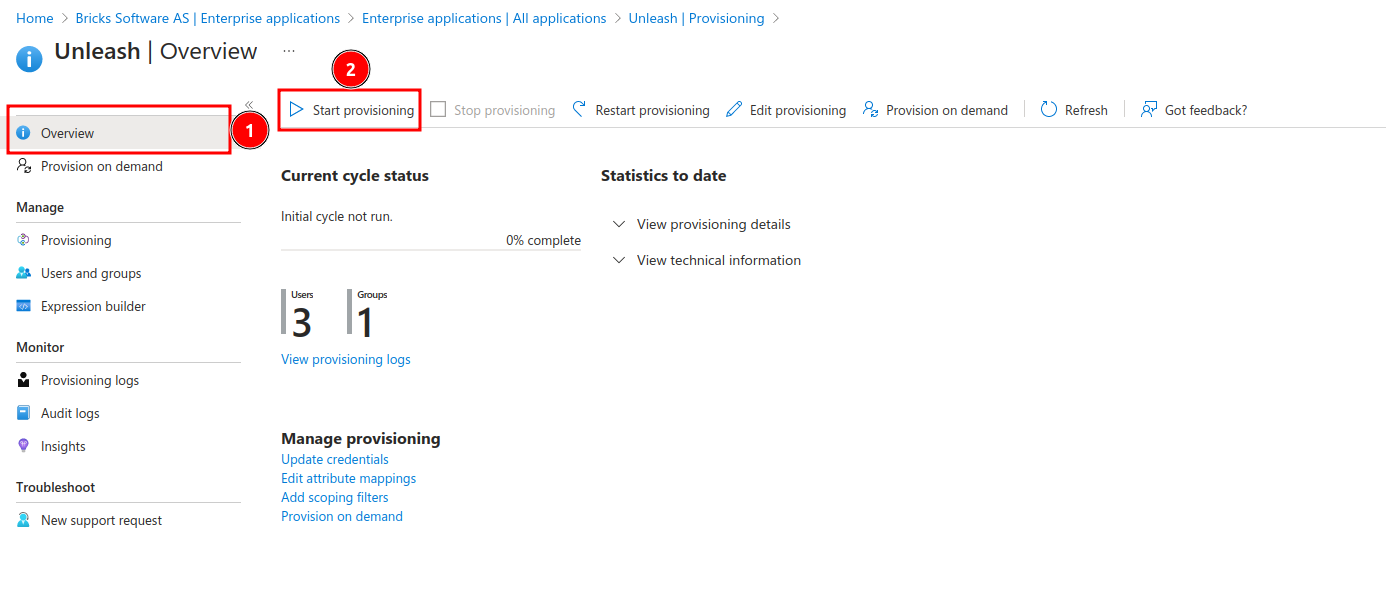
### Step 4: Enable Provisioning
**1) Enable provisioning**
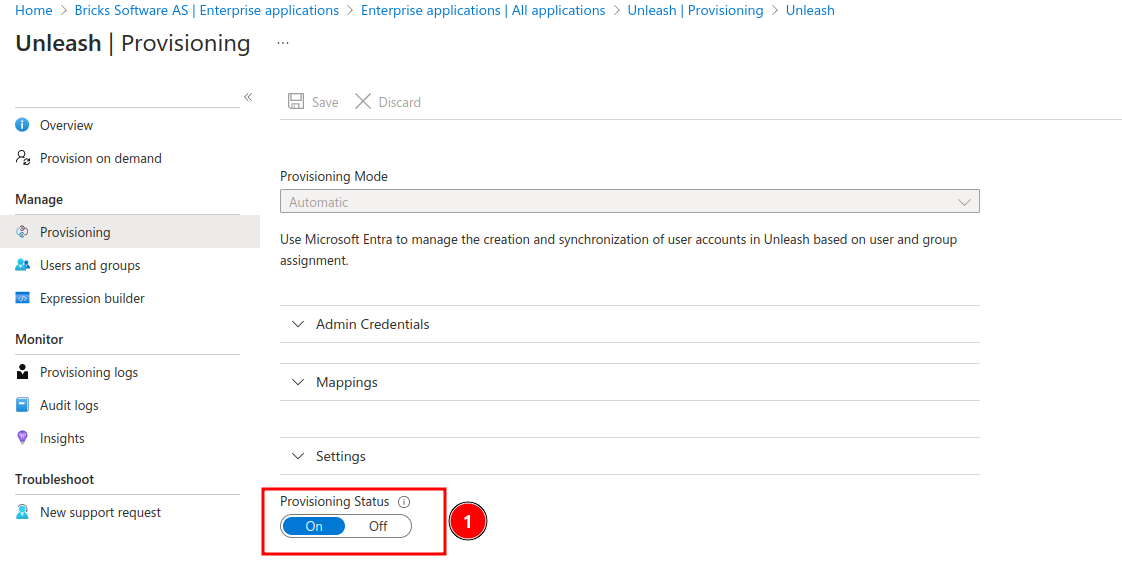
**2) Enable automatic provisioning**