Actions
Overview
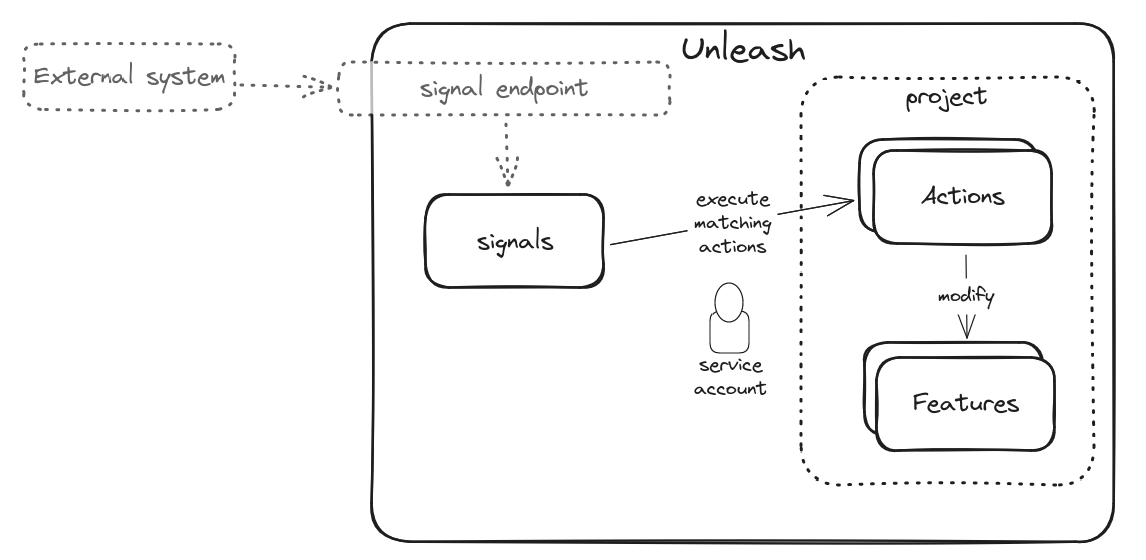
Actions allow you to configure automated actions to be executed based on signals received from an external system.
Creating actions
Permissions
Creating actions requires the ADMIN permission.
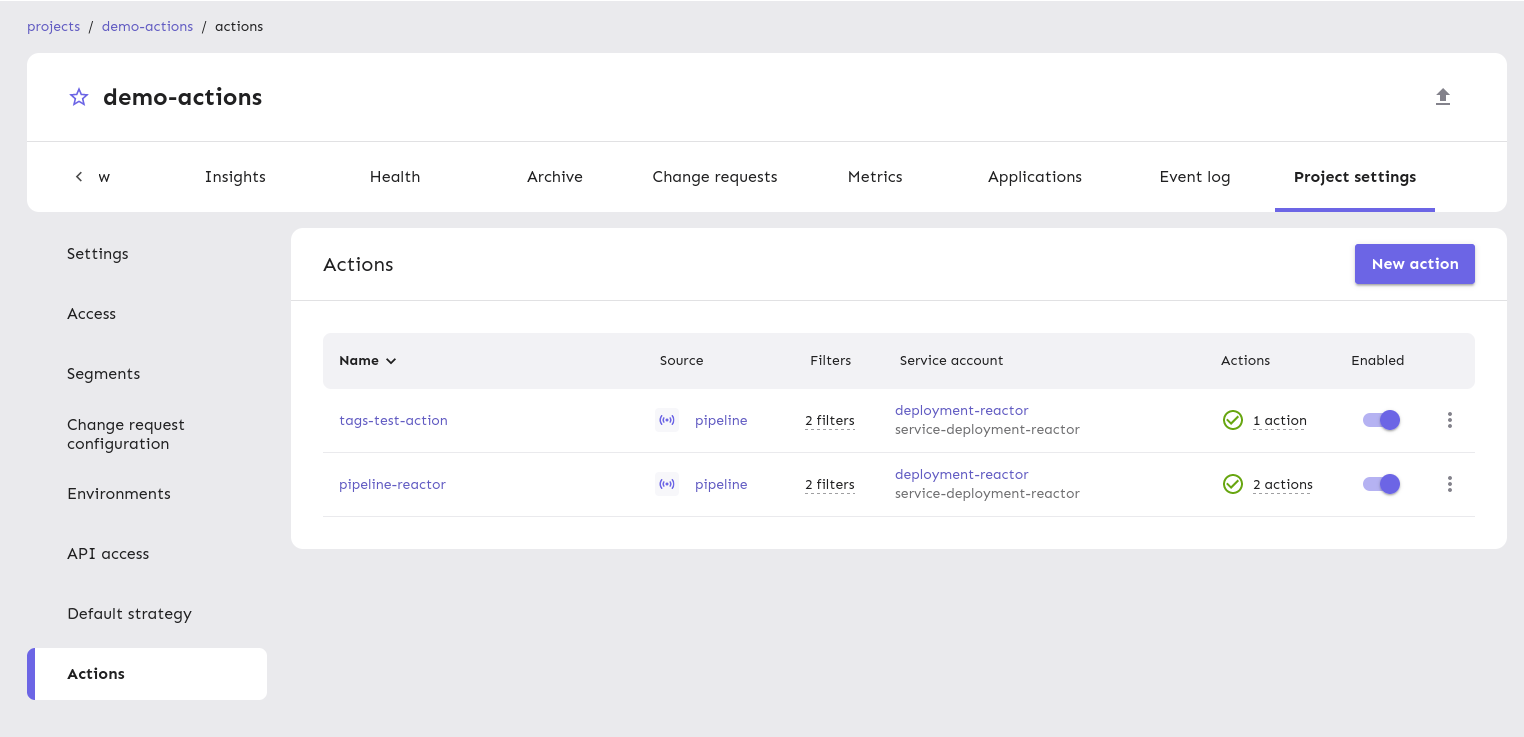
Actions are scoped to a project. To be able to create actions, you need to navigate to the project settings and find the Actions tab.
Name and description
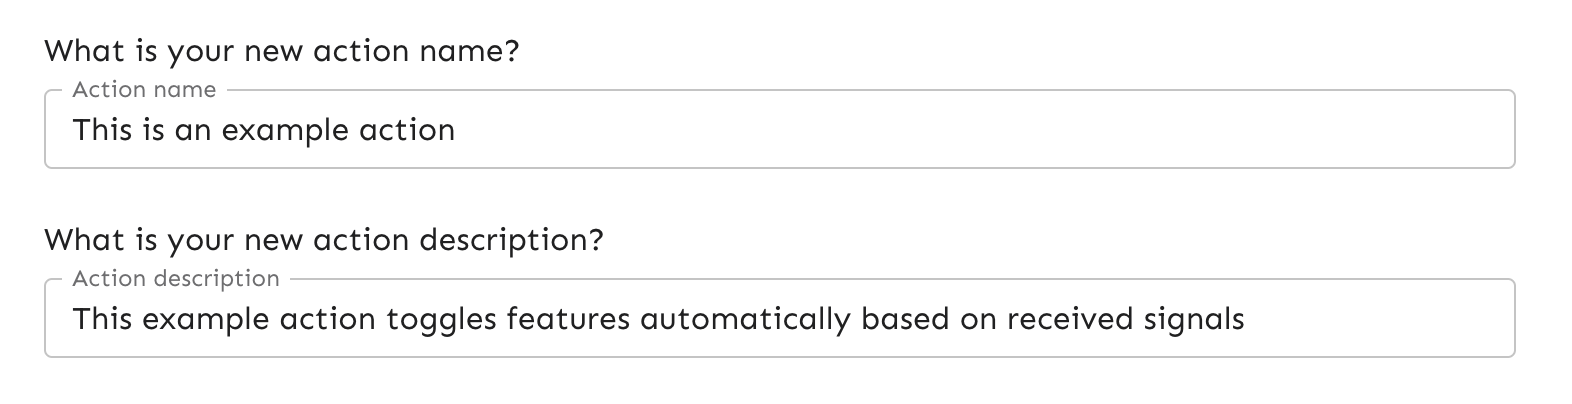
When creating a new action you first need to specify a name and a description. This will help you identify your action and give it a meaningful description.
Source and filters
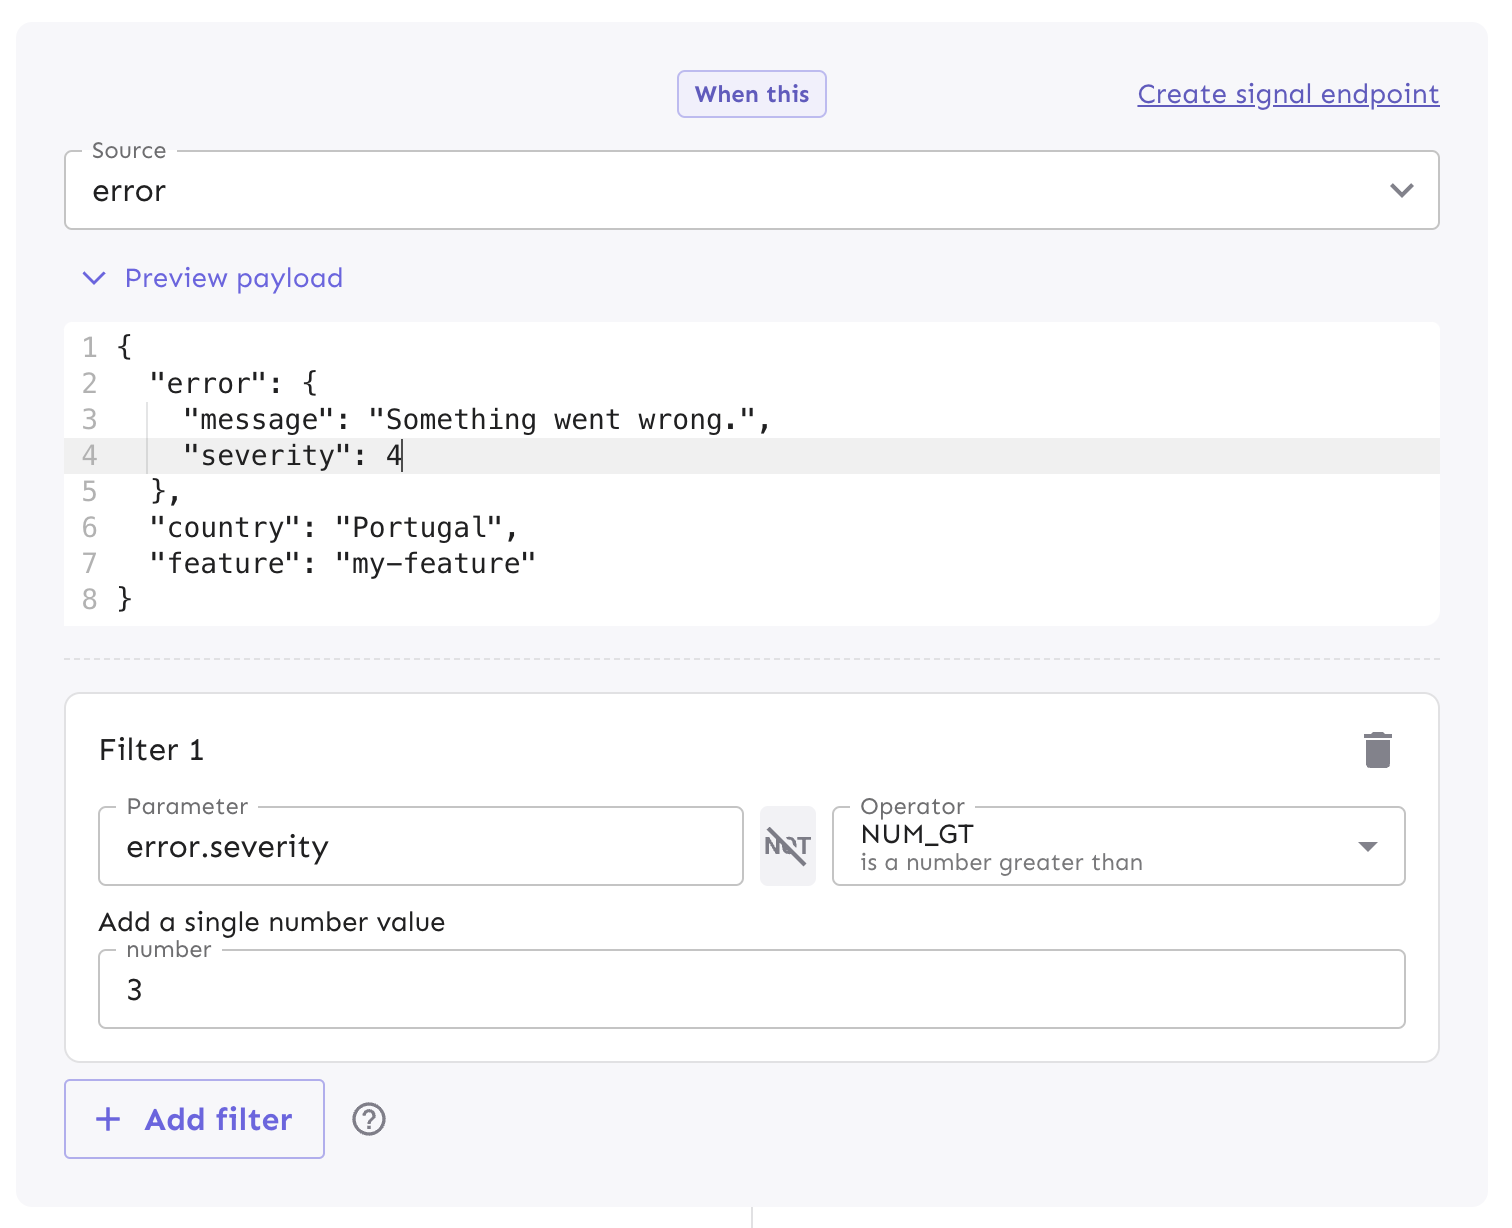
Then you need to select a source. If you haven’t created a signal endpoint yet, you can do so by using the Create new signal endpoint link (more information on this in the Signals section).
If the source you selected already received at least one signal, you’ll be able to see a preview of the latest signal received. This can help you define the different filters that need to match for the action to be executed.
Filters work similarly to feature flag strategy constraints, where the signal payload acts as the context for the constraint evaluation.
Filters are completely optional, so if you don’t configure any filter your action will always be executed whenever you receive a new signal on the selected source.
Actions
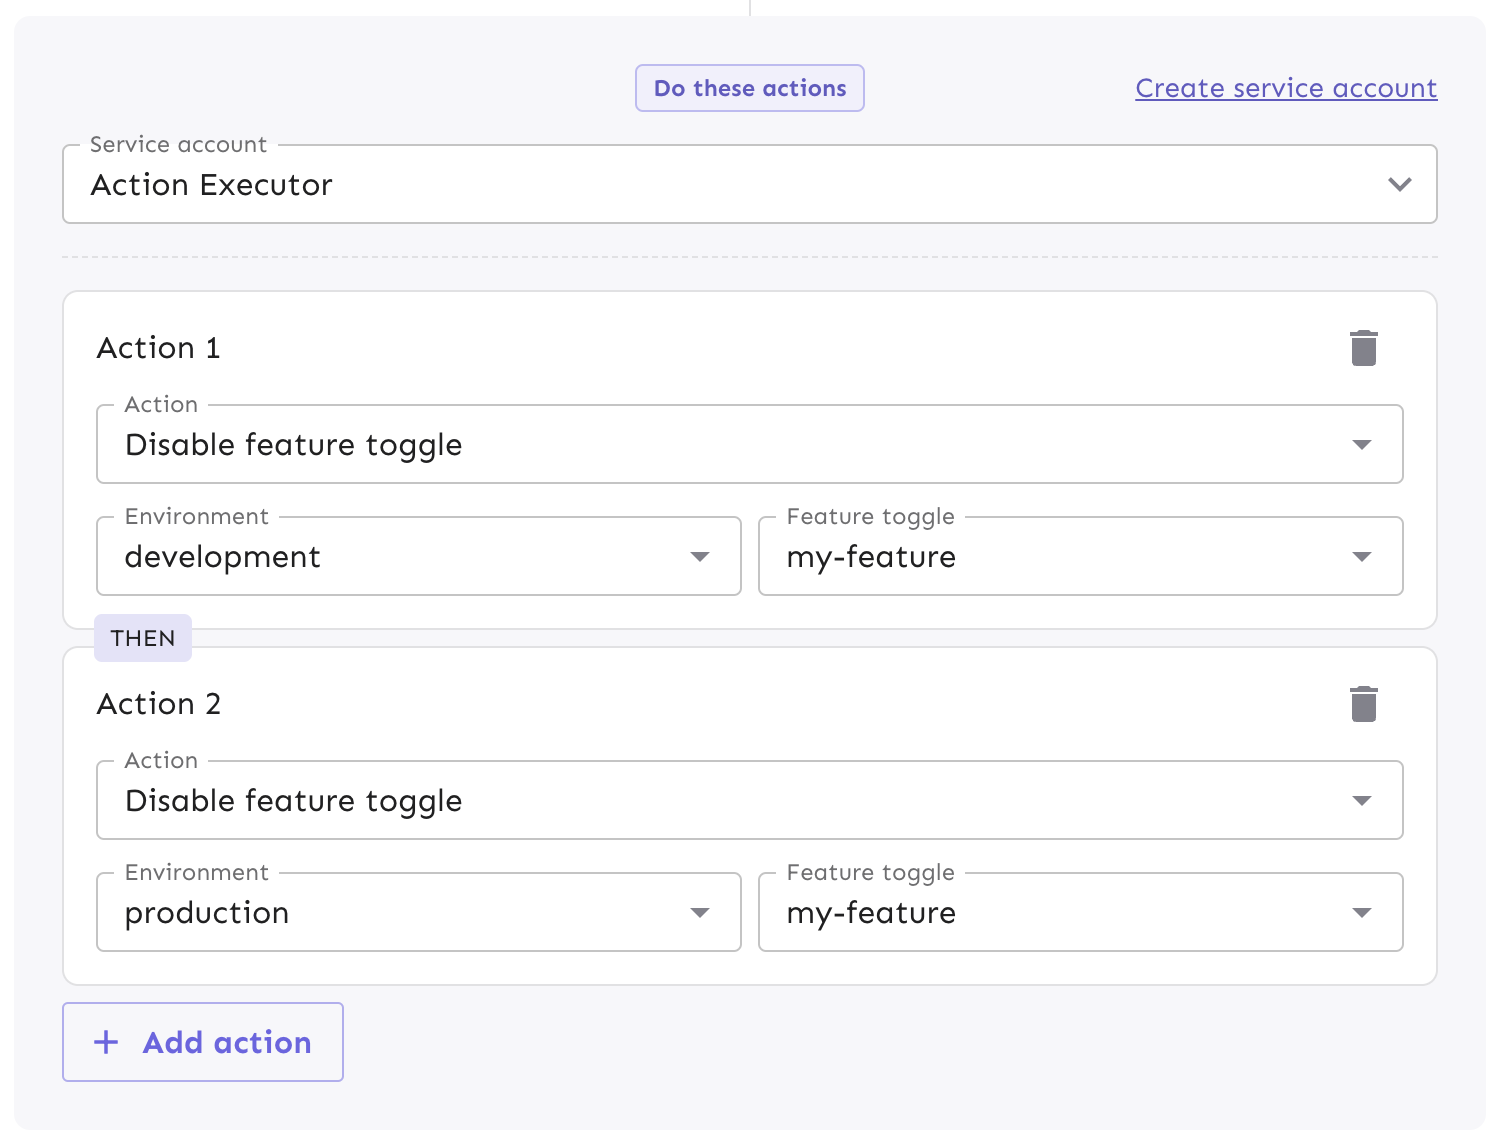
When these actions are triggered, they execute using the identity of a service account. As a result, when you later view events in Event Log, you’ll see this service account listed as the actor for those events. In order to execute the configured actions successfully, this service account needs to have the necessary permissions. This service account doesn’t need an API token, so when creating it you can skip the token generation step and simply make sure it has the necessary permissions.
The actions are executed in the same order that they are defined. If a previous action fails, the following actions will not be started. You can add multiple actions to an action set and you can add multiple action sets to a project. Depending on the action you want to execute you will have to provide different parameters.
Viewing action executions
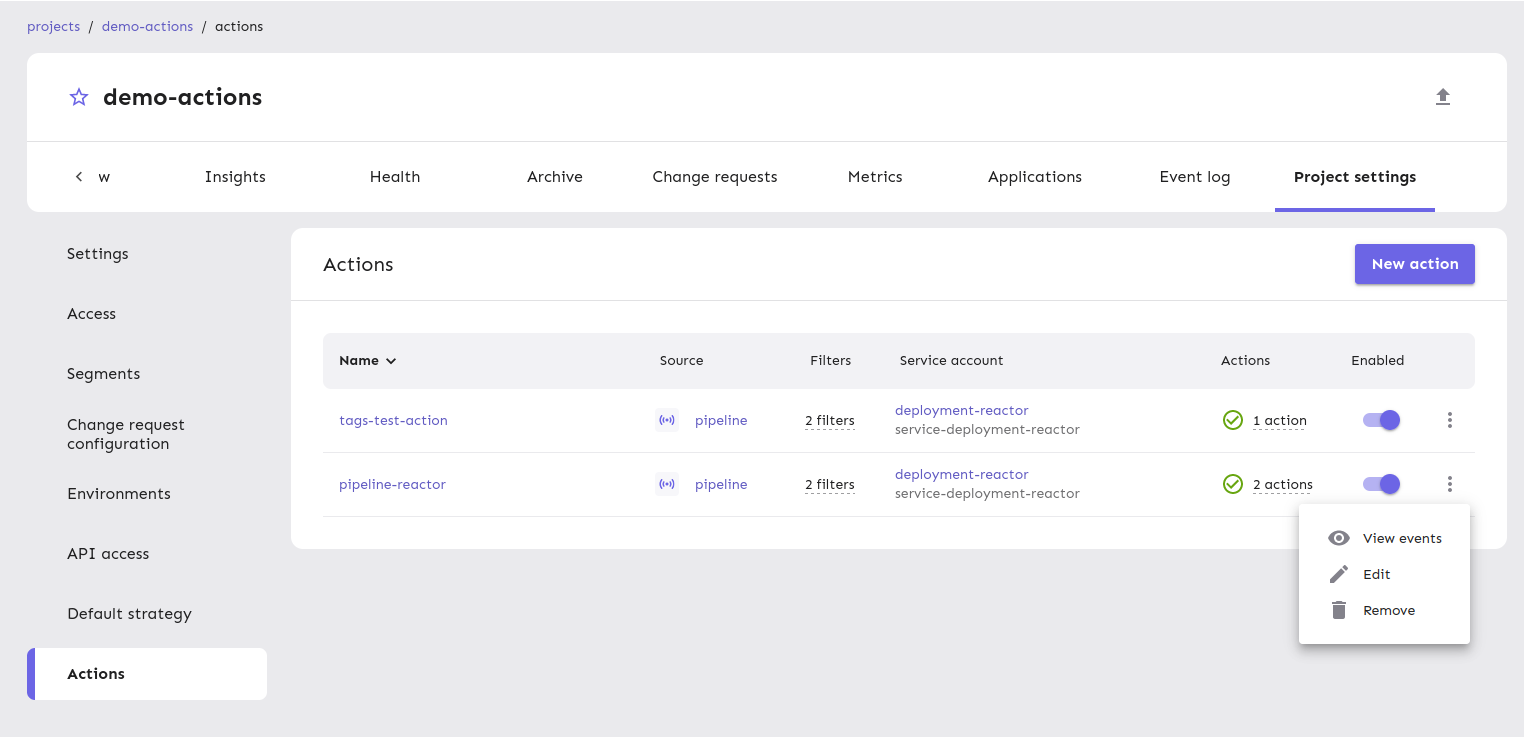
Once the action is configured and you start receiving signals that match the filters you configured, you can see the action executions in the Actions tab.
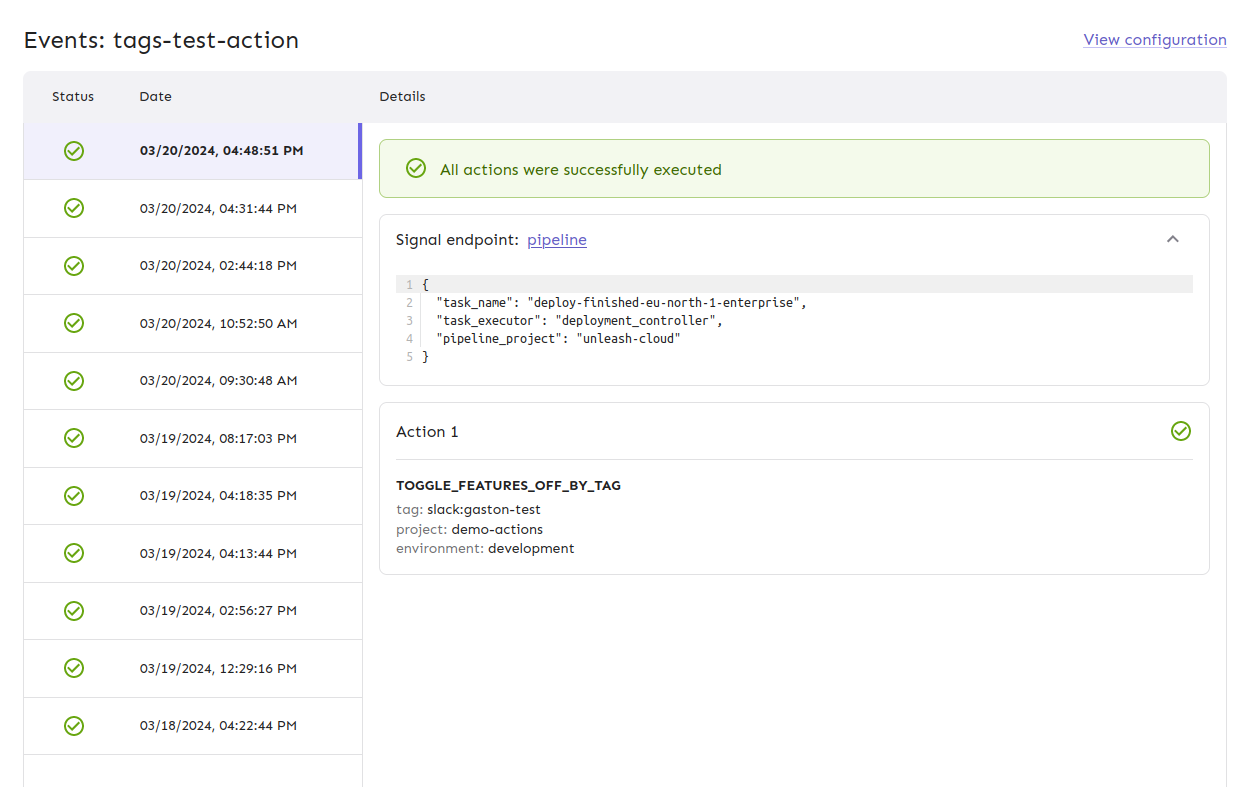
Using the View events option will show you the details of the action executions (what was the payload, did they execute successfully or not, what was the error in case of an error, etc).
To view the action events as they are executed, select the View events option in the respective action row. This will show you more information about each action execution: The signal payload, whether the actions executed successfully, the error details in case of an error, and other details.
Limits that apply
There are some constraints on the actions feature as a measure to protect the stability of Unleash. These values can be overridden for self-hosted installations.
Unprocessed signals are processed in a “first in, first out” fashion, once every minute. If the number of pending signals to process exceeds the limit, it may take longer for the latest signals to be processed.
The limits are as follows:
- Max action sets per project: 5.
- Max filters per action set: 5.
- Max distinct values in a filter: 25.
- Max actions per action set: 10.
- Max signals to process per cycle: 10.
Ref: Unleash Config
Sending signals to Unleash
See Signals