How to Implement Feature Flags in iOS
iOS is a mobile operating system developed by Apple for their mostly used mobile device: the iPhone. Swift is a programming language designed for Apple iOS devices. Unleash offers an iOS SDK for connecting SwiftUI with your iOS application to use feature flags. We will be using the open-source iOS Swift project called Open Meteo!
Leveraging feature flags allows developers to toggle new features on and off, whether you’re experimenting in your local environment, testing for QA purposes, or rolling out changes to users in production. With Unleash, an open-source feature flag service, you can use our tooling to implement feature flags into your application and release new features faster, strategically, and safely. But how can you do this in iOS with Swift?
In this tutorial, you will learn how to set up and use iOS feature flags with Unleash.
Prerequisites
In this tutorial, you will need the following:
- Xcode
- Mac OS X
1. Architect to limit PII and configuration leakage
Since React is a front-end framework, there are special security considerations to plan around when implementing feature flags.
Most importantly, you must:
a. Limit PII (personally identifiable information) leakage from the end-user device (e.g. browser or mobile device) to your central feature flag control service.
b. Avoid leakage of configuration information from the central feature flag control service to end-user devices.
Solving both means you need to avoid evaluating feature flags on the user’s machine due to security risks like exposing API keys and flag data. Instead, send application context (e.g. username, location, etc) to your feature flag evaluation service to evaluate the results. These results (and only these results) should be stored in the client-side application memory. By keeping the evaluated results for a specific context in memory, you avoid network roundtrips every time your application needs to check the status of a feature flag. This method prevents unauthorized access and data breaches by keeping configurations and PII secure.
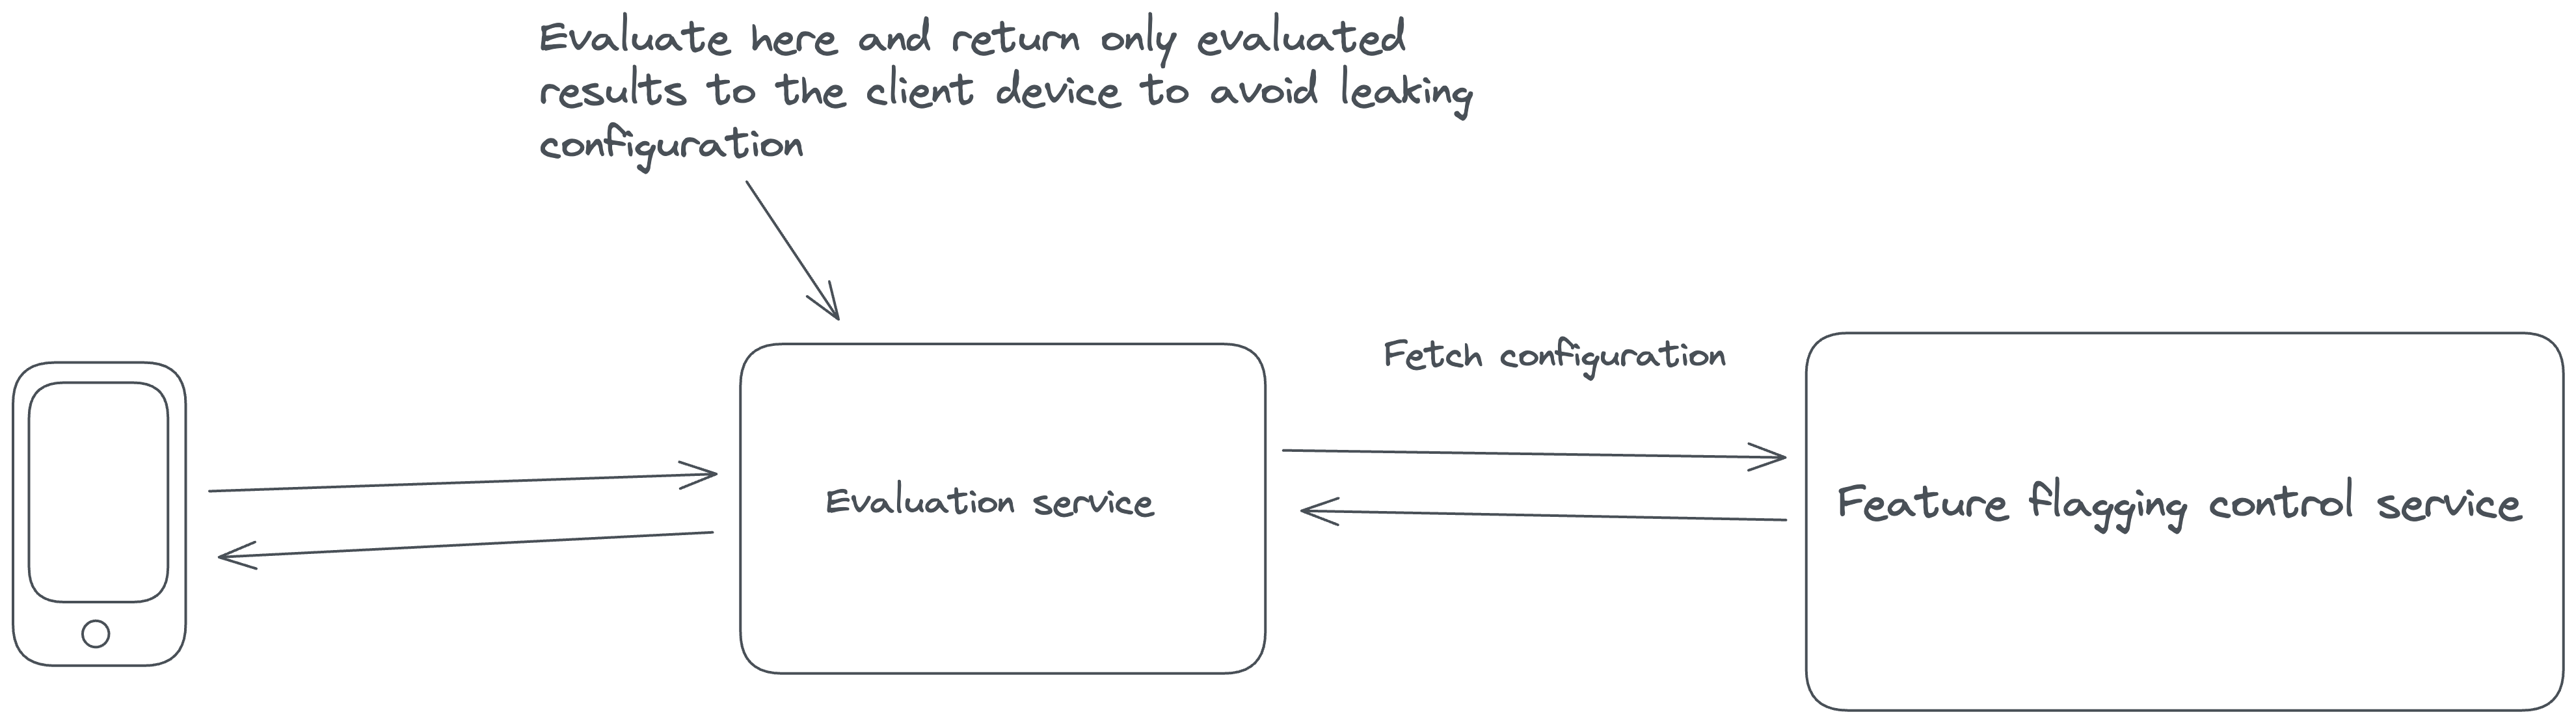
Unleash, the open-source feature flag system used in this tutorial, evaluates feature flags in this way, so by following the rest of these steps, you will be protecting your user’s data and your company’s reputation.
For a complete list of architectural guidelines, see our best practices for building and scaling feature flag systems.
2. Install a local feature flag provider
There are many feature flag tools available. In this section, you will install Unleash in order to run it, log in, and create a feature flag, but you can use other tools in place of Unleash if you prefer. You’ll need to edit the code accordingly, but the steps will probably be about the same.
Use Git to clone the Unleash repository and Docker to build and run it. Open a terminal window and run the following commands:
You will now have Unleash installed onto your machine and running in the background. You can access this instance in your web browser at http://localhost:4242
Log in to the platform using these credentials:
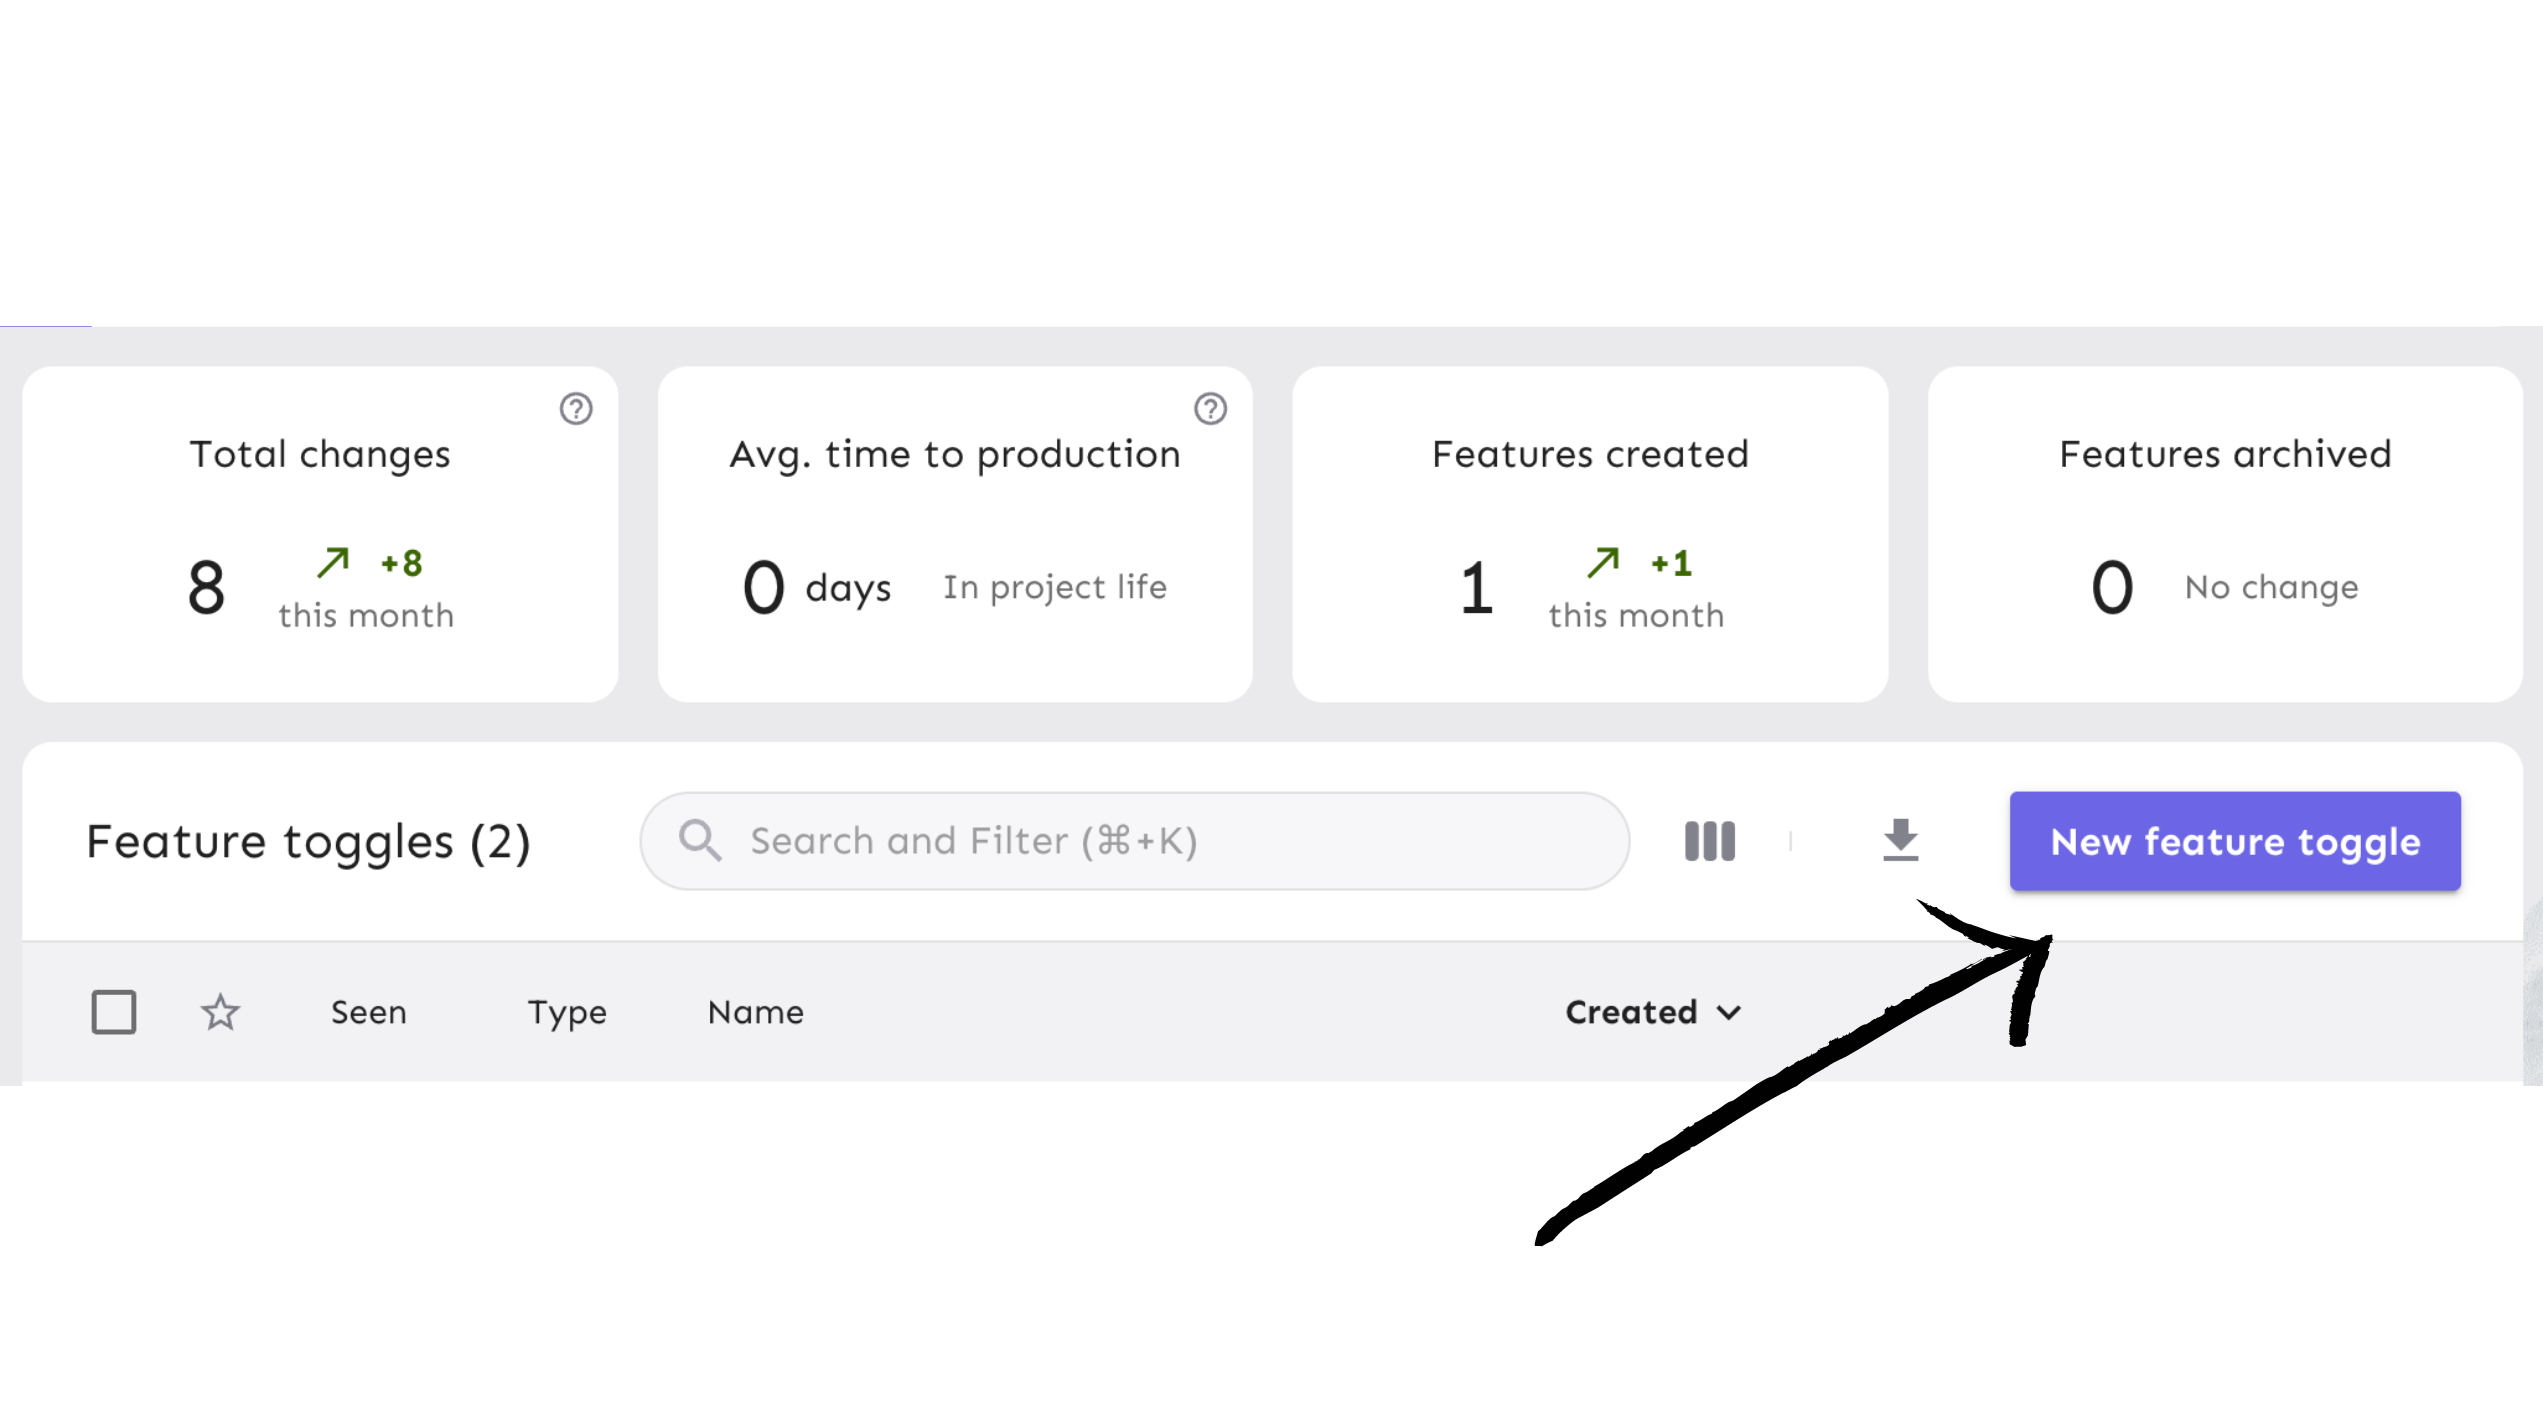
Click the ‘New feature flag’ button to create a new feature flag. Once you have created a flag, you will see it here.
3. Create and configure the feature flag
Next, you will create a feature flag and turn it on for your iOS app.
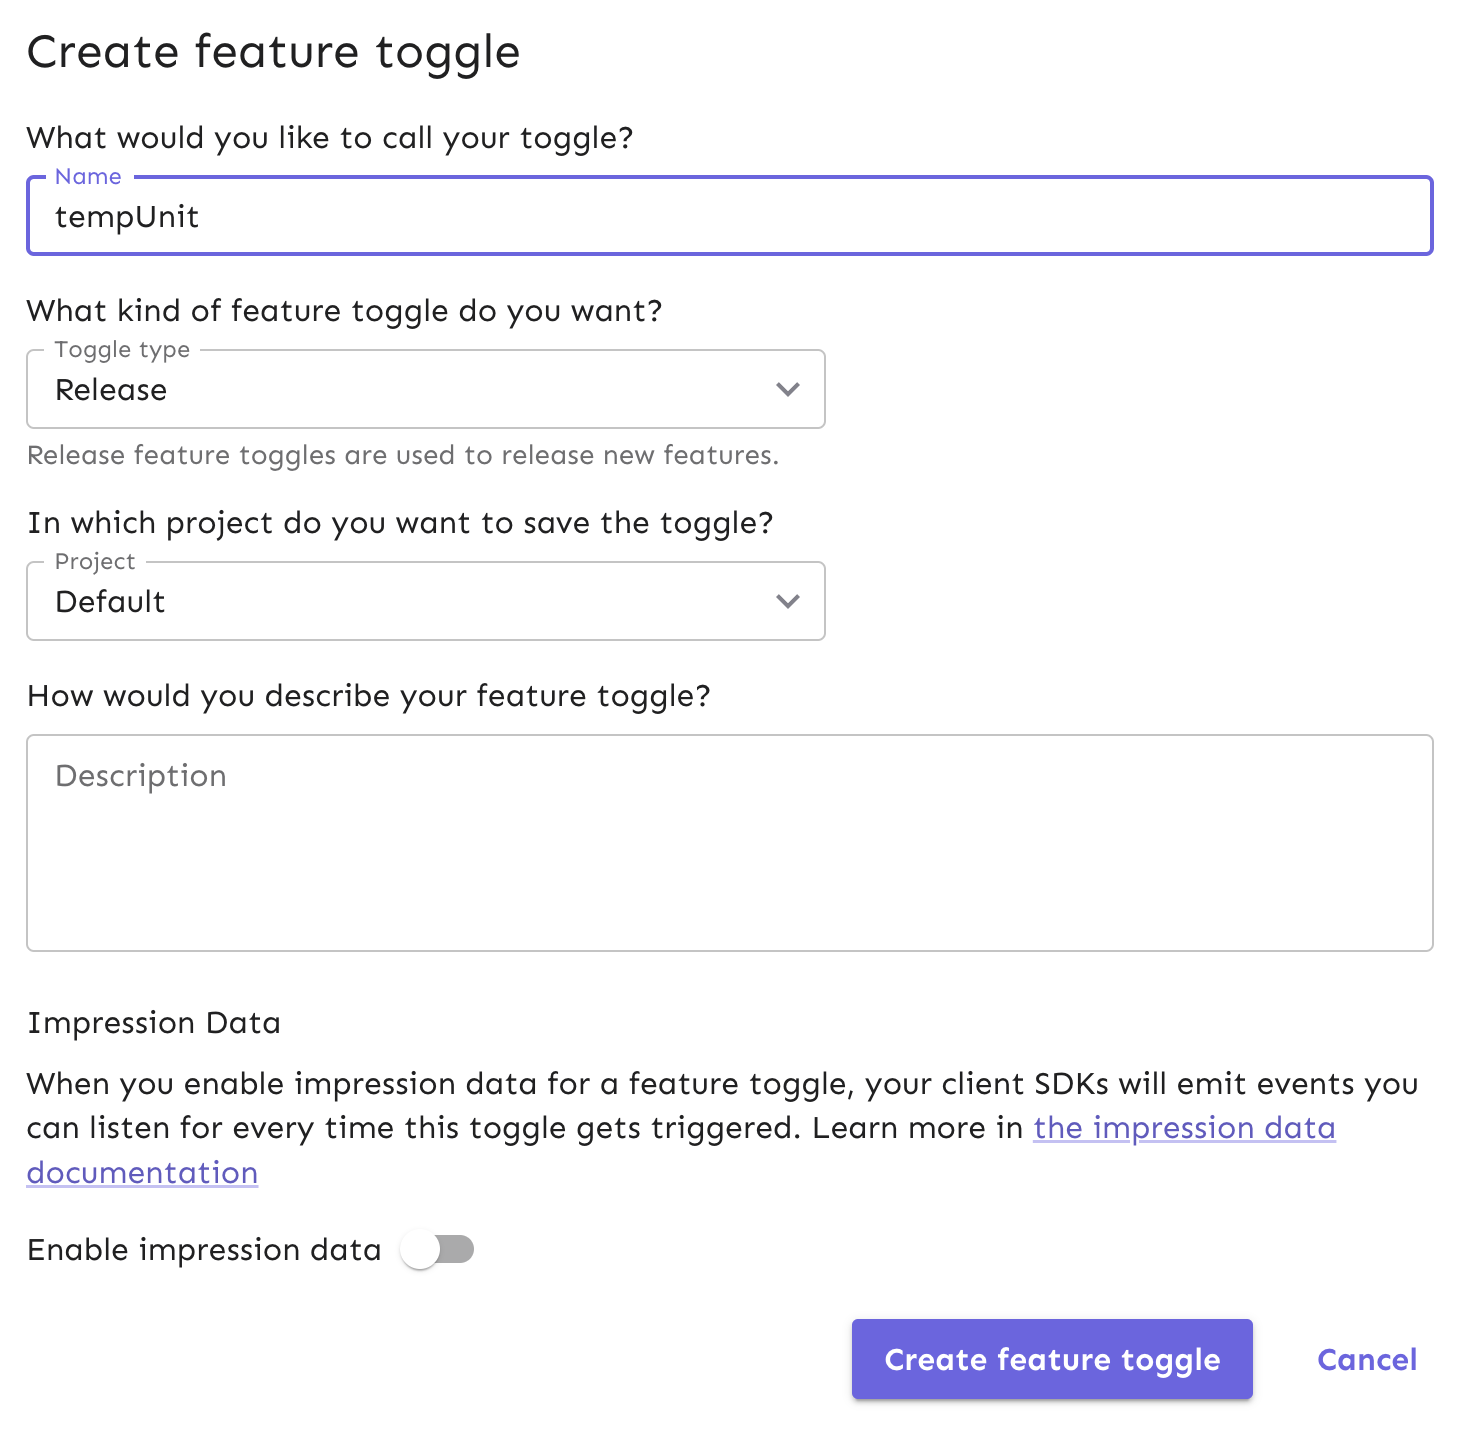
In the Create Flag view, give your feature flag a unique name and click ‘Create feature flag’.
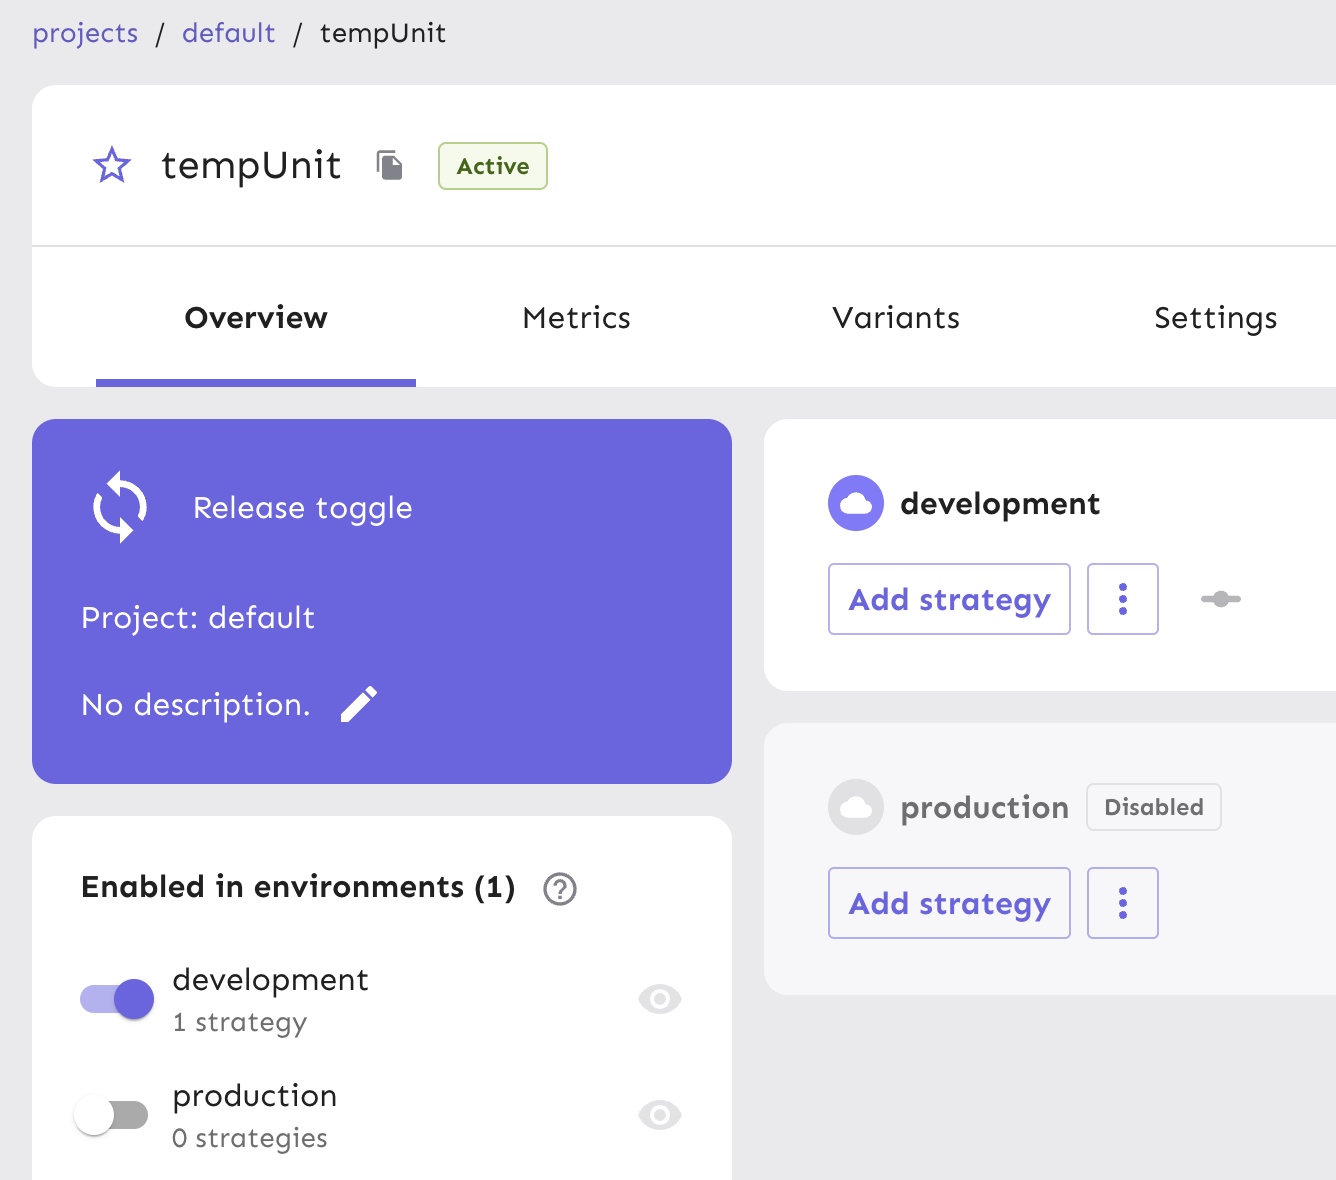
For the purpose of this tutorial, name the feature flag tempUnit. Use the default values in the rest of the feature flag form.
Your new feature flag has been created and is ready to be used. Enable the flag for your development environment, which makes it accessible for use in the iOS app we will clone into your local environment.
Next, generate an API token to authenticate calls made to Unleash servers from your project. This API token will eventually be pulled into a configuration object within your iOS application to toggle features.
Note We require an API token as part of your flag configuration to ensure that only applications with the correct authentication can access your feature flags in Unleash. API tokens are created by users with API management access and thus controls how they can be distributed to applications that need it, and by whom.
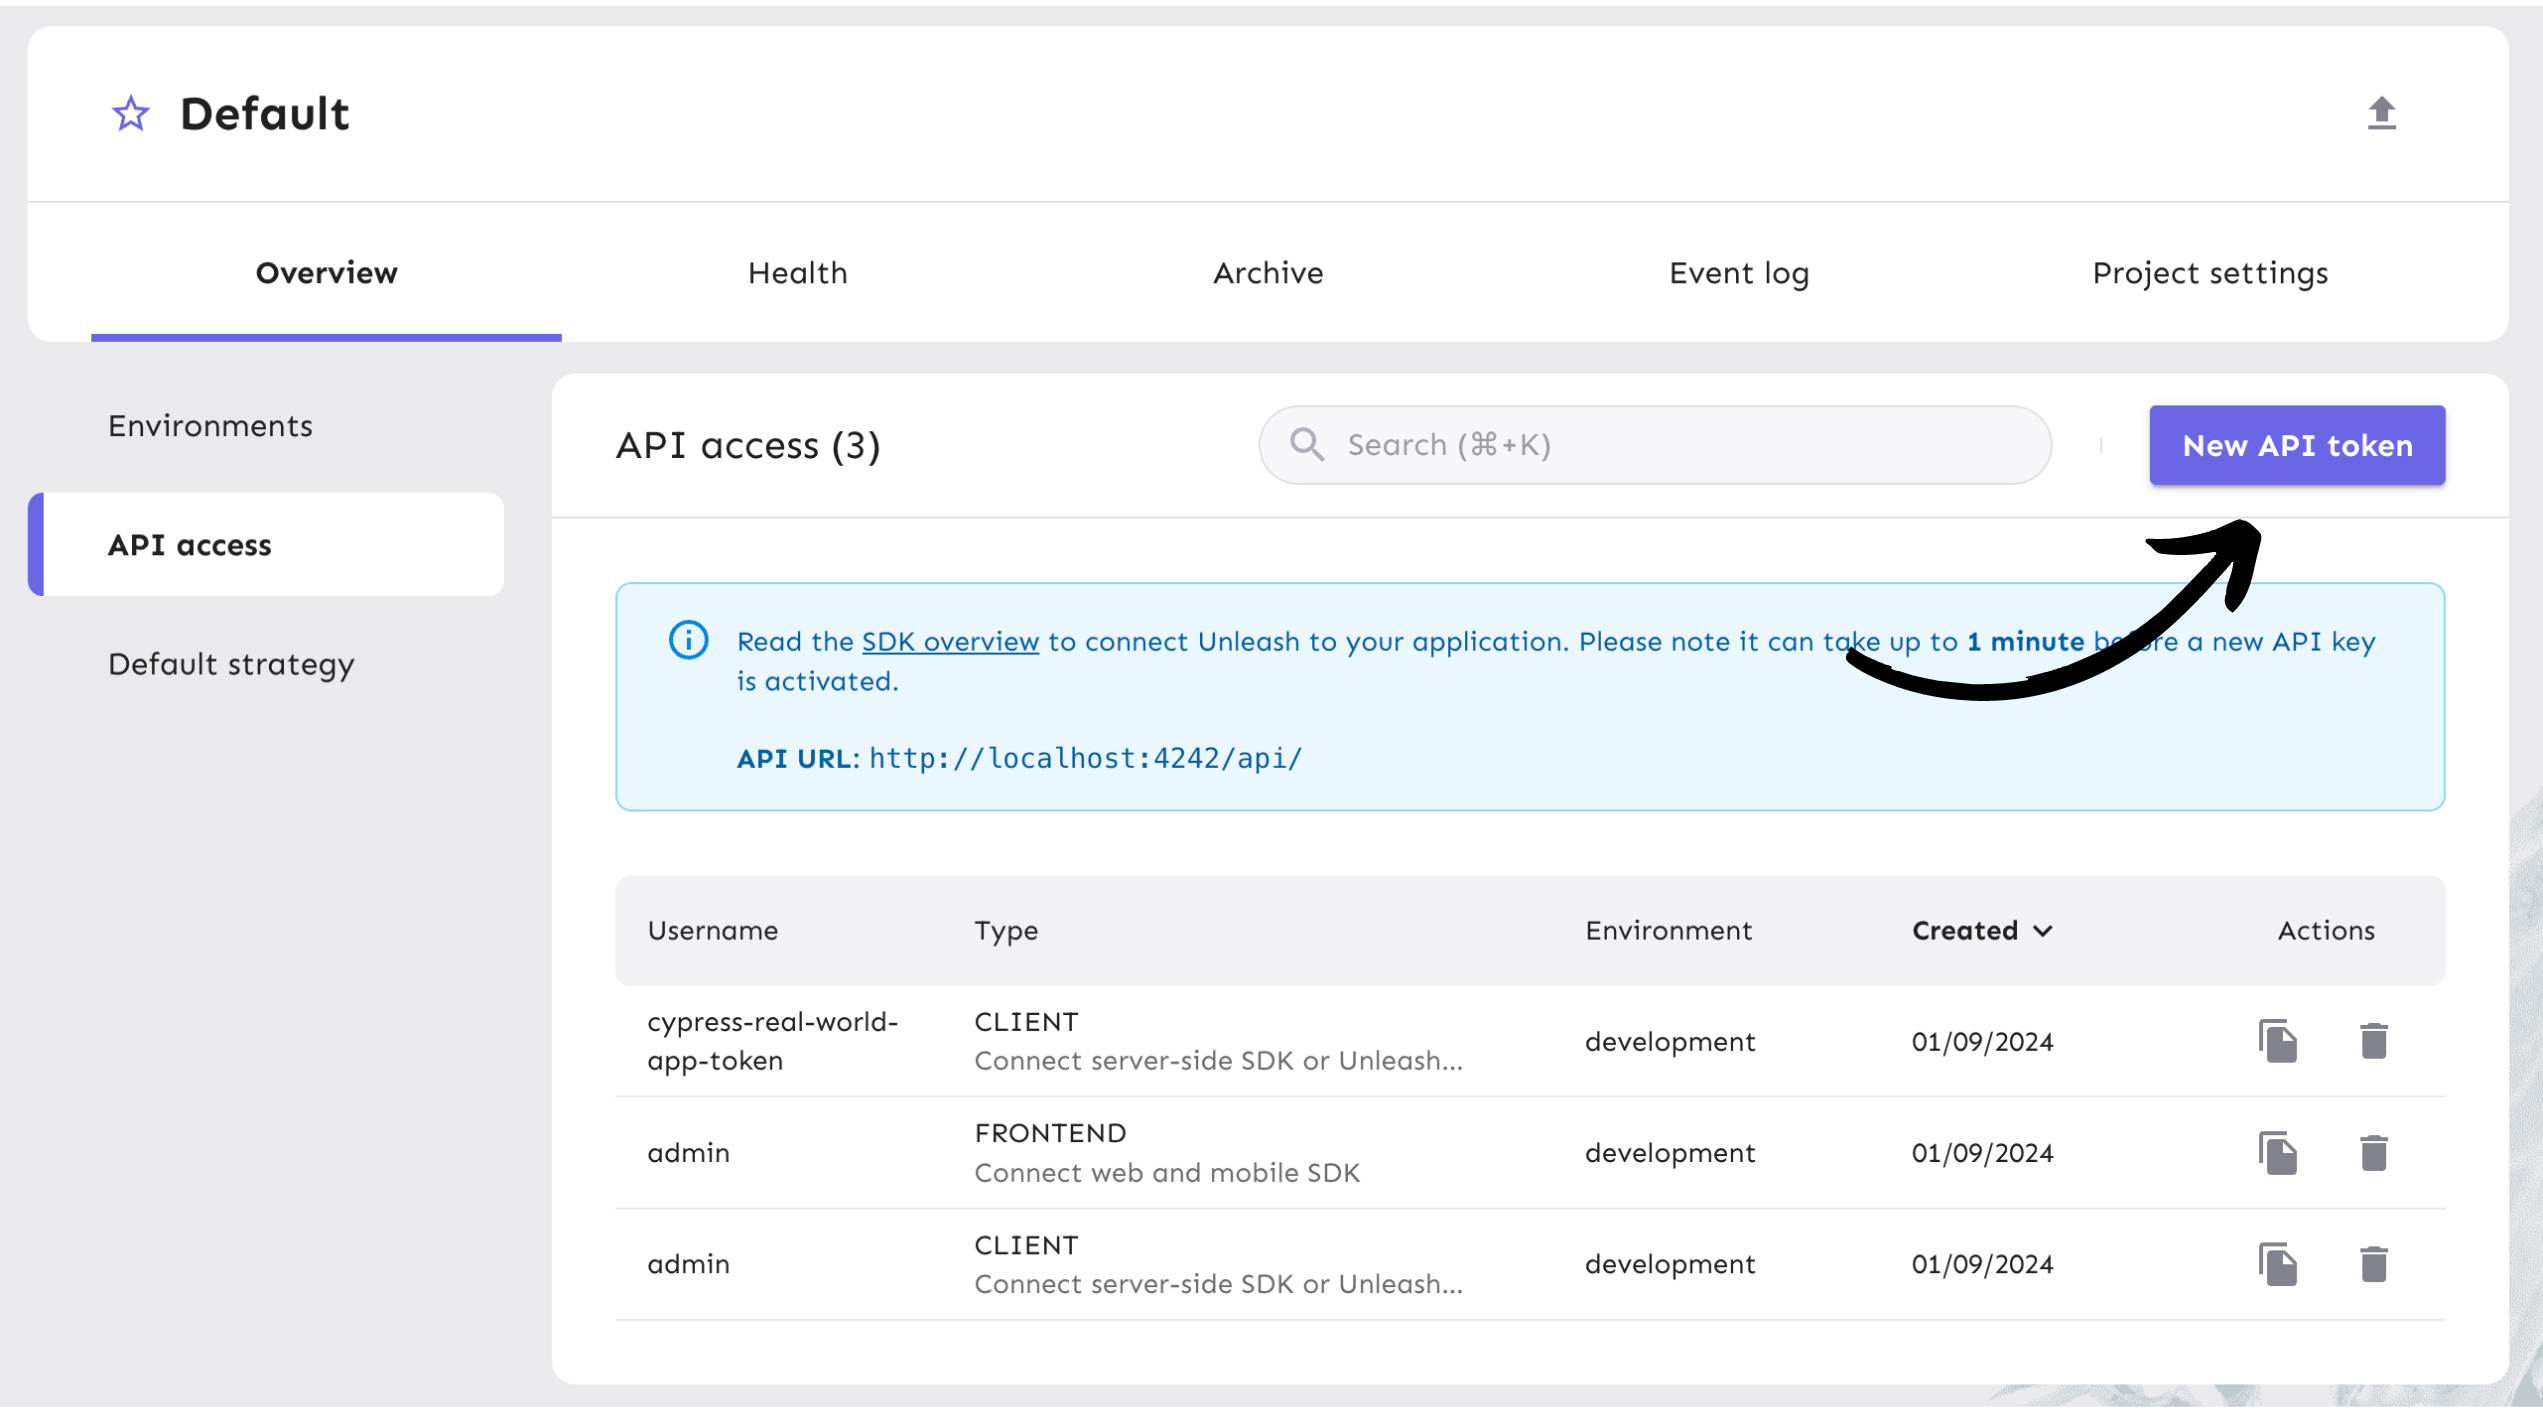
From your project view on the platform, go to “Project Settings” and then “API Access”.
Select the ‘New API token’ button.
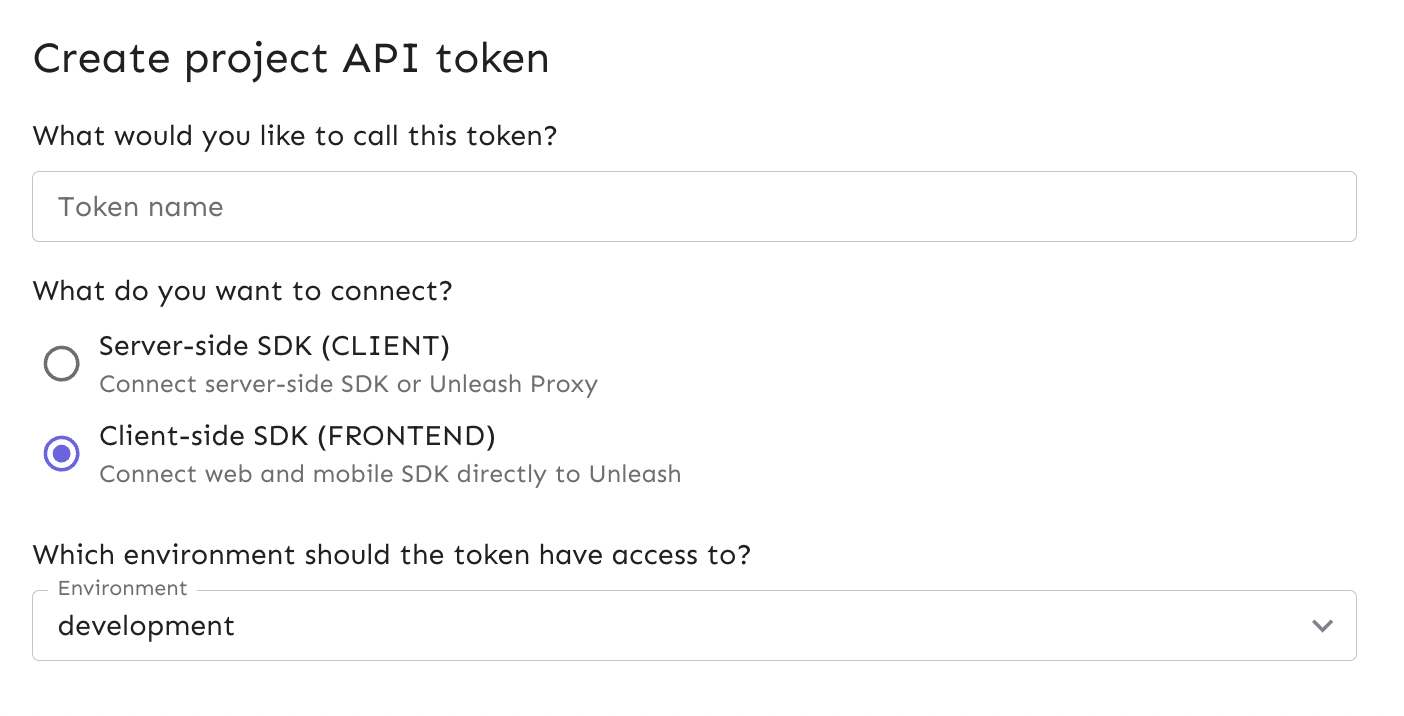
Name the API token and select the “Frontend SDK” token type, since we’ll be doing our flag evaluation on the client using the iOS SDK. You can read more about Unleash API tokens in our documentation.
The token should have access to the “development” environment, as shown in the platform screenshot below.
The API token you generated can be managed in the API Access view in your project settings. It will become handy in Step 4.
4. Add Unleash to an iOS app
In this section, you will clone an open source iOS app called Open Meteo, which is meant to model a weather application on Apple devices.
Go to your Terminal and clone the repository with this command:
Go into the repository directory and install the dependencies:
Open your XCode workspace, build and run the app on a simulator or device.
🚩 Note: Make sure you have CocoaPods installed on your system.
Next, follow the steps below in order to install the unleash-ios-sdk:
- In your Xcode project go to File -> Swift Packages -> Add Package Dependency
- Supply the link to this repository
- Set the appropriate package constraints (typically up to next major version)
- Let Xcode find and install the necessary packages
Once you’re done, you should see SwiftEventBus and UnleashProxyClientSwift listed as dependencies in the file explorer of your project.
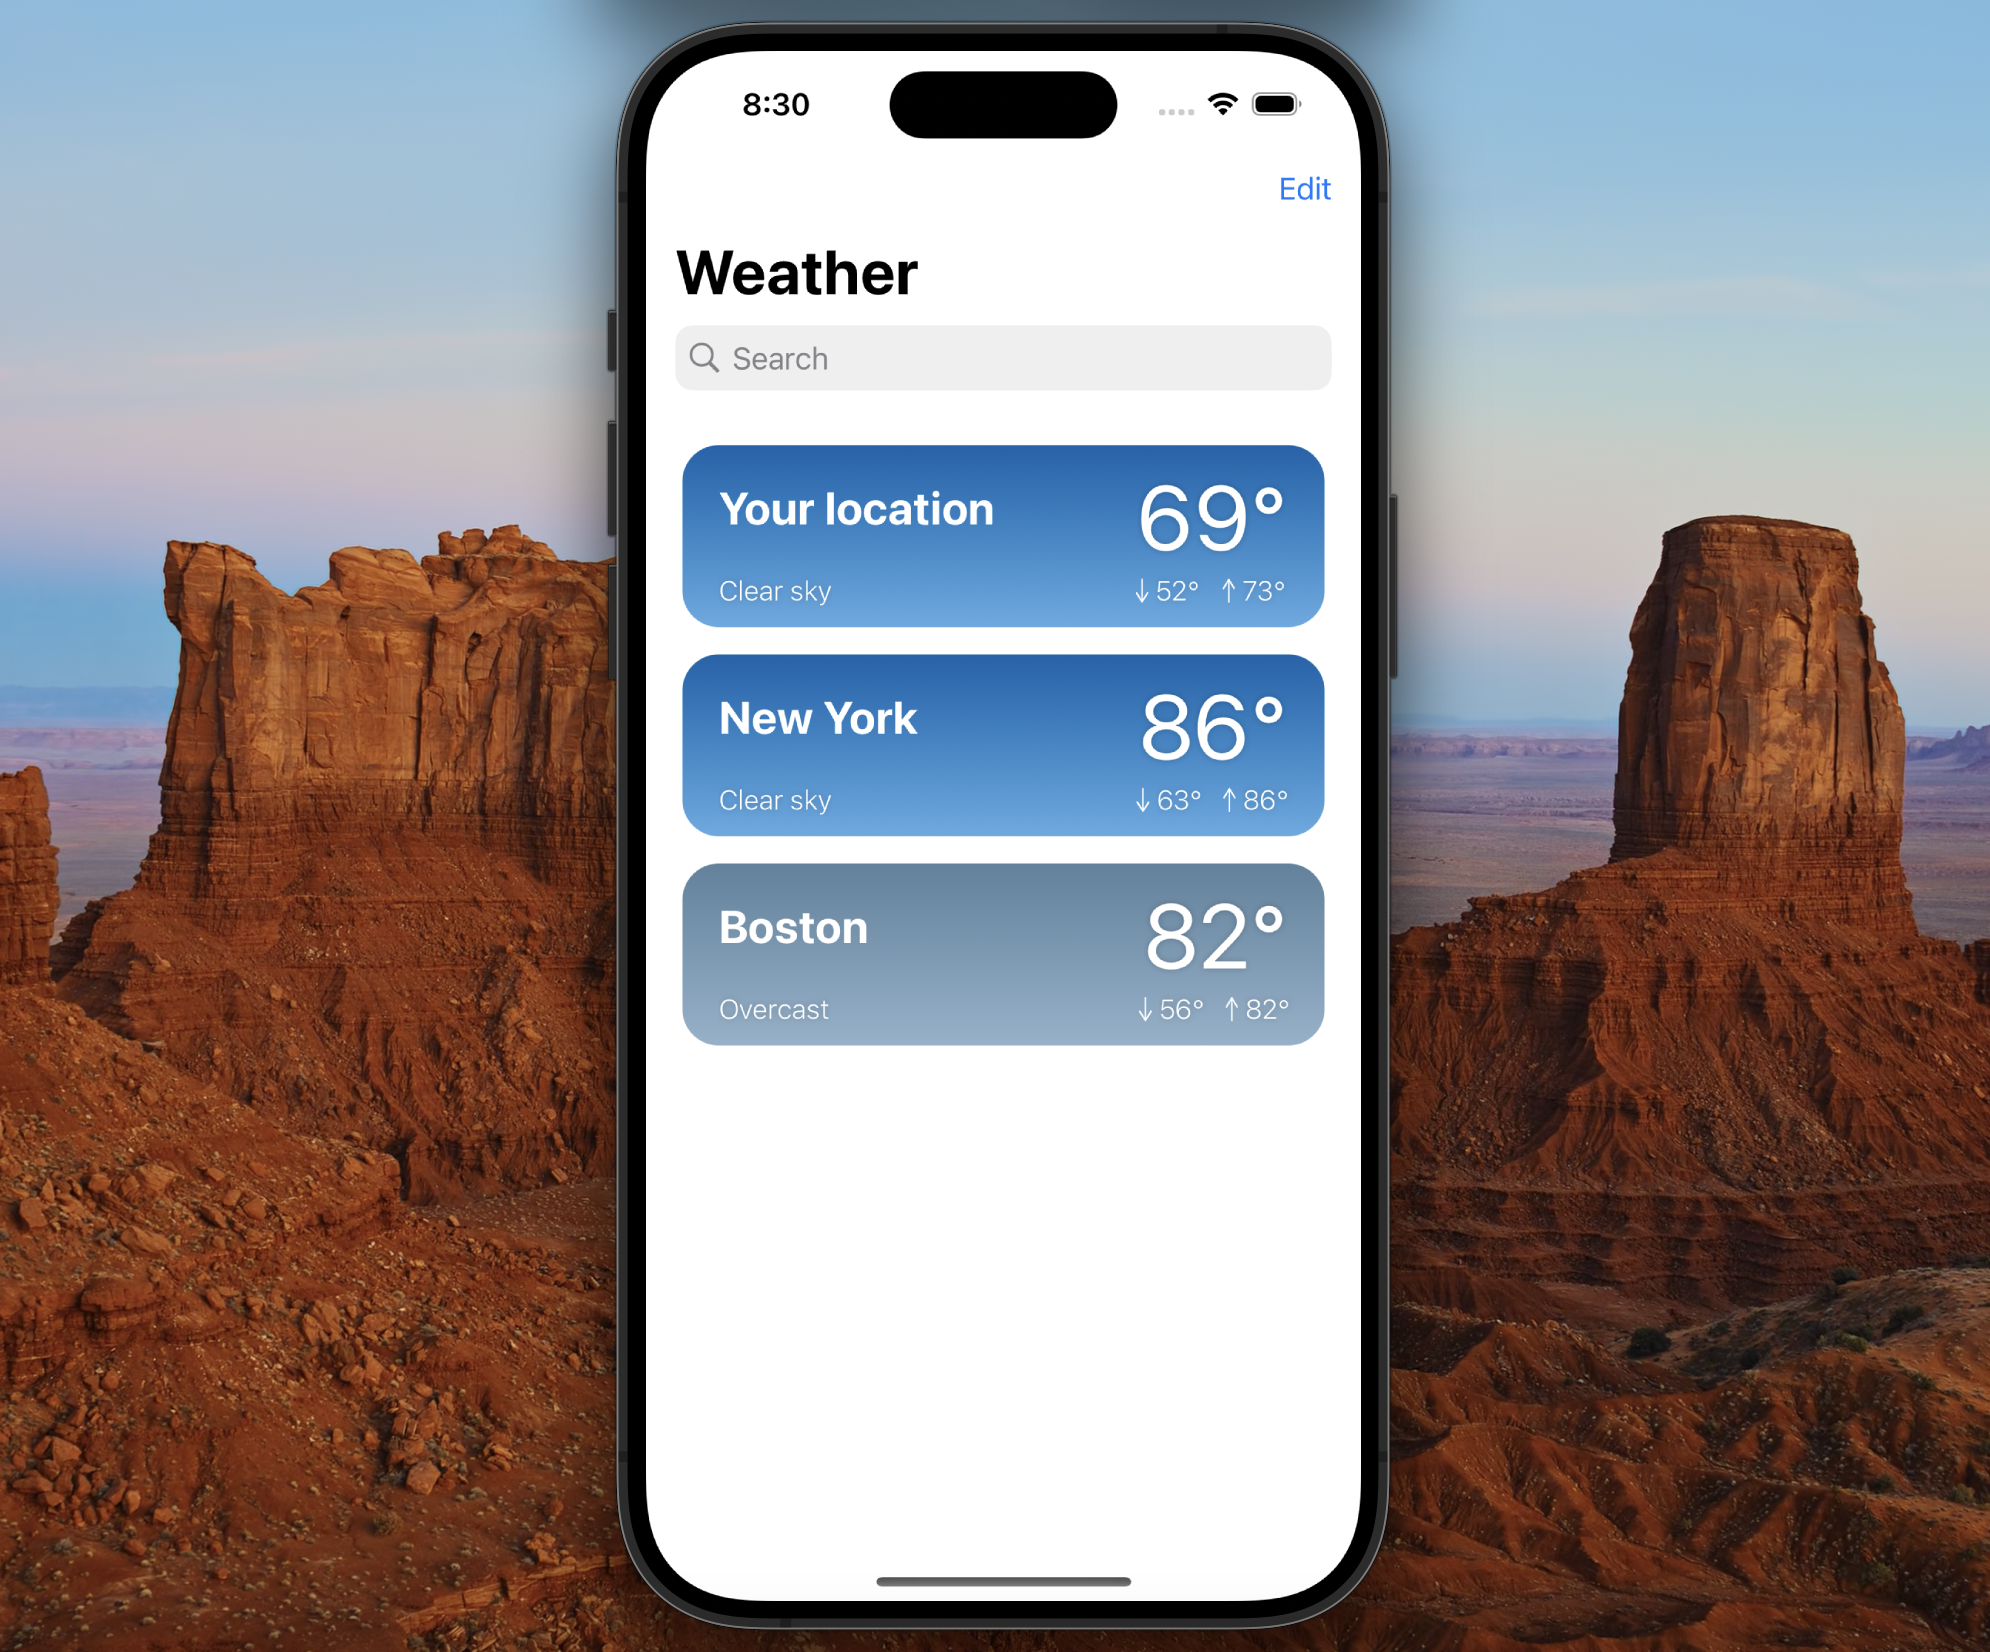
When you run the app, you may see an iPhone simulator displaying the weather app:
5. Configure Unleash and log iOS feature flag status
Next, we will configure Unleash in your iOS app.
Navigate to the OpenMeteo/AppDelegate file in your XCode workspace.
At the top of the file, add these two import lines:
Inside the AppDelegate class, add this code snippet:
Next, replace the <client_key> string in the config object with the API token you generated. You can do this by copying the API token into your clipboard from the API Access view table in your Unleash instance and pasting it into the code.
As the application is launching, it will make an authenticated call to the Unleash server so we can begin using the tempUnit feature flag we created.
You can check our documentation on API tokens and client keys for more specifics and see additional use-cases in our Frontend SDK with iOS documentation.
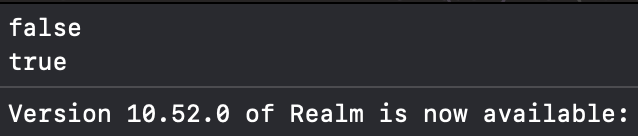
Rebuild and run your app. In your console, you will see the feature flag status defaulted to false and then true when the data has been updated from making the call to Unleash.
6. Verify the feature flag experience
Now that we’ve added in new functionality and connected it to our feature flag, we can verify that if you disable the flag in your development environment, your iOS app will no longer serve a new view.
In your local Unleash instance, turn off the feature flag by disabling it in the development environment.

Next, return to your app and rebuild the project. With the flag disabled, the flag status will remain false in the console after it captures the data from Unleash.
Conclusion
In this tutorial, we ran Unleash locally, created a new feature flag, installed the iOS SDK into an iOS app, and logged a feature flag status.
Explore some more advanced uses cases in our iOS Examples