How to Implement Feature Flags in React
React is a popular JavaScript library utilized by millions of developers across the world to build user interfaces for frontend, mobile, or server-side applications when paired with frameworks. Originally developed by Meta, React has a strong community and is best used for interactive, complex, SEO-friendly application development.
Leveraging feature flags allows developers to toggle on and off new features, whether you’re experimenting in your local environment, testing for QA purposes, or rolling out changes to users in production. Feature flags can play a critical part in optimizing the entire software development lifecycle. With Unleash, an open-source feature flag service, you can use our tooling to implement feature flags into your application and release new features faster, strategically, and safely. But how can you do this in React?
Cypress Real World App is an open-source React project that allows you to test and experiment in a React codebase that mirrors a real-world use case: a financial transaction application. It harnesses Cypress for testing, Material UI for CSS, a built-in database, and other tools to provide a fully functioning application experience for educational purposes.
In this tutorial, you will learn how to set up and use React feature flags with Unleash. We will be using the Cypress Real World App to implement the feature flag solution, which will simulate how you can gradually roll out a notifications feature to users. By the end of this tutorial, you will be able to activate your created flag and unveil the notification icon to a select group of users, who can then click on it to access the Notifications view and view transaction updates from their contacts.
Watch the video tutorial and follow along with the code from this documentation.
Prerequisites
In this tutorial, you will need the following:
- A web browser like Chrome or Firefox
- Git
- Docker
- NPM, Node and Yarn to install and run a React app
- (Optional) A code editor like Visual Studio Code
1. Architect to limit PII and configuration leakage
Since React is a front-end framework, there are special security considerations to plan around when implementing feature flags.
Most importantly, you must:
a. Limit PII (personally identifiable information) leakage from the end-user device (e.g. browser or mobile device) to your central feature flag control service.
b. Avoid leakage of configuration information from the central feature flag control service to end-user devices.
Solving both means you need to avoid evaluating feature flags on the user’s machine due to security risks like exposing API keys and flag data. Instead, send application context (e.g. username, location, etc) to your feature flag evaluation service to evaluate the results. These results (and only these results) should be stored in the client-side application memory. By keeping the evaluated results for a specific context in memory, you avoid network roundtrips every time your application needs to check the status of a feature flag. This method prevents unauthorized access and data breaches by keeping configurations and PII secure.
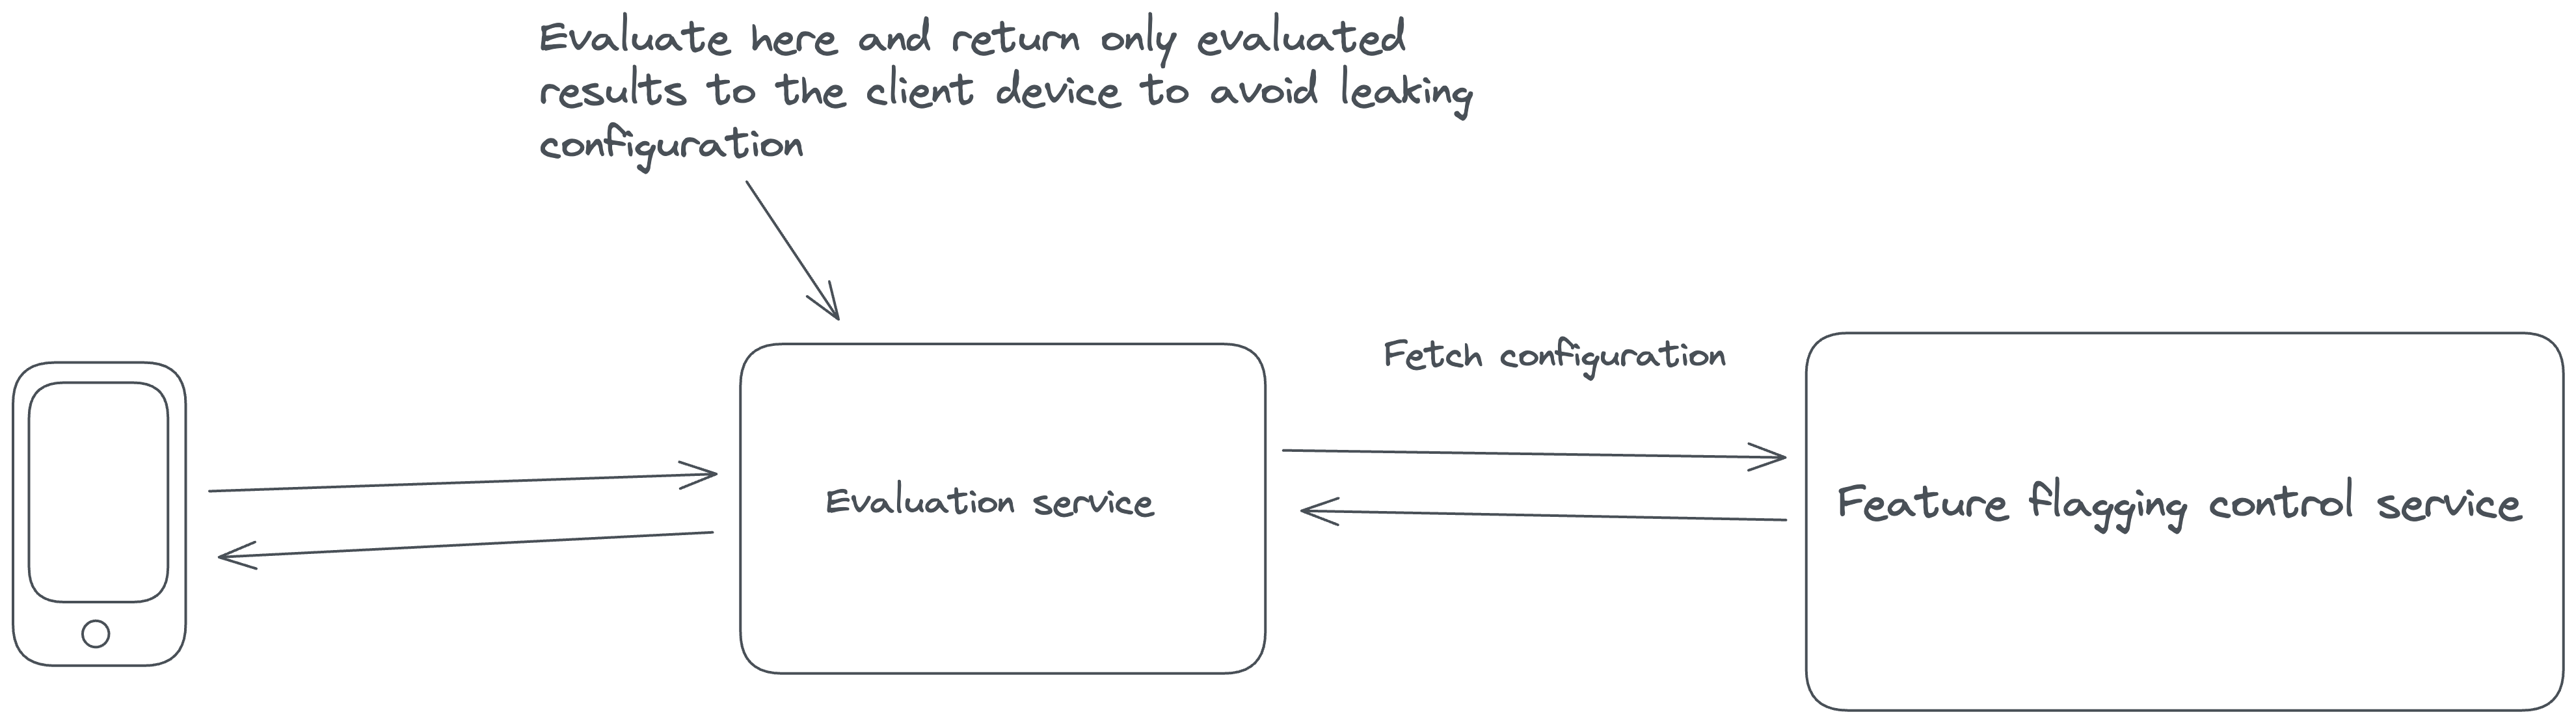
Unleash, the open-source feature flag system used in this tutorial, evaluates feature flags in this way, so by following the rest of these steps, you will be protecting your user’s data and your company’s reputation.
For a complete list of architectural guidelines, see our best practices for building and scaling feature flag systems.
2. Install a local feature flag provider
There are many feature flag tools available. In this section, you will install Unleash in order to run it, log in, and create a feature flag, but you can use other tools in place of Unleash if you prefer. You’ll need to edit the code accordingly, but the steps will probably be about the same.
Use Git to clone the Unleash repository and Docker to build and run it. Open a terminal window and run the following commands:
You will now have Unleash installed onto your machine and running in the background. You can access this instance in your web browser at http://localhost:4242
Log in to the platform using these credentials:
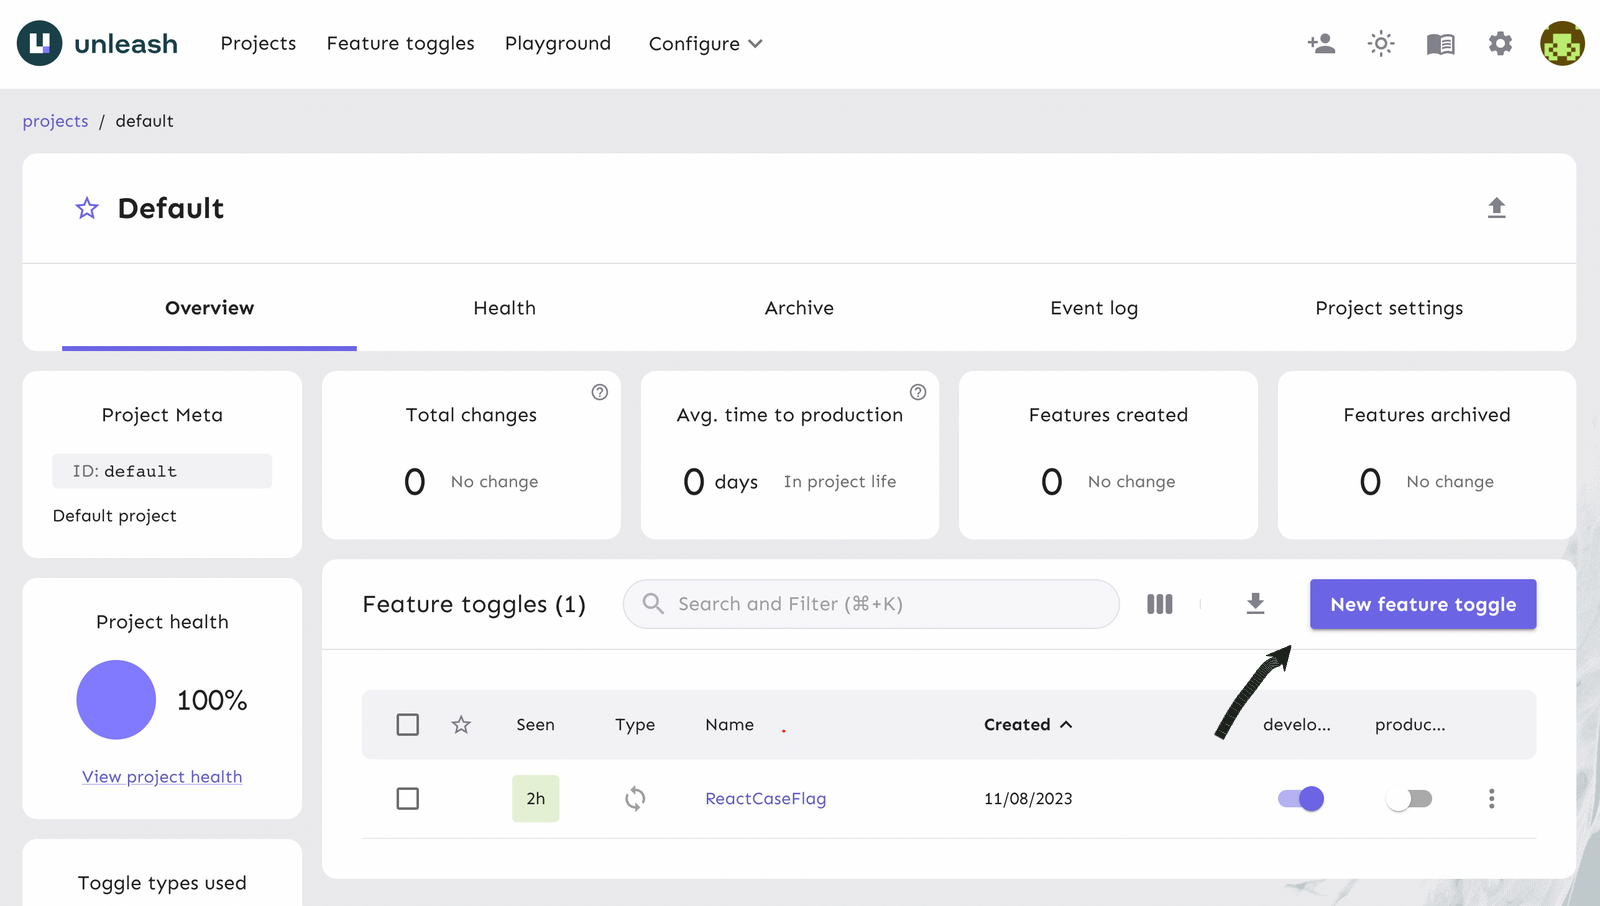
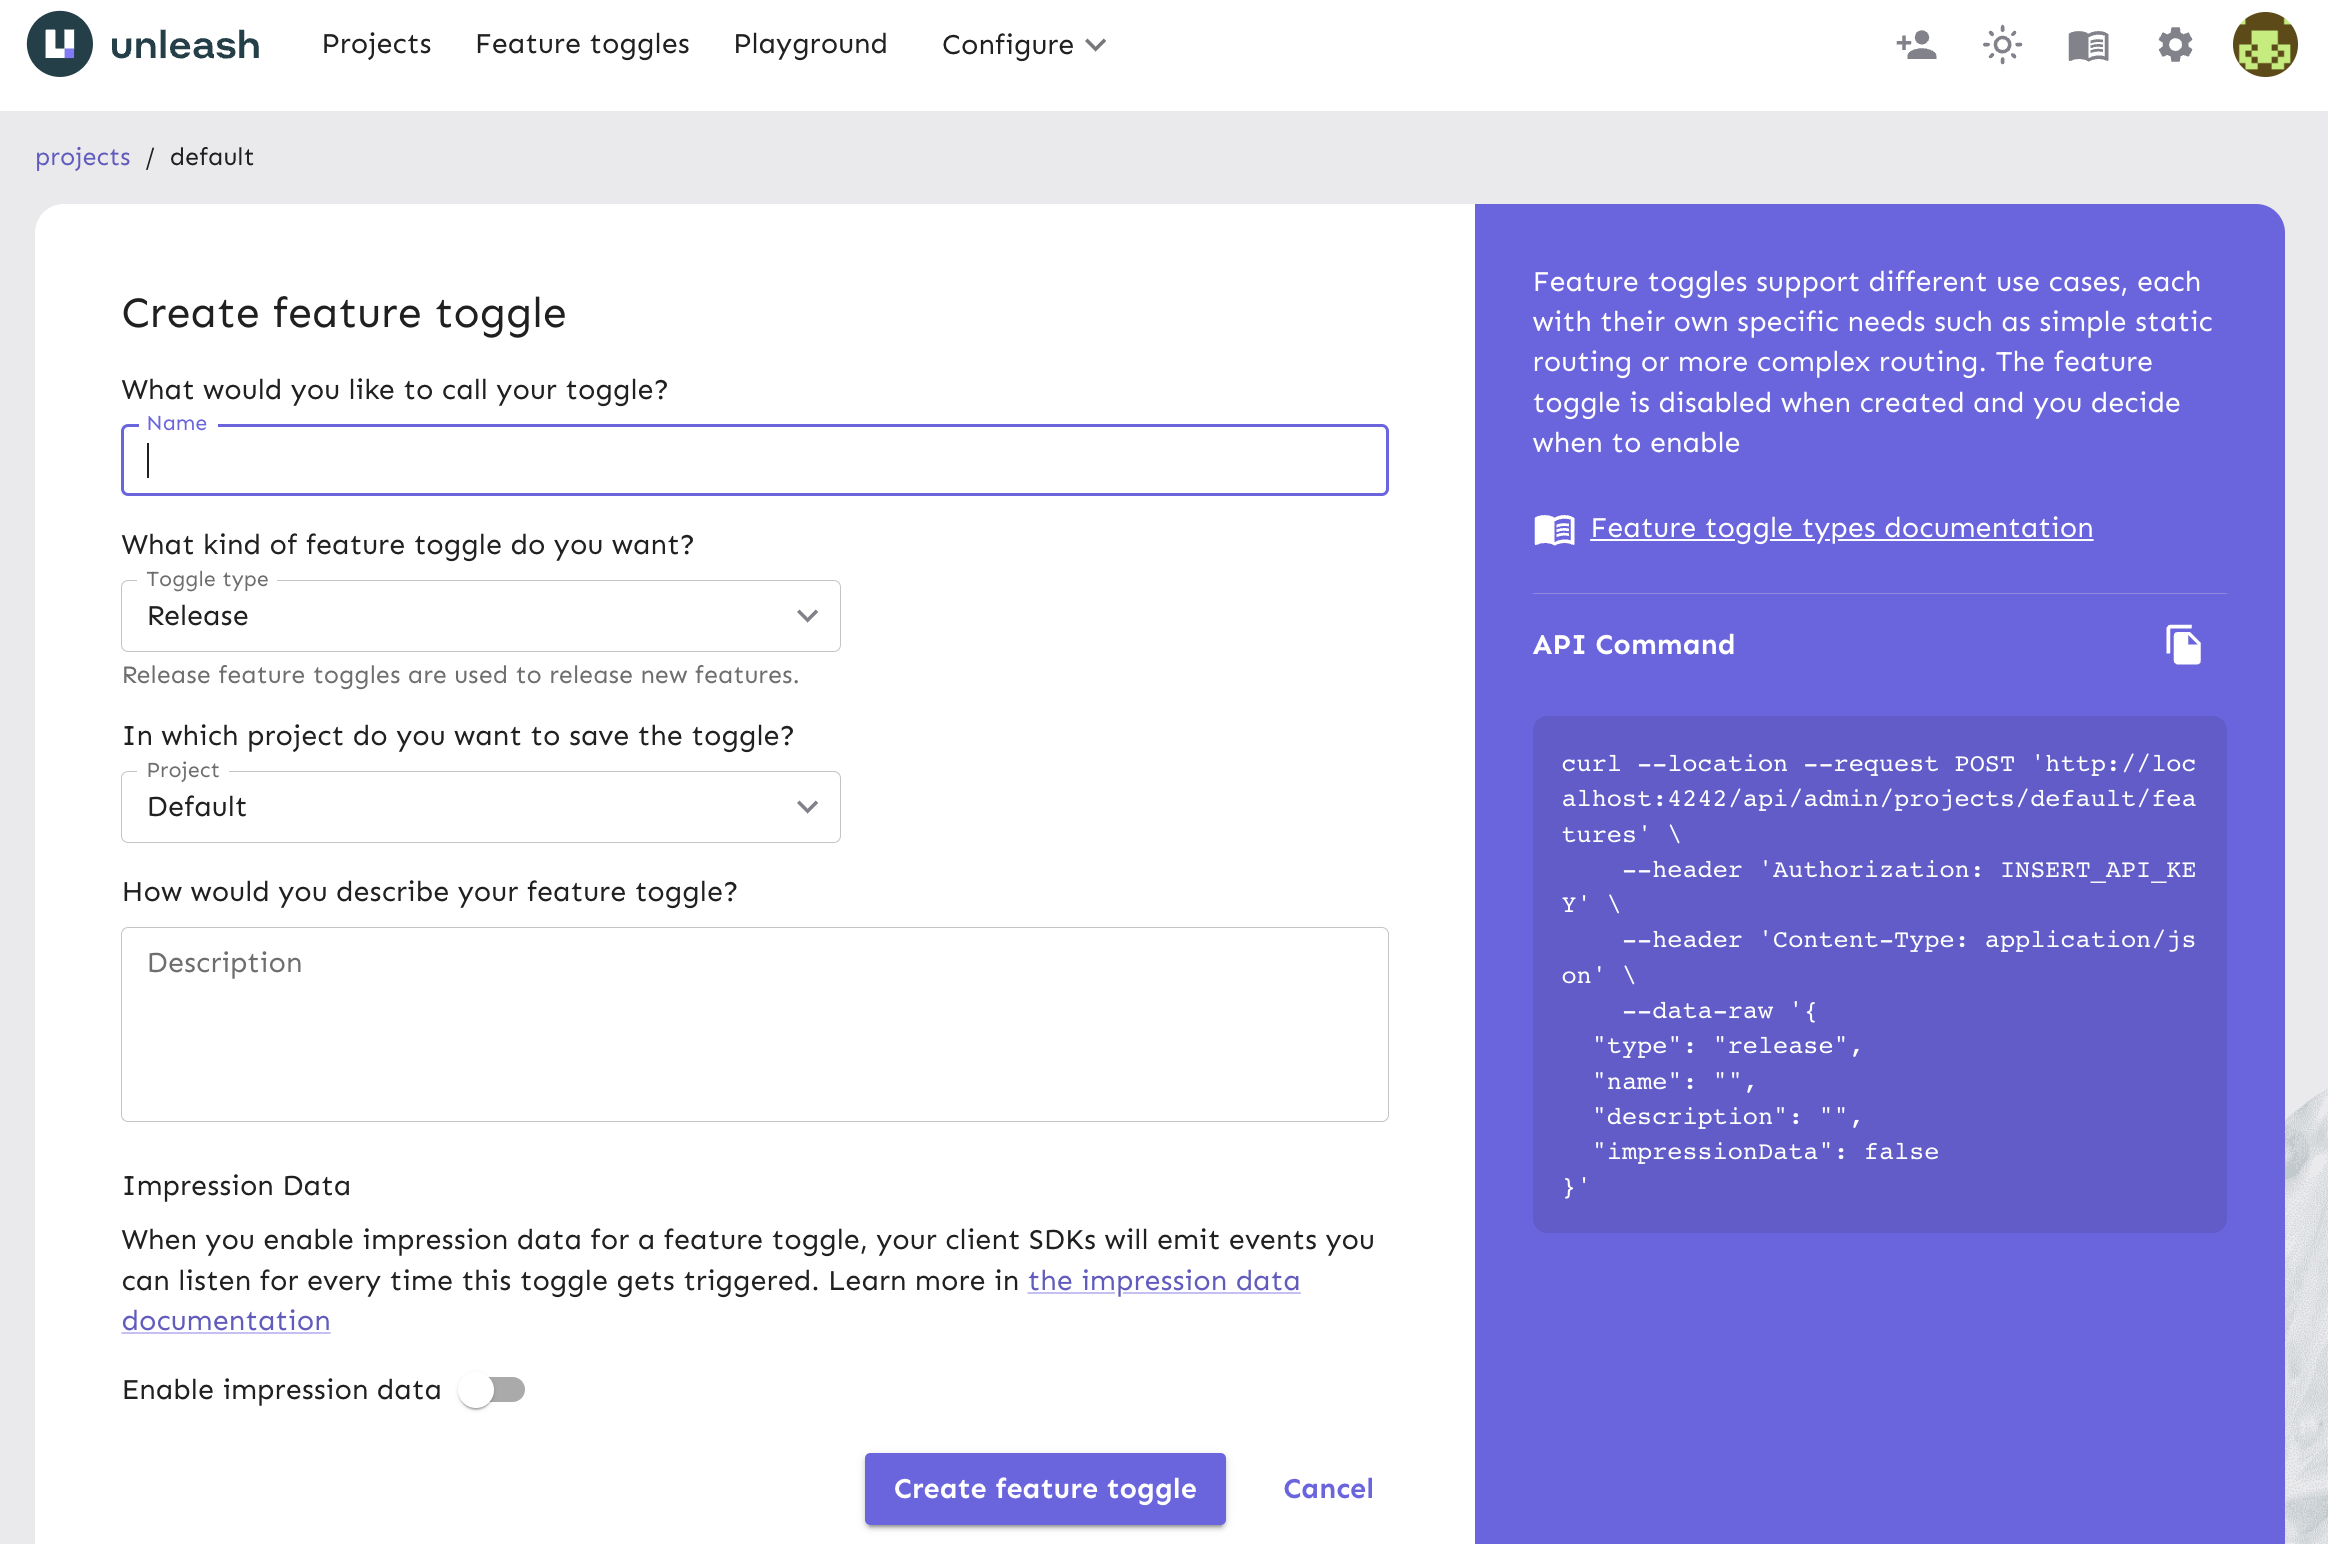
The unleash platform shows a list of feature flags that you’ve generated. Click on the ‘New Feature Flag’ button to create a new feature flag.
3. Create, enable, and configure a feature flag
Next, you will create a feature flag on the platform and turn it on for your React app.
Give your feature flag a unique name and click ‘Create feature flag’.
For the purpose of this tutorial, name the feature flag newNotificationsBadge. Use the default values in the rest of the feature flag form.
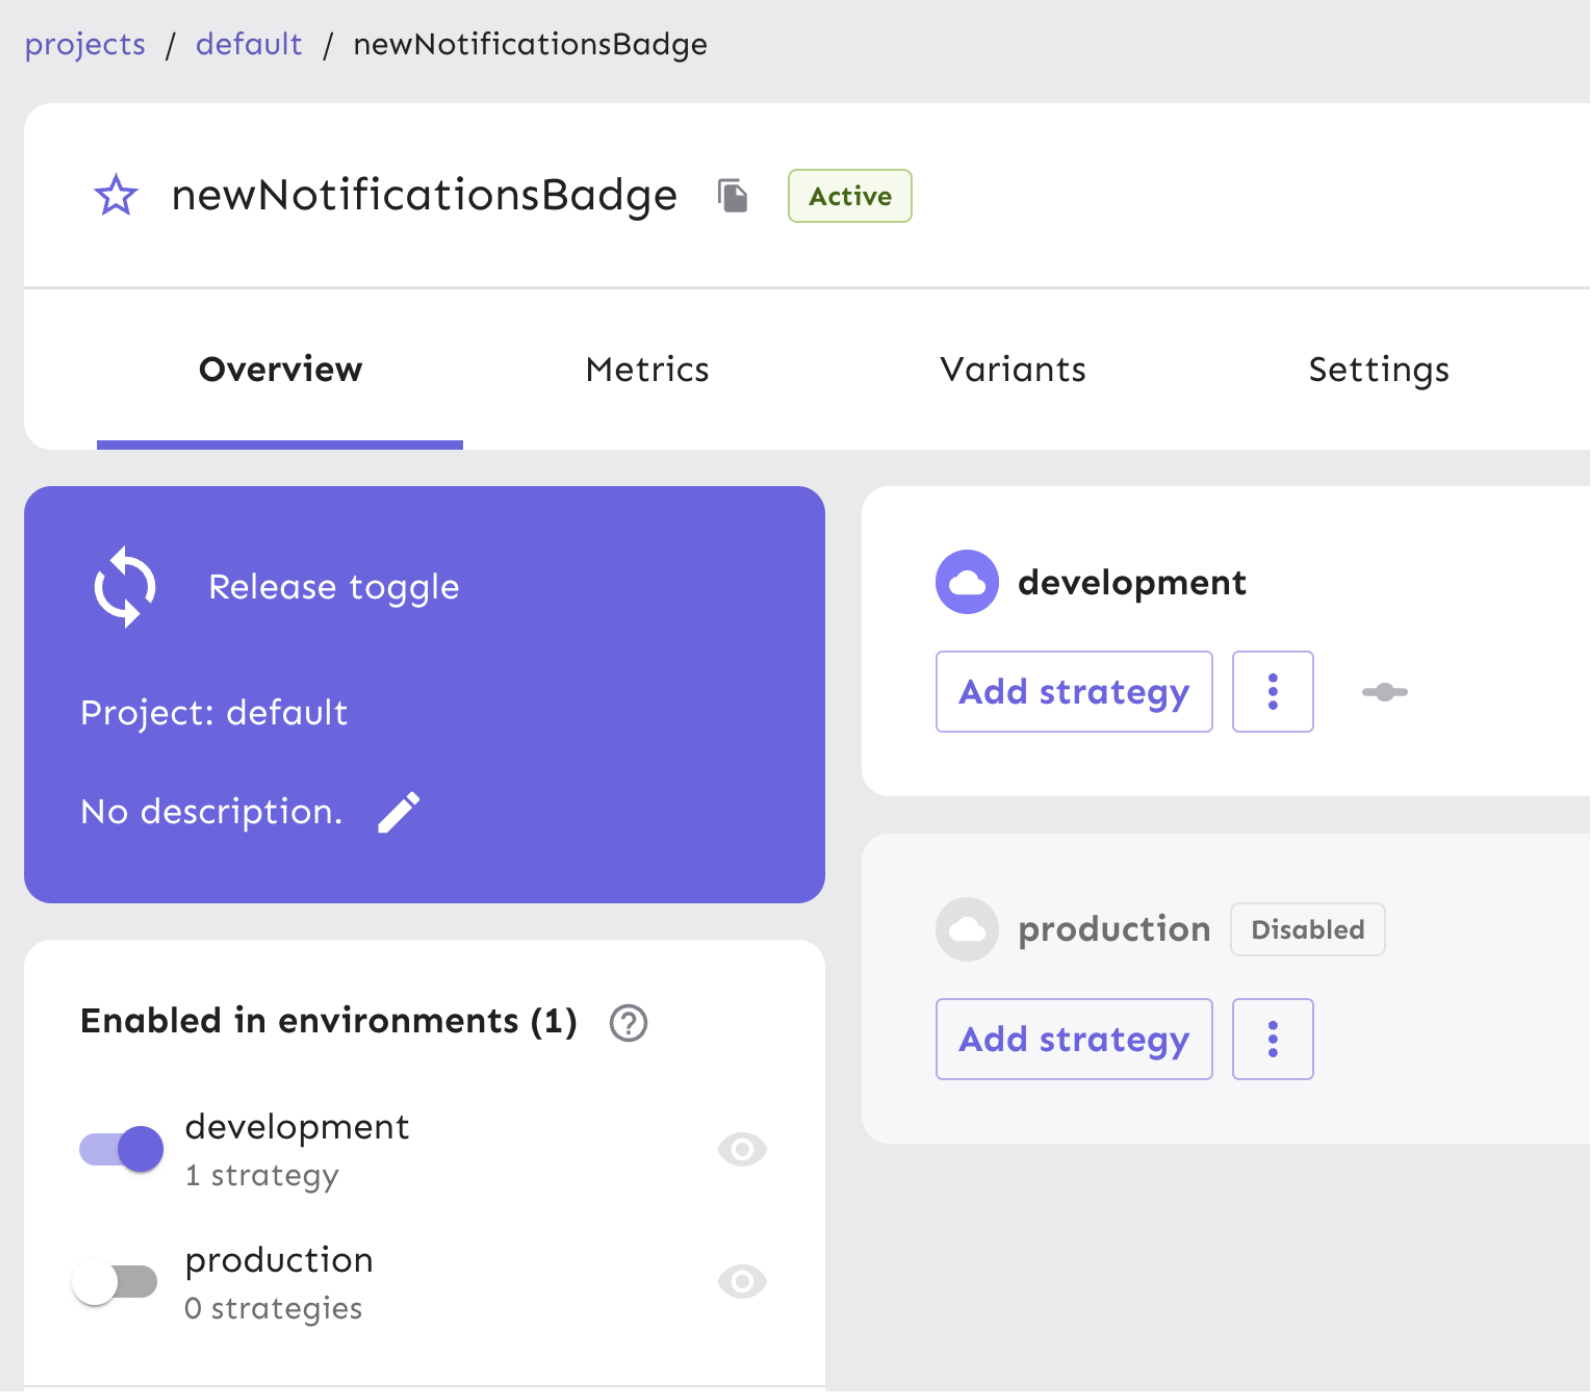
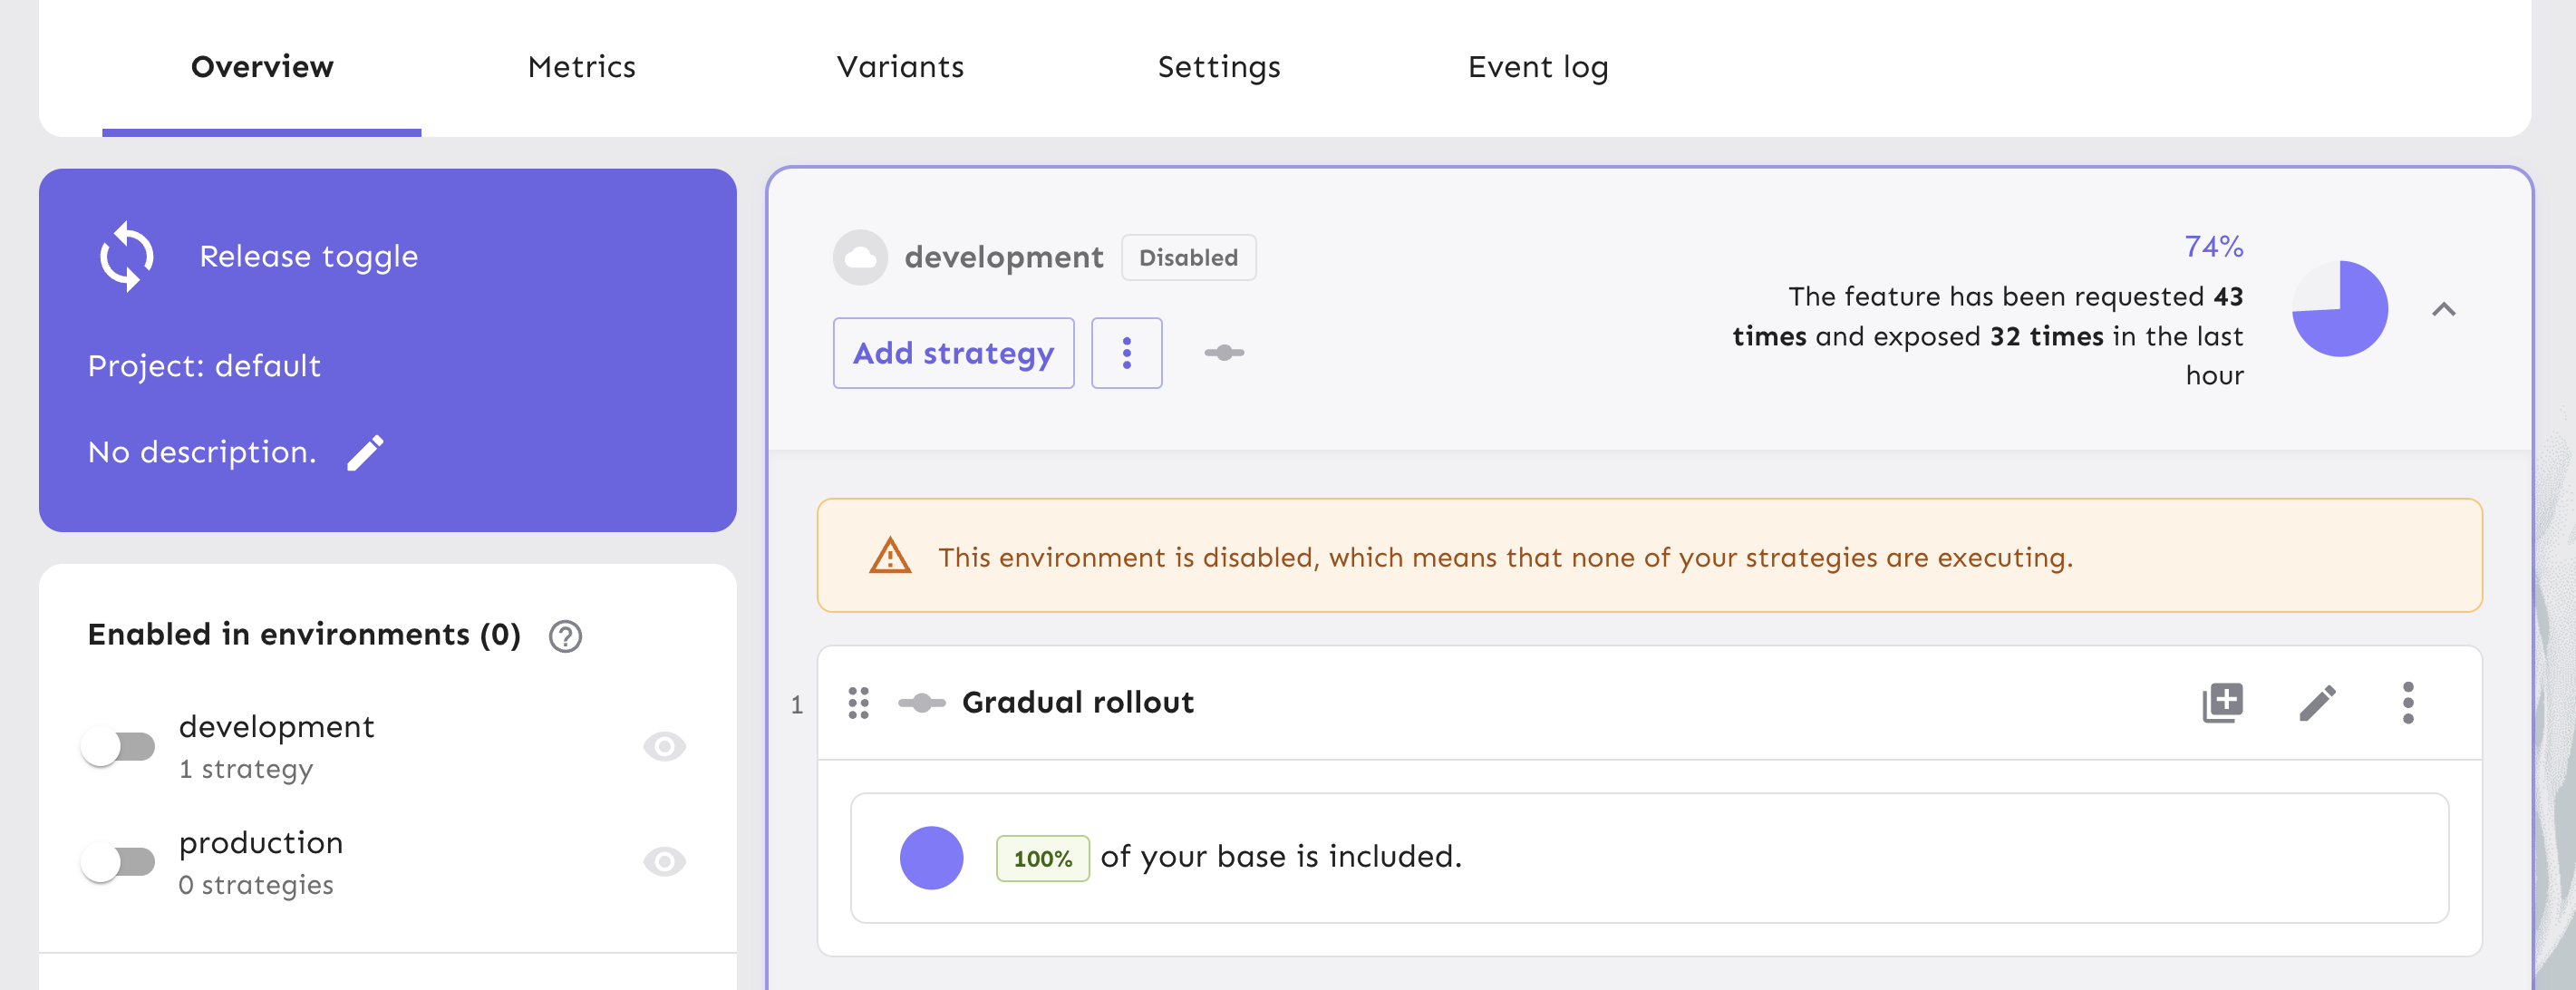
Your new feature flag is created and ready to be used. Enable the flag for your development environment, which makes it accessible to be used in the React app we will generate from your local environment.
Your new feature flag is created and ready to be used. Enable the flag for your development environment, which makes it accessible to be used in the React app we will generate from your local environment.
Next, generate an API token to authenticate calls made to Unleash servers to access and use the feature flag in your project. This API token will eventually be pulled into a configuration object within your React application to toggle features.
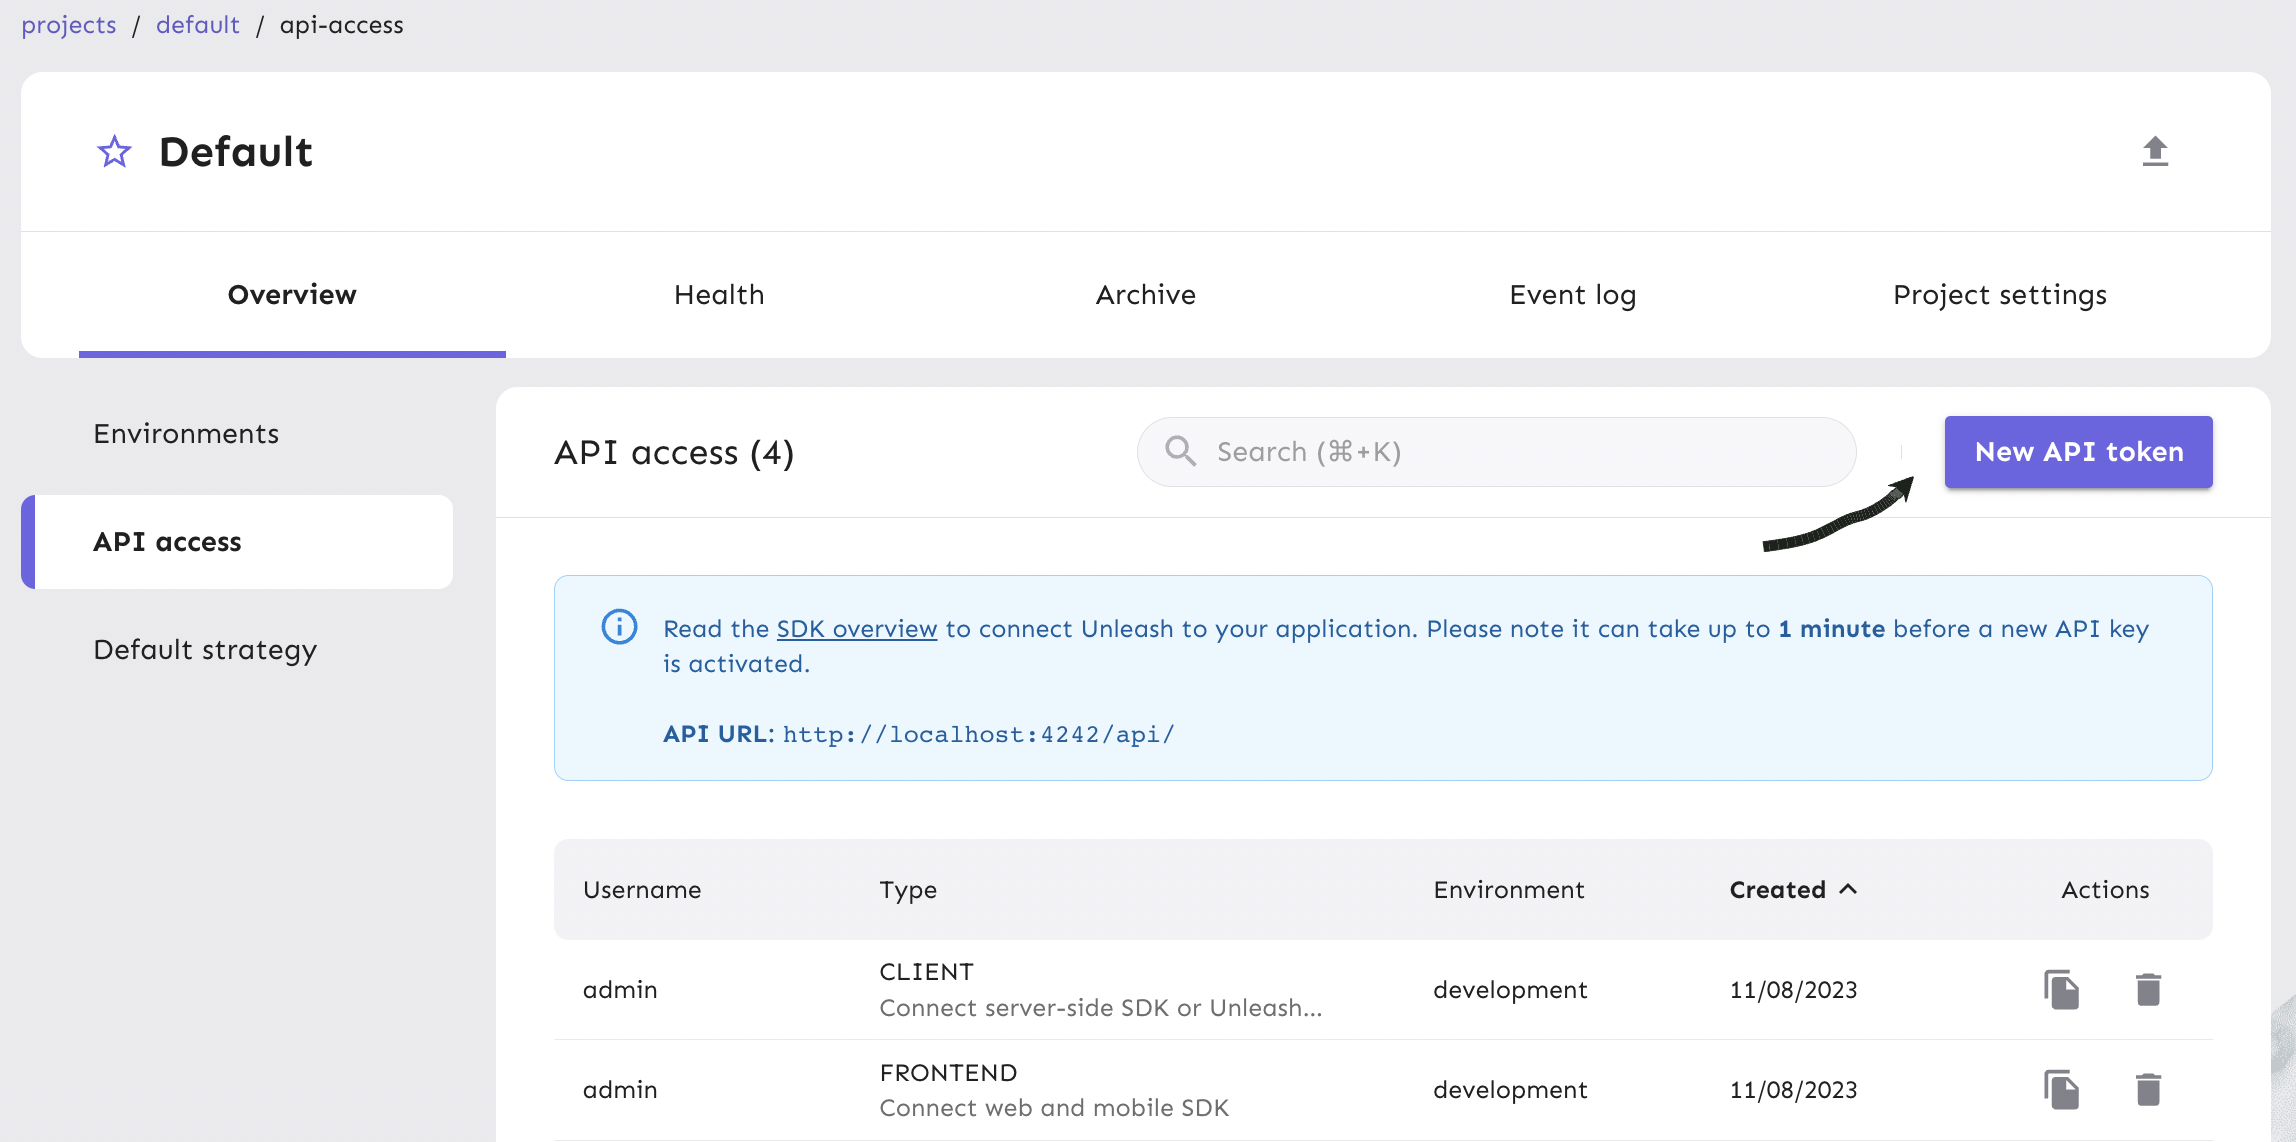
From your project view on the platform, click on Project Settings and then API Access.
Click on the ‘New API token’ button.
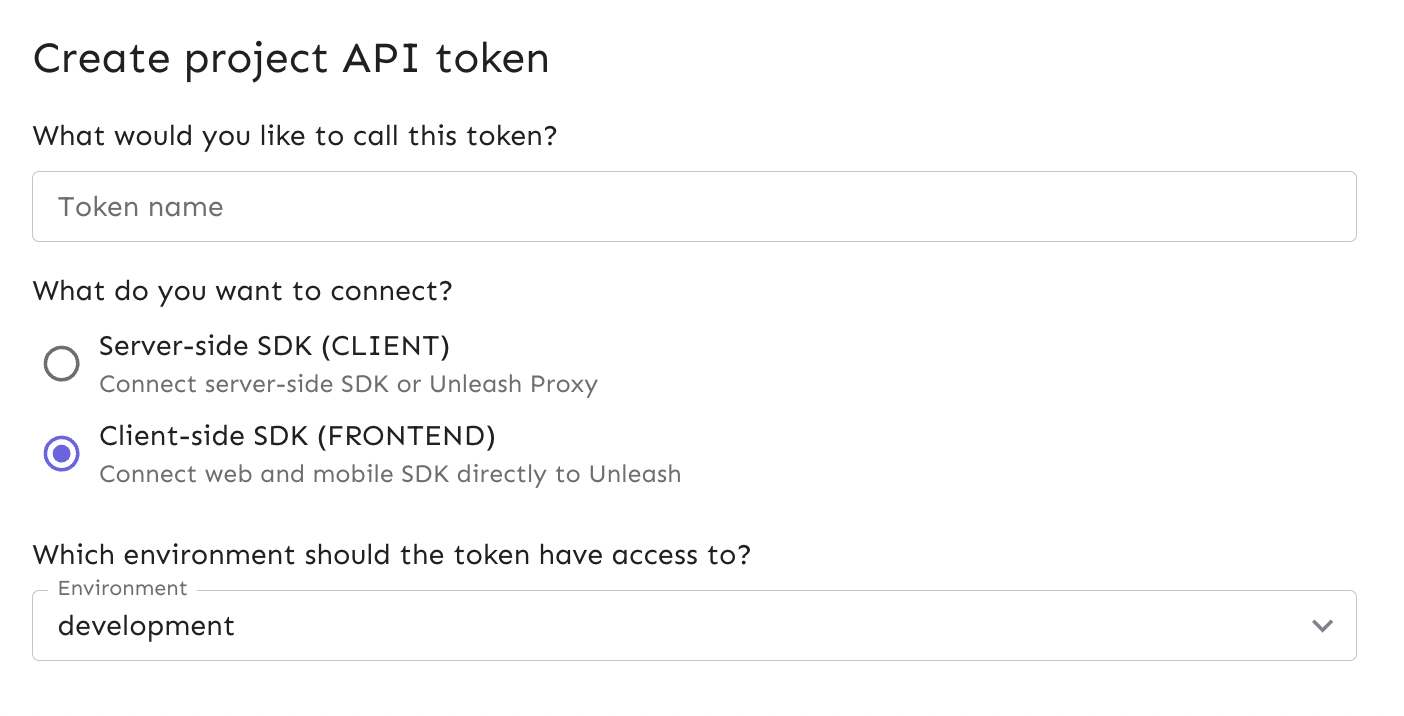
Name the API token and connect to the Frontend SDK.
The token should have access to the “development” environment, as shown in the platform screenshot below.
The API token you have generated can be managed in the API Access view in your project settings. This token will come in handy in Step 5.
4. Clone an open source React app
In this section, you will clone an open source React application called Cypress Real World App, which is meant to model what a more complex, real life use case would be for a fully-functioning app to experiment in.
This project leverages many libraries and frameworks to handle the user interface, functionality, database, authentication, and testing of a financial transaction app. These frameworks include Express, Material-UI, Cypress, TypeScript and more.
Go to your Terminal and clone the repository with this command:
🚩 Note: Since Yarn is required in order to run the app, make sure you have it installed globally. If you do not, run the command below.
In your app’s directory, begin installing the dependencies and then run the app:
Note: We recommend using the default ports that exist in the app’s configurations, which are explained in the README for it to point to. In order to ensure those function as expected, make sure no other apps are running on your machine that also port to
localhost:3000andlocalhost:3001.
In your browser at http://localhost:3000, you will be directed to the sign-in page of the Cypress Real World App.
Utilize one of the pre-existing user accounts from the database to sign in.
For more detailed instructions on the setup process for this app, review the README.
It’s time to pull in your newly created feature flag in your app. Run the following command to install the Unleash React SDK in your repo:
Once Unleash has been installed, open up a code editor like VSCode to view your React repo.
In src/index.tsx, import the <FlagProvider>:
Paste in a configuration object:
In the Router section of this file, wrap the FlagProvider around the existing <App /> component:
Next, replace the <client_key> string in the config object with the API token you generated. You can do this by copying the API token into your clipboard from the API Access view table and pasting it into the code.
This configuration object is used to populate the FlagProvider component that comes from Unleash and wraps around the application, using the credentials to target the specific feature flag you created for the project.
You can check our documentation on API tokens and client keys for more specifics and see additional use-cases in our Frontend SDK with React documentation.
5. Use the feature flag to rollout a notifications badge
In a real world use case for your feature flag, you can gradually rollout new features to a percentage of users by configuring the flag’s strategy.
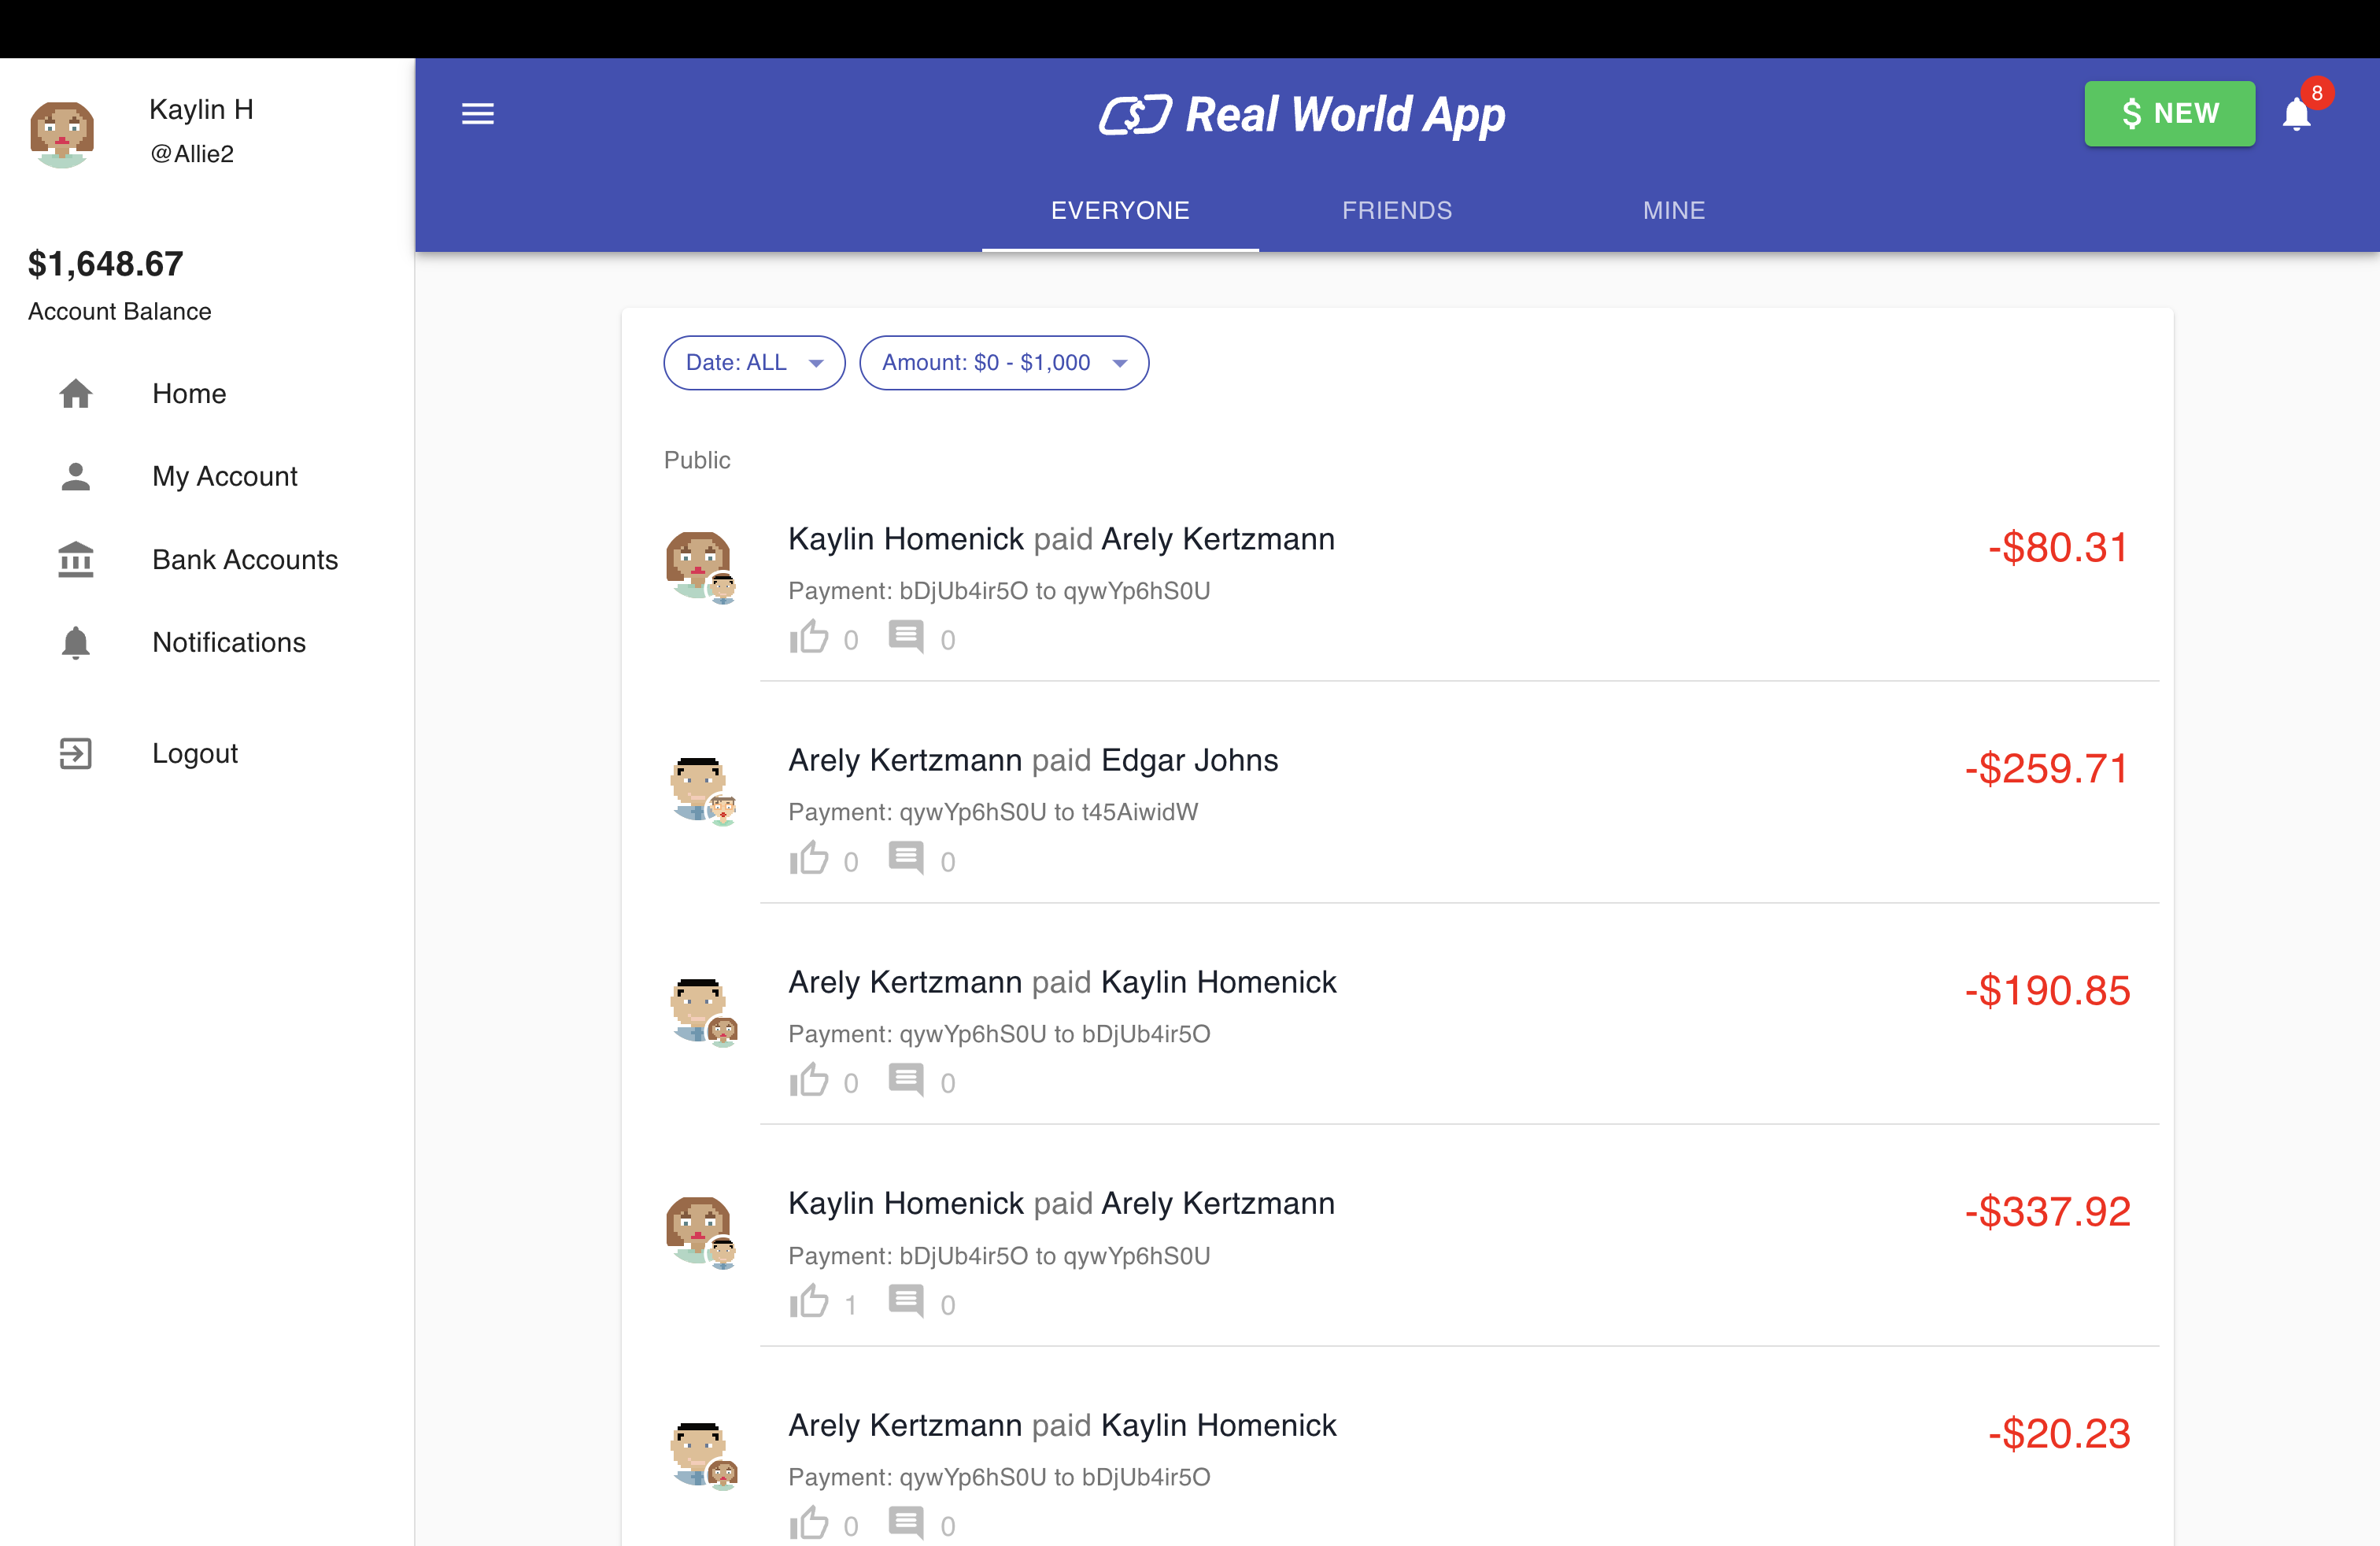
In this case, we want to rollout a new notifications badge that will appear in the top navigation bar so users can see the latest updates from transactions between contacts. This will require us to modify the visibility of a React component that is rendered in our app.
In src/components/NavBar.tsx, import the useFlag feature:
Within the NavBar component in the file, define and reference the flag you created.
This flag will be used to conditionally render the notification icon Badge that is pulled in from Material-UI.
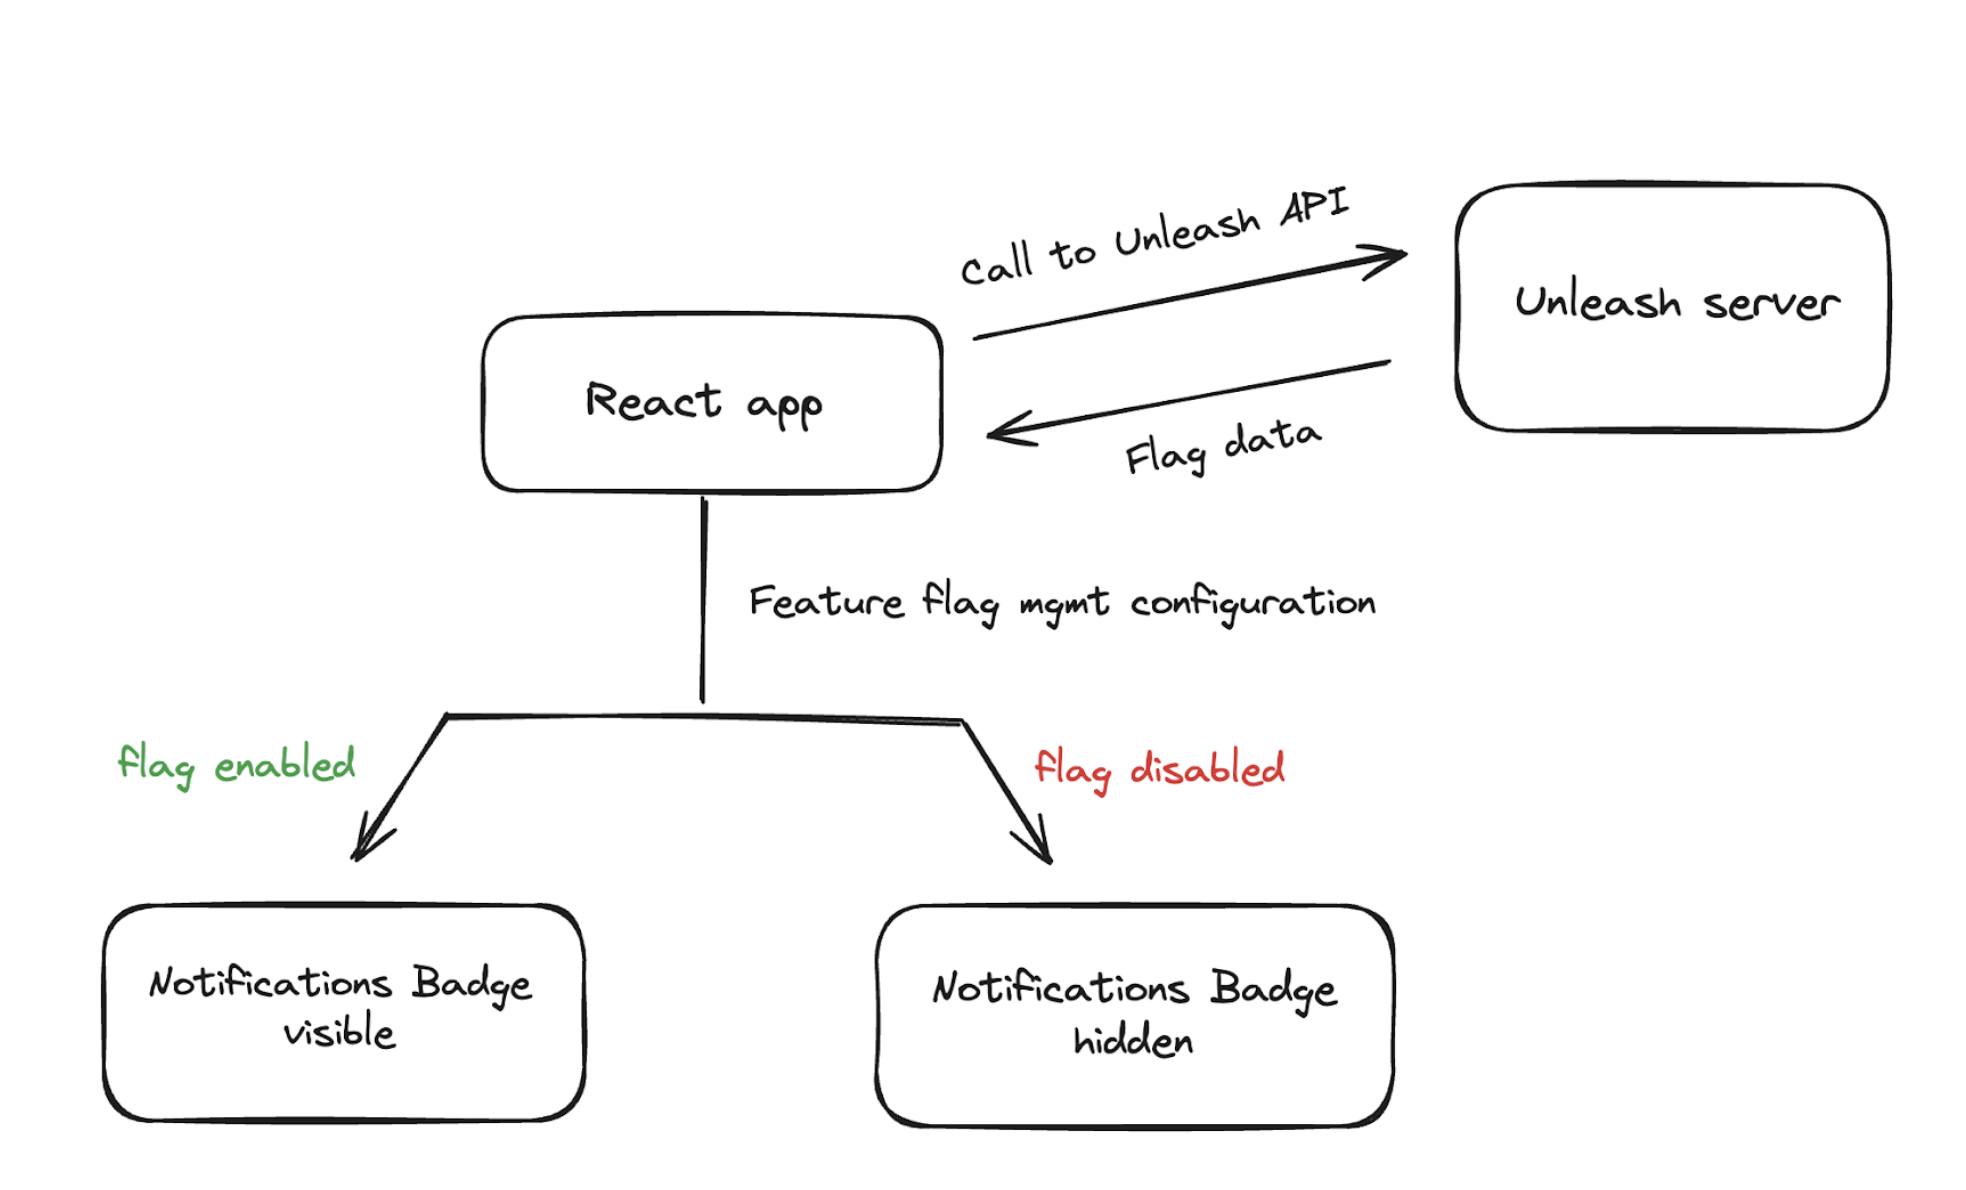
If the flag is enabled, the notification badge will display to users and will route them to the Notifications view.
Find the Badge component in the file and wrap it in a boolean operator:
Note: Ensure you have the correct format in your file or the Prettier formatter will display an error.
6. Verify the toggle experience
In your Unleash instance, you can toggle your feature flag on or off to verify that the different UI experiences load accordingly.
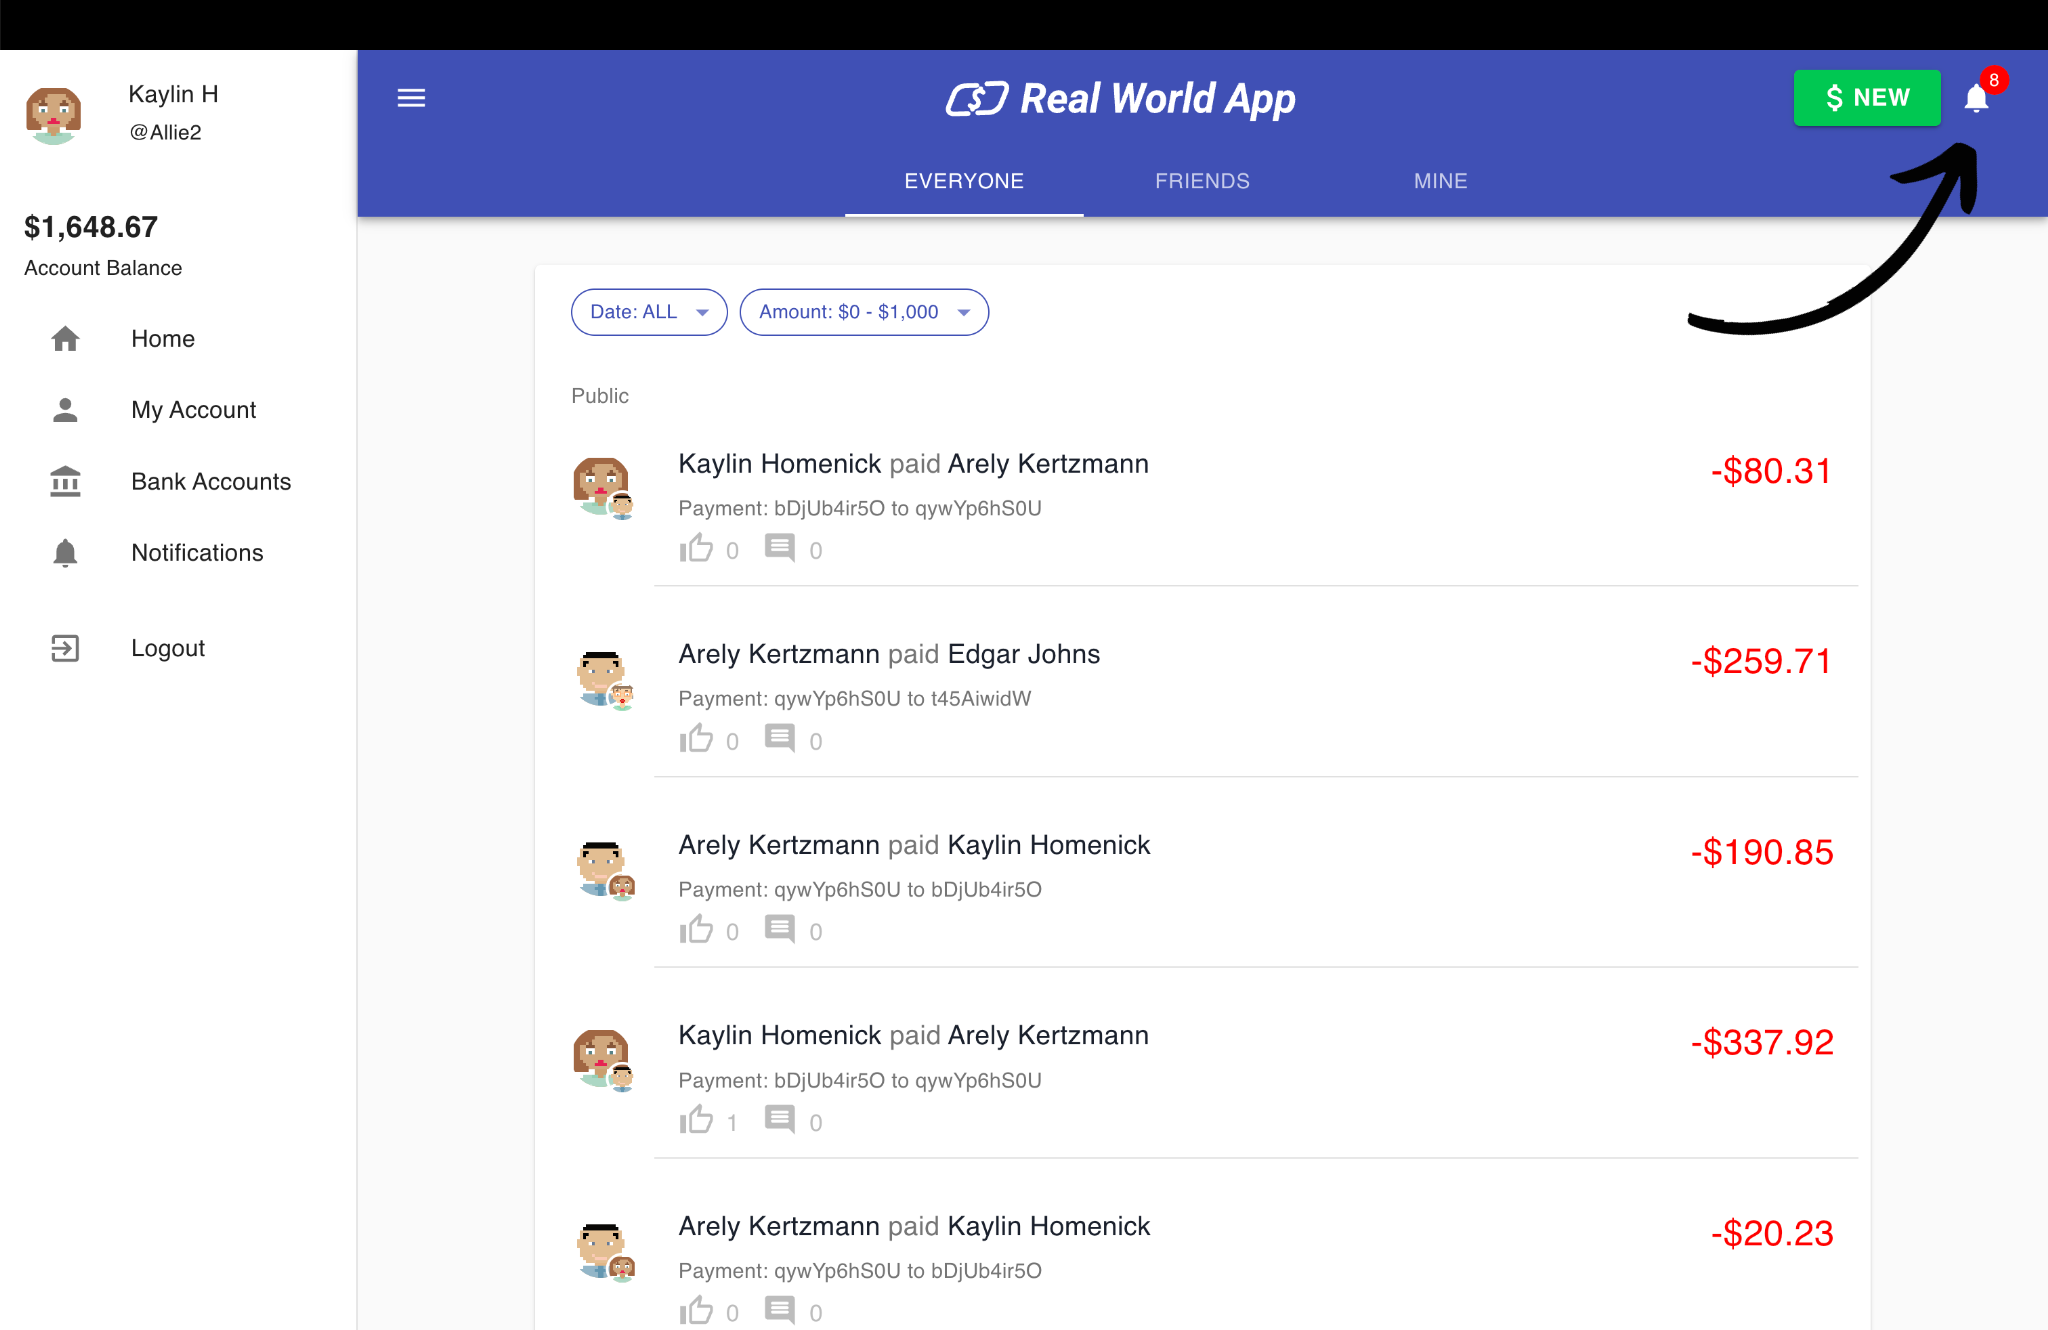
Enabling the flag will result in being able to see the notifications icon in the top menu of the app.
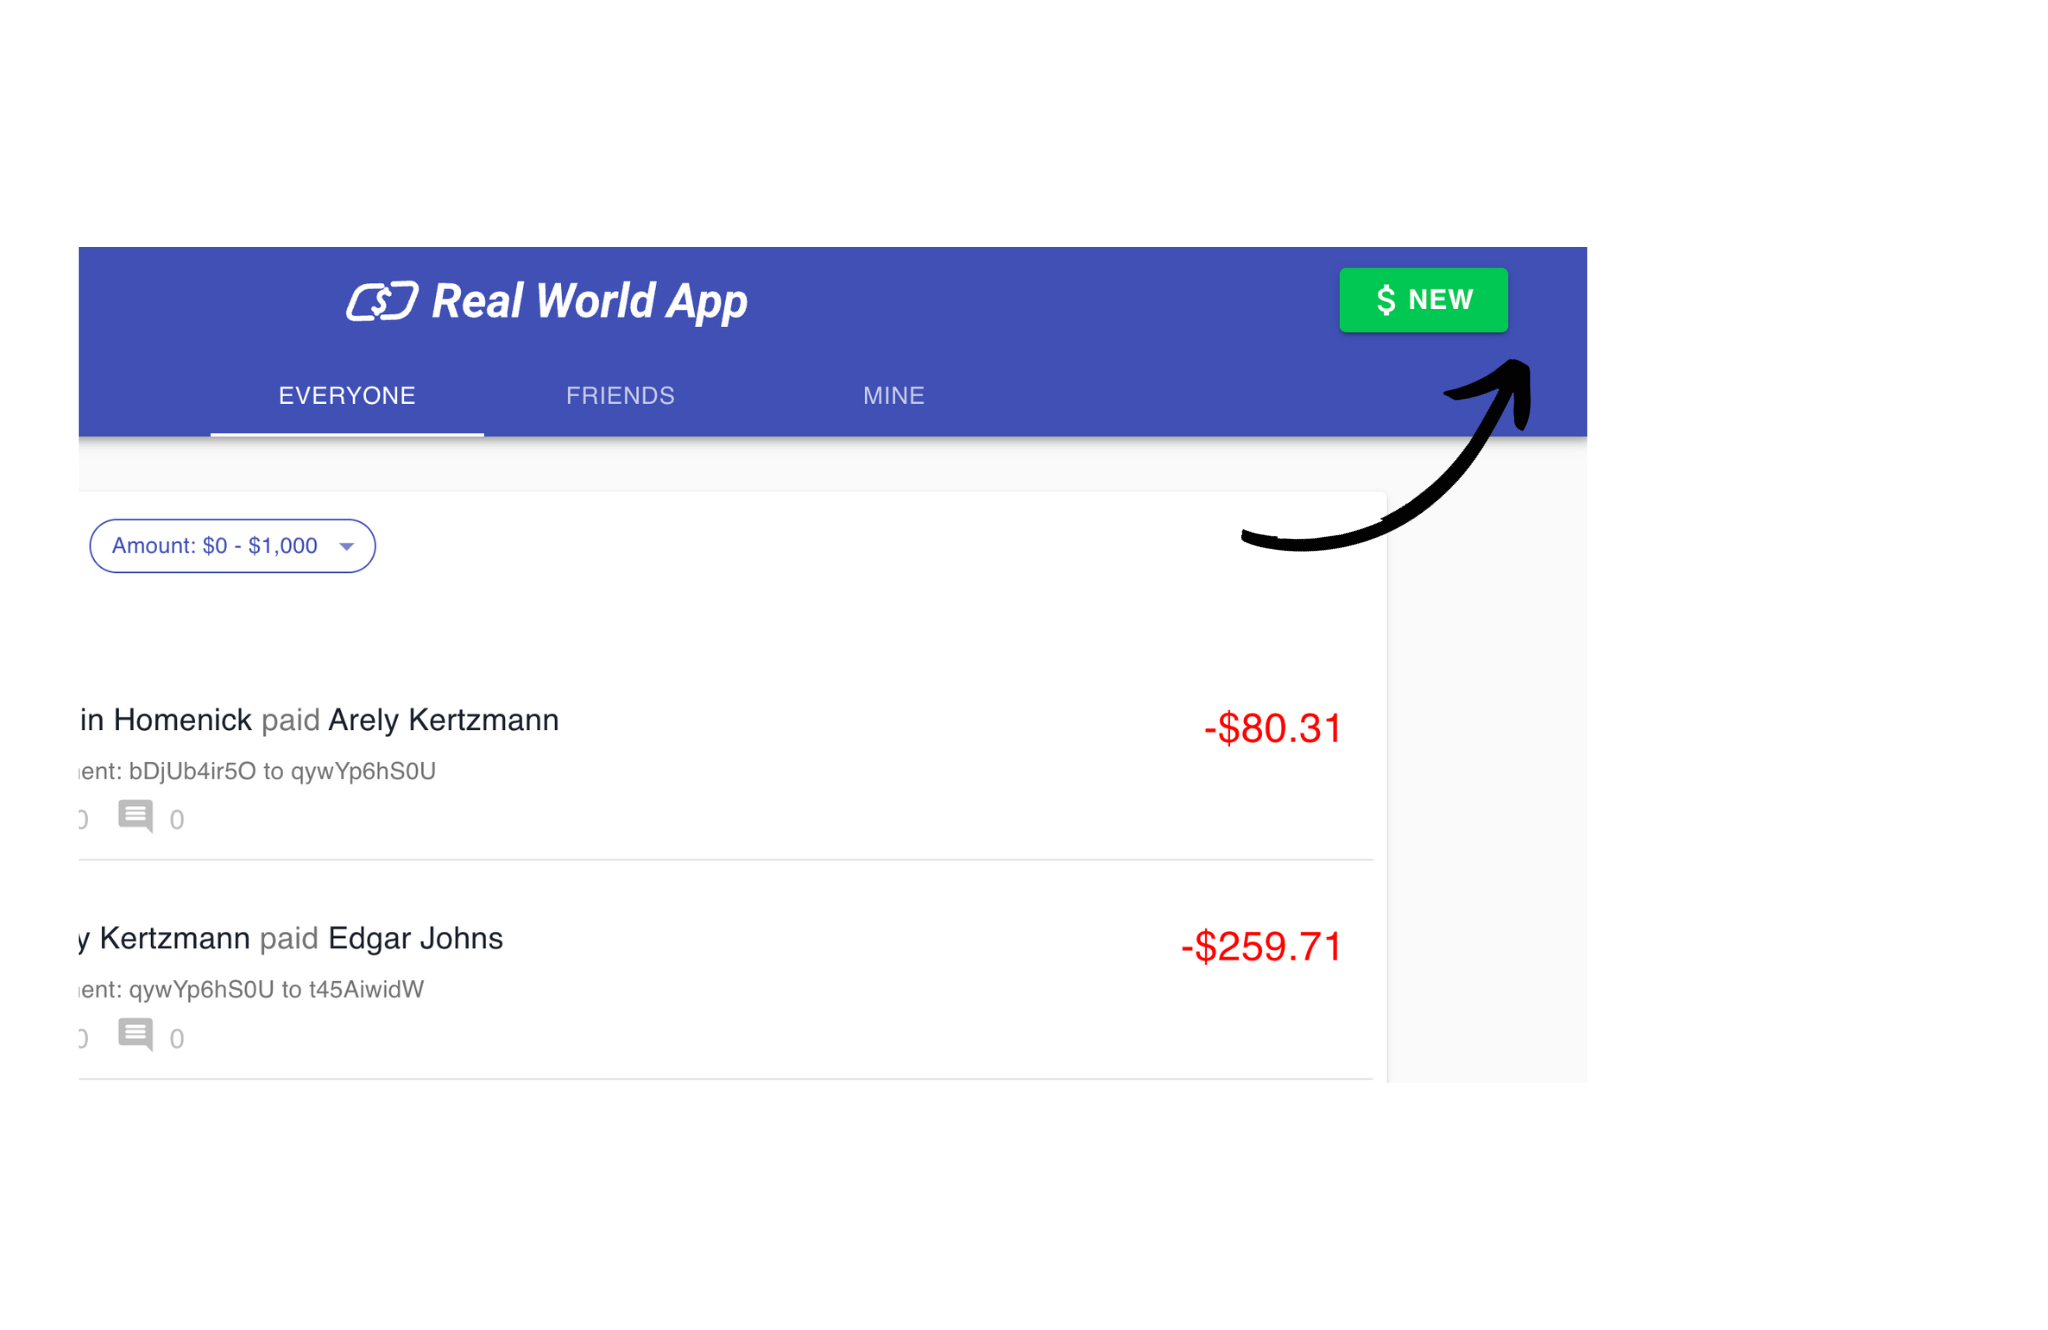
If you disable the flag, this results in a view of a navigation menu without the notification badge for all users.
You’ve successfully implemented a feature flag using best practices to control the release of a notifications feature in a real world app!
Conclusion
In this tutorial, we installed Unleash locally, created a new feature flag, installed Unleash into a React app, and toggled the visibility of a notifications feature within a real world open source project!
Explore some more advanced uses cases in our React Examples