How to Implement Feature Flags in Python
Python is a popular programming language used for a variety of software applications and services. It is supported widely in the developer community and is known for being intuitive, readable, and friendly to new and experienced developers.
Leveraging feature flags allows developers to toggle new features on and off, whether you’re experimenting in your local environment, testing for QA purposes, or rolling out changes to users in production. Feature flags play a critical role in optimizing the entire software development lifecycle. With Unleash, an open-source feature flag service, you can use our tooling to implement feature flags into your application and release new features faster, strategically, and safely. But how can you do this in Python?
Flask Surveys Container App is an example Python application using Flask and SQLAlchemy to create and store surveys. Flask is a Python framework that provides out-of-the-box configurations to get the shell of a full-stack web application up and running, which includes Jinja for building web page HTML templates served using Python routing. This sample app runs in a Docker container.
In this tutorial, you will learn how to set up and use Python feature flags with Unleash. We will use the Flask Surveys Container app to implement the feature flag solution, which will roll out a feature that allows users to delete surveys they create.
At the end of this tutorial, you will be able to turn on the feature flag and activate a route that will remove surveys from the database.
Watch the video tutorial and follow along with the code from this documentation.
Prerequisites
In this tutorial, you will need the following:
- A web browser like Chrome or Firefox
- Git
- Docker
- (Optional) a code editor like Visual Studio Code
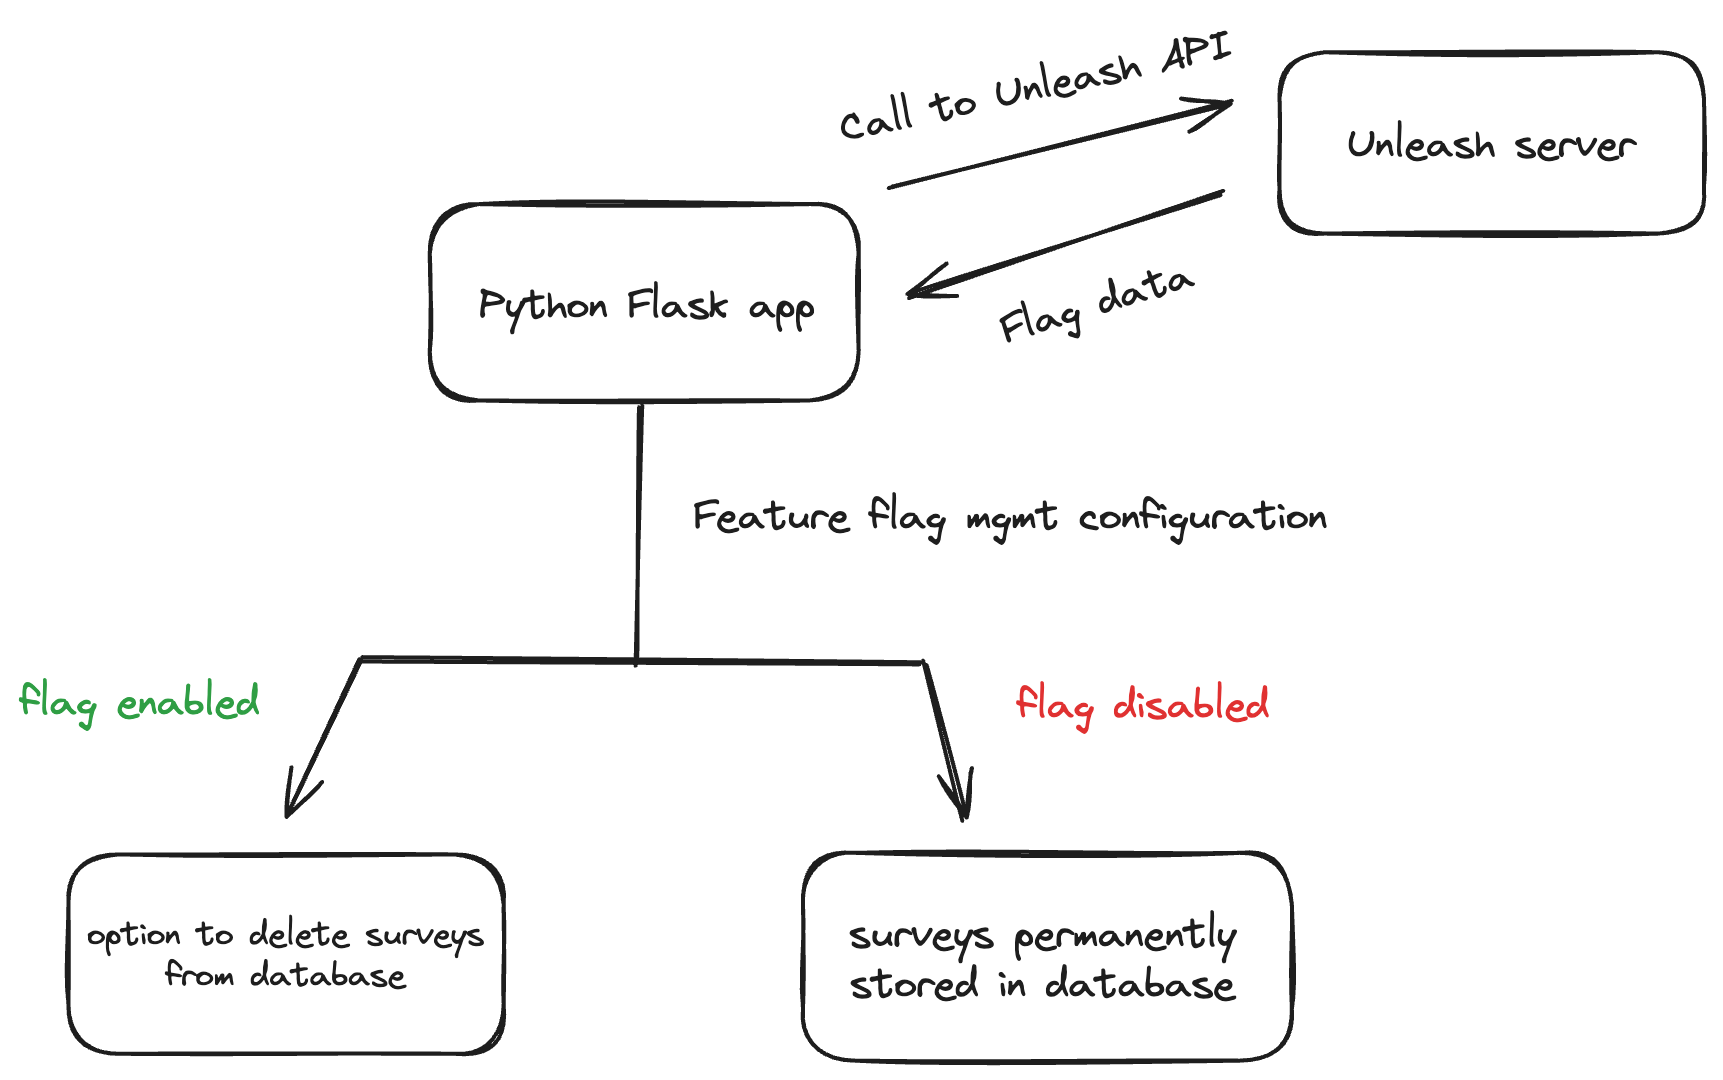
This architecture diagram breaks down how the Python app works with Unleash to control feature flags. We connect the Unleash service to your Python app using the Python SDK.
The Unleash Server is a Feature Flag Control Service, which is a service that manages your feature flags and is used to retrieve flag data from (and send data to, especially when not using a UI). The Unleash server has a UI for creating and managing projects and feature flags. There are also API commands available to perform the same actions straight from your CLI or server-side app.
1. Unleash best practice for backend apps
Since Python is a backend language, there are special security considerations to plan around when implementing feature flags.
Most importantly, you must:
- Limit feature flag payloads for scalability, security, and efficiency
- Improve architectural resiliency with graceful degradation
As your application scales, performance and resiliency become more critical and costly if not addressed. A feature flagging system should not be the reason your app slows down or fails. That’s why we recommend you account for this by reducing the size of your feature flag payloads. For example, instead of making one large call to retrieve flag statuses for all users as part of your configuration, group your users by specific attributes as part of your targeting rules that would be most relevant for your application.
Additionally, our SDKs cache your feature flag configuration to help reduce network round trips and dependency on external services. You can rely on the cache if your Feature Flag Control Service is not available, which will mitigate potential failure in your application.
For a complete list of architectural guidelines, see our best practices for building and scaling feature flag systems.
2. Install a local feature flag provider
There are many feature flag tools available. In this section, you will install Unleash, run the instance locally, log in, and create a feature flag, but you can use other tools in place of Unleash if you prefer. You’ll need to edit the code accordingly, but the basic steps will probably be the same.
Use Git to clone the Unleash repository and Docker to build and run it. Open a terminal window and run the following commands:
You will now have Unleash installed onto your machine and running in the background. You can access this instance in your web browser at http://localhost:4242
Log in to the platform using these credentials:
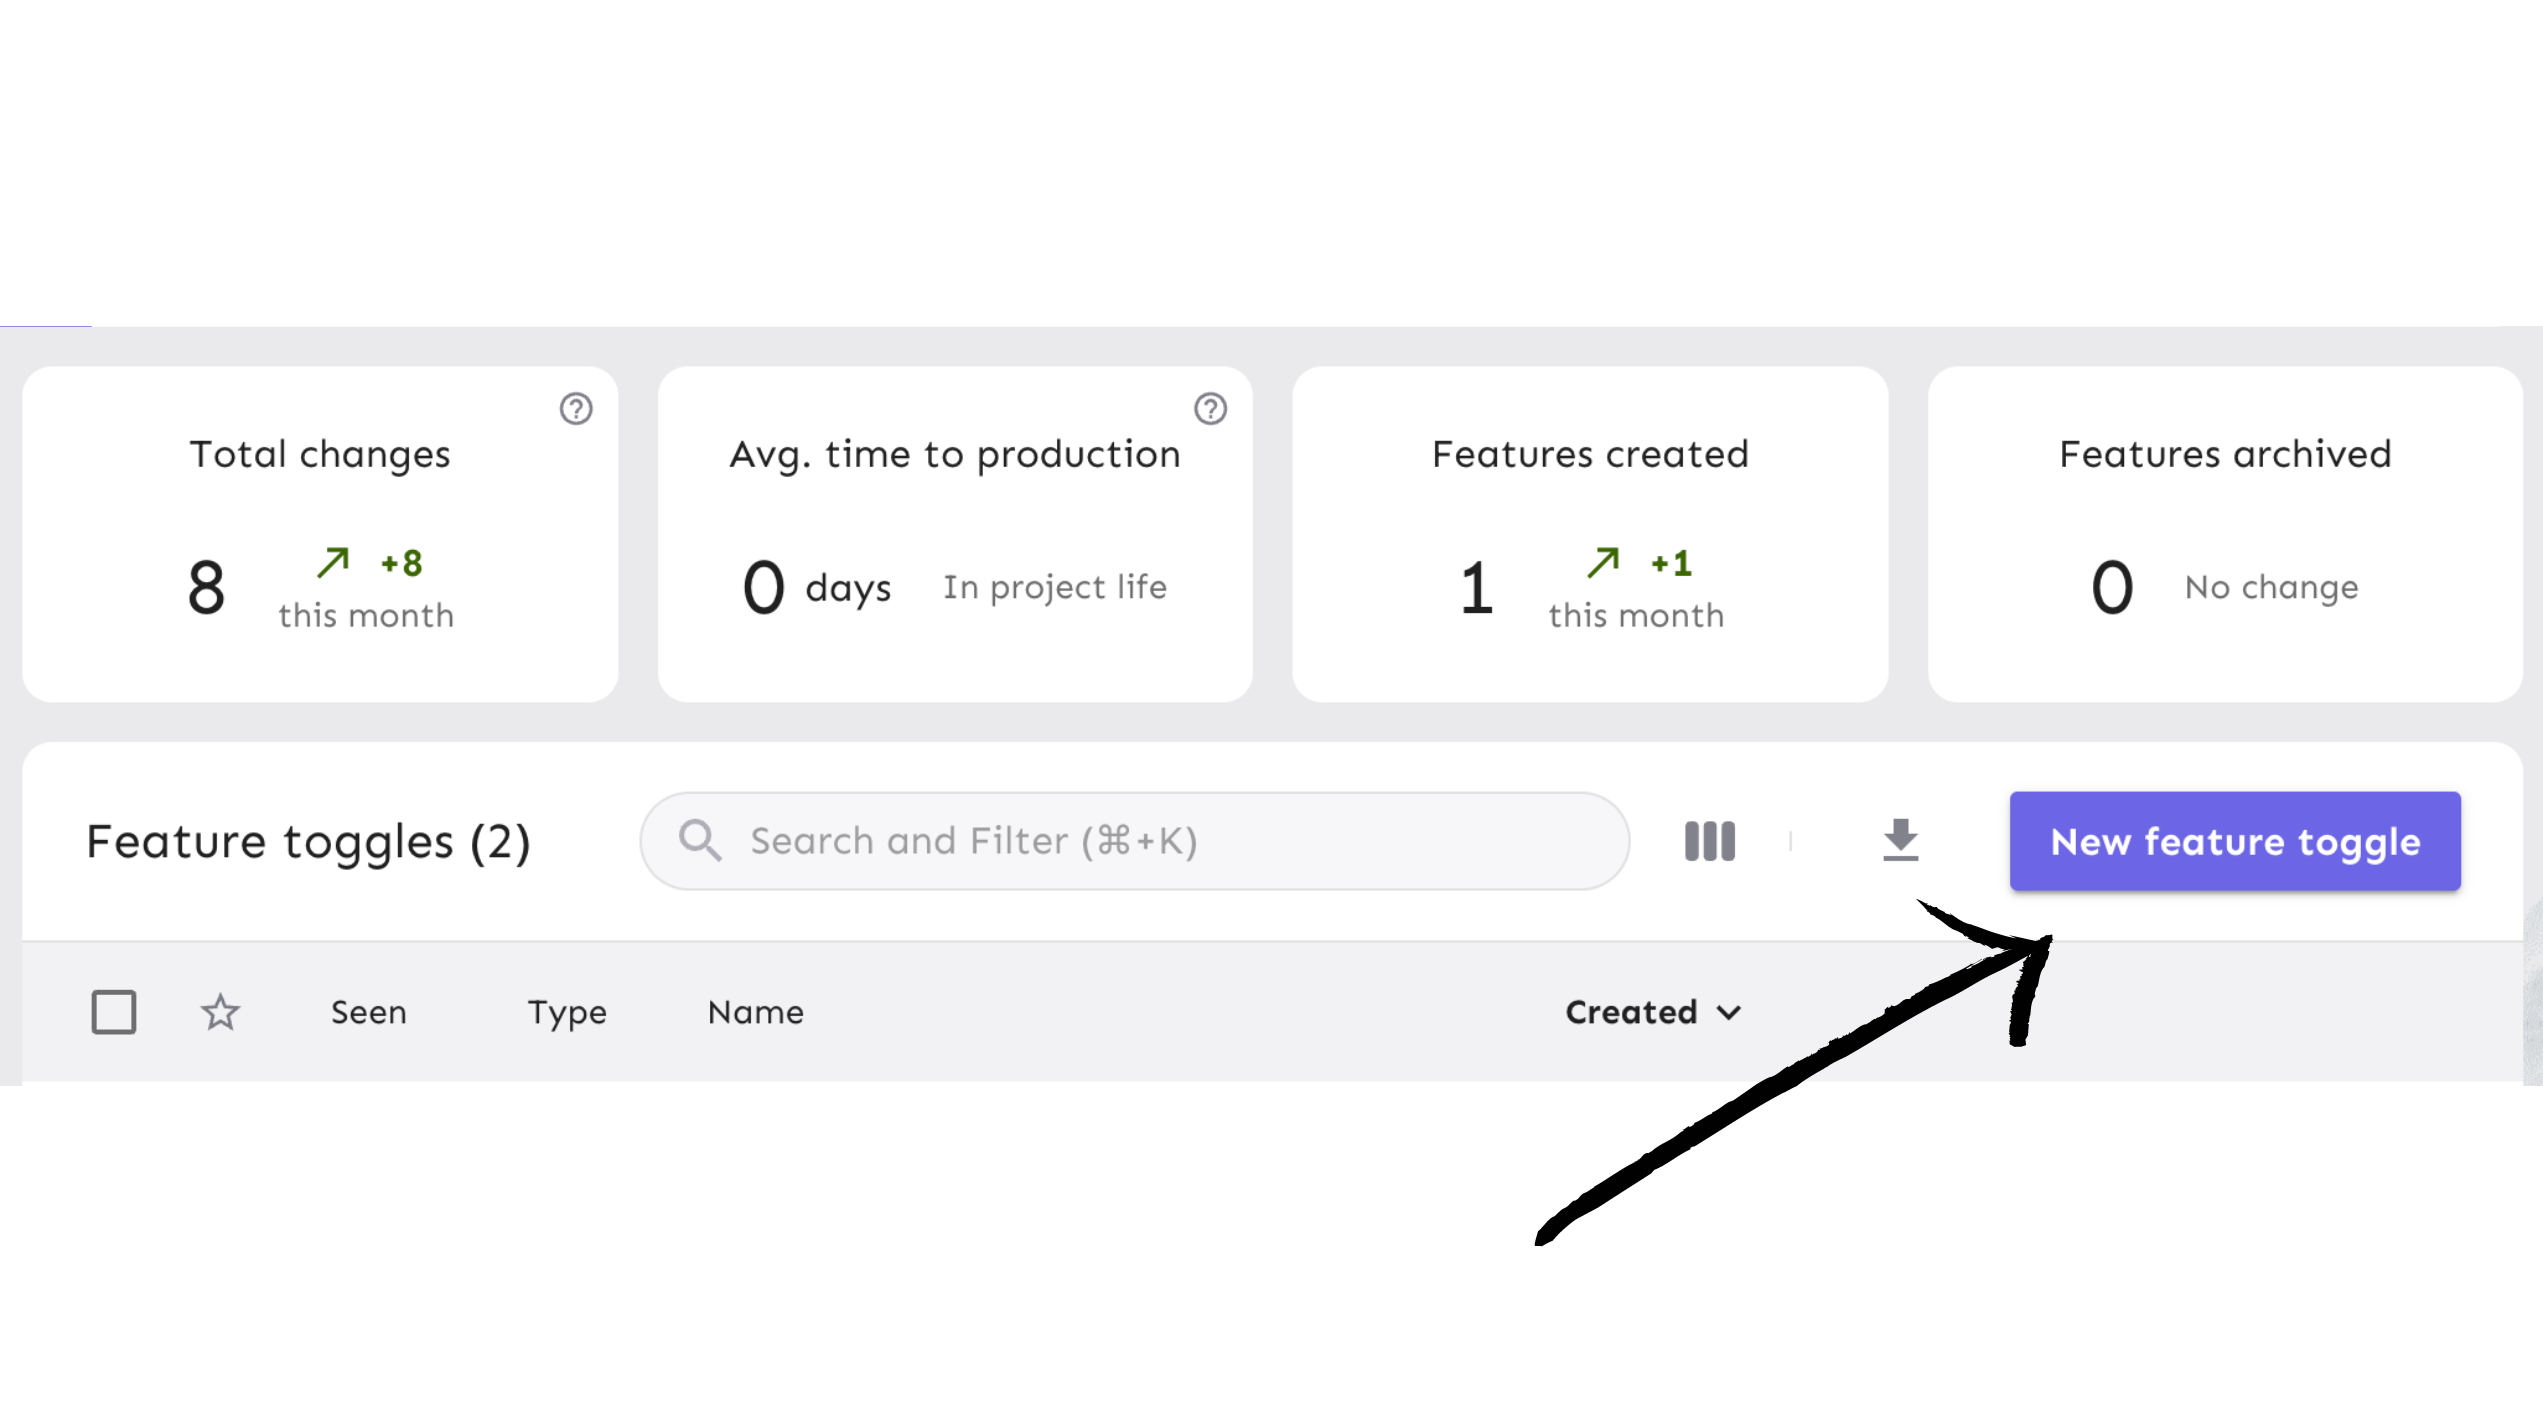
Click the ‘New feature flag’ button to create a new feature flag. Once you have created a flag, you will see it here.
3. Create and configure the feature flag
Next, you will create a feature flag and turn it on for your Python app.
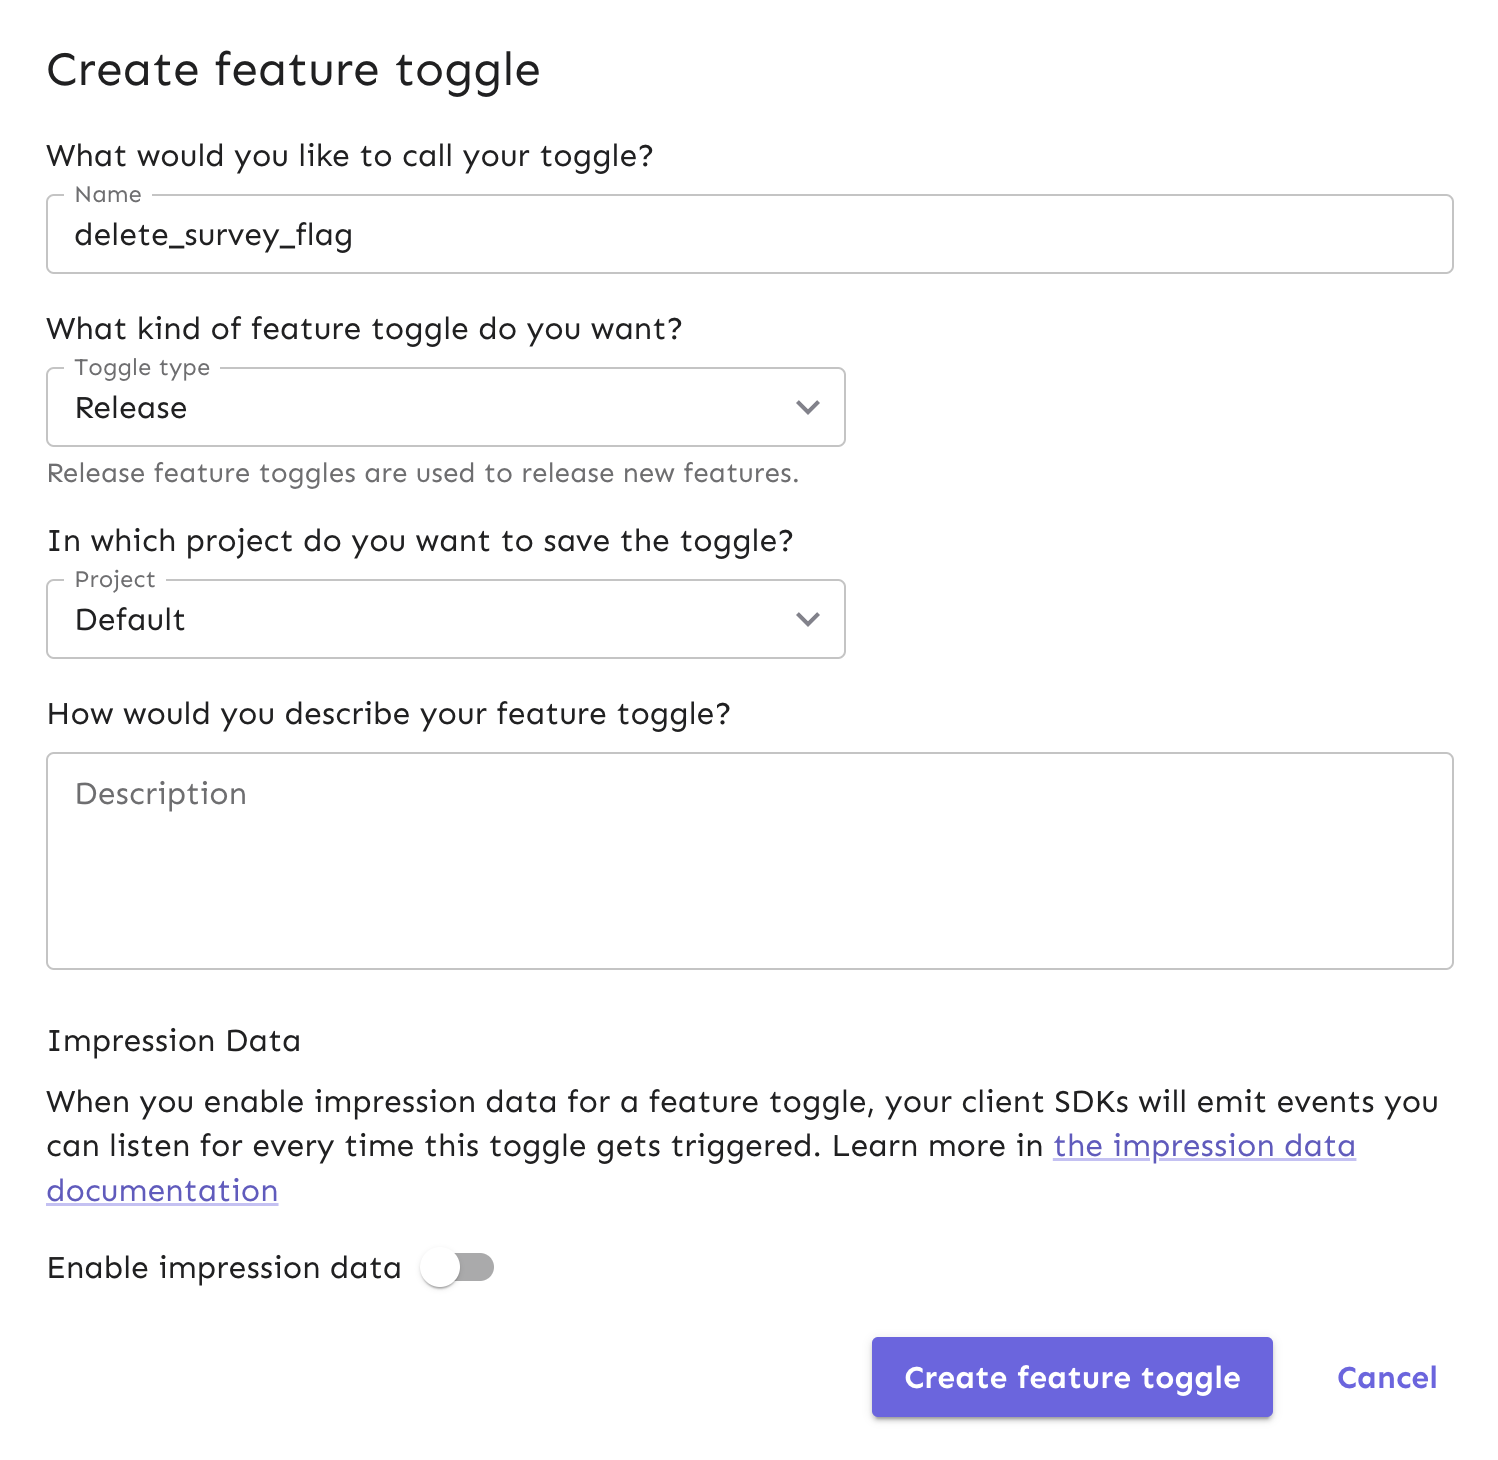
In the Create Flag view, give your feature flag a unique name and click ‘Create feature flag’.
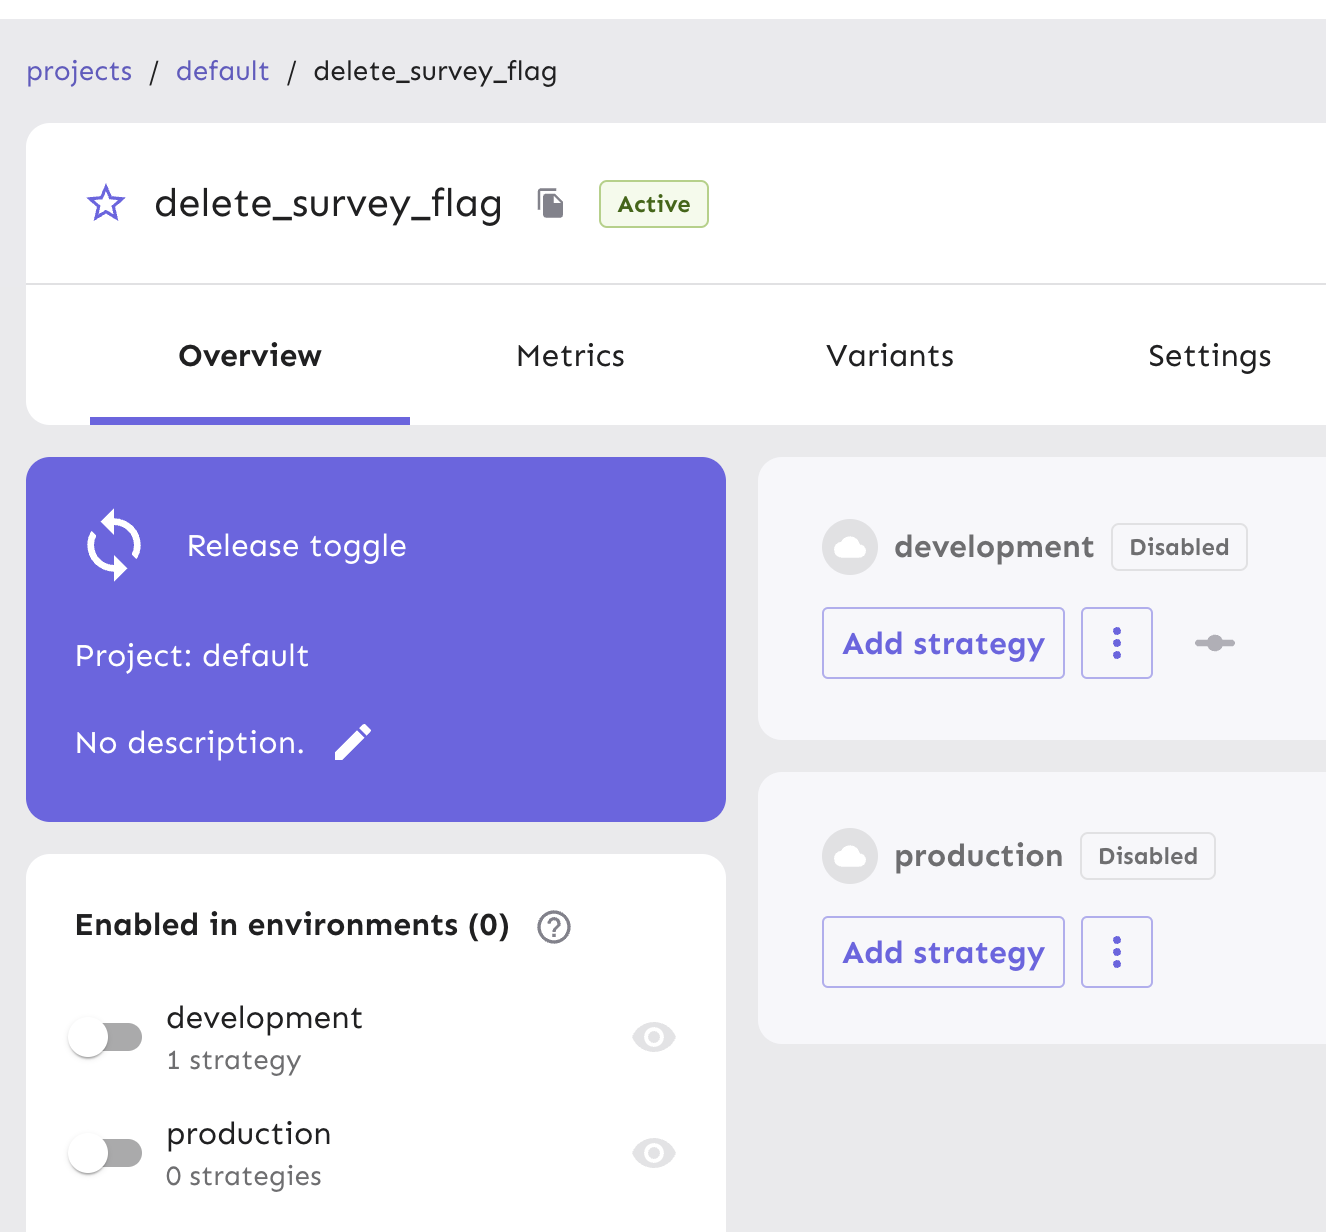
For the purpose of this tutorial, name the feature flag delete_survey_flag. Use the default values in the rest of the feature flag form.
Your new feature flag has been created and is ready to be used. Enable the flag for your development environment, which makes it accessible for use in the Python app we will clone into your local environment.
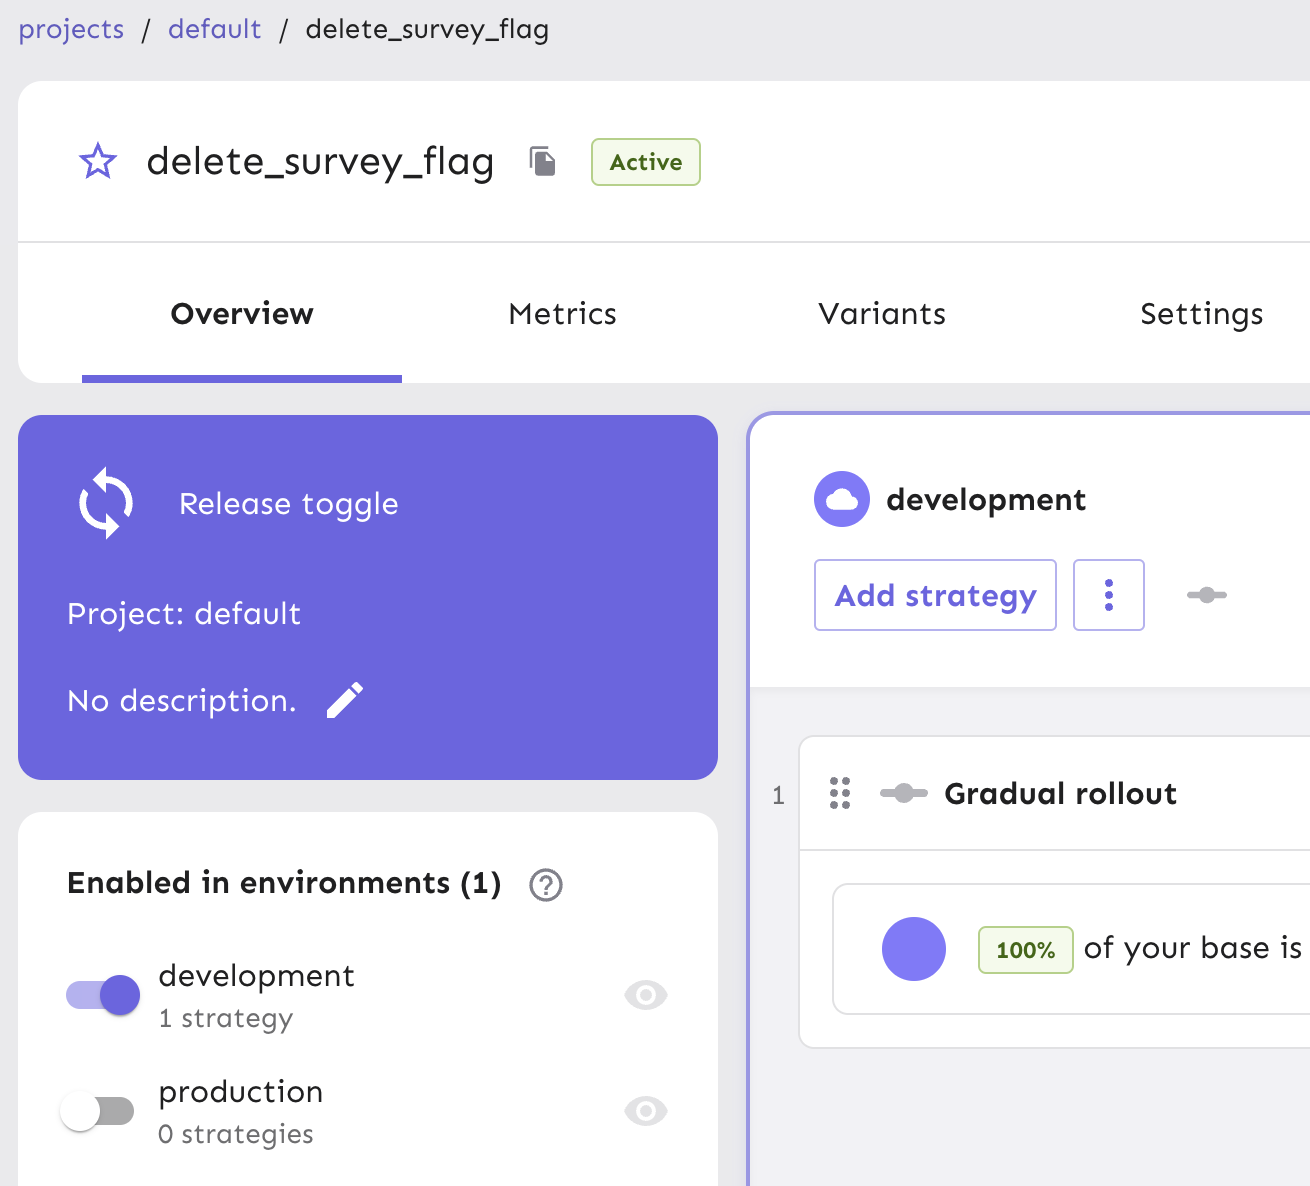
Next, generate an API token to authenticate calls made to Unleash servers from your project. This API token will eventually be pulled into a configuration object within your Python application to toggle features.
Note We require an API token as part of your flag configuration to ensure that only applications with the correct authentication can access your feature flags in Unleash. API tokens are created by users with API management access and thus controls how they can be distributed to applications that need it, and by whom.
From your project view on the platform, go to “Project Settings” and then “API Access”.
Select the ‘New API token’ button.
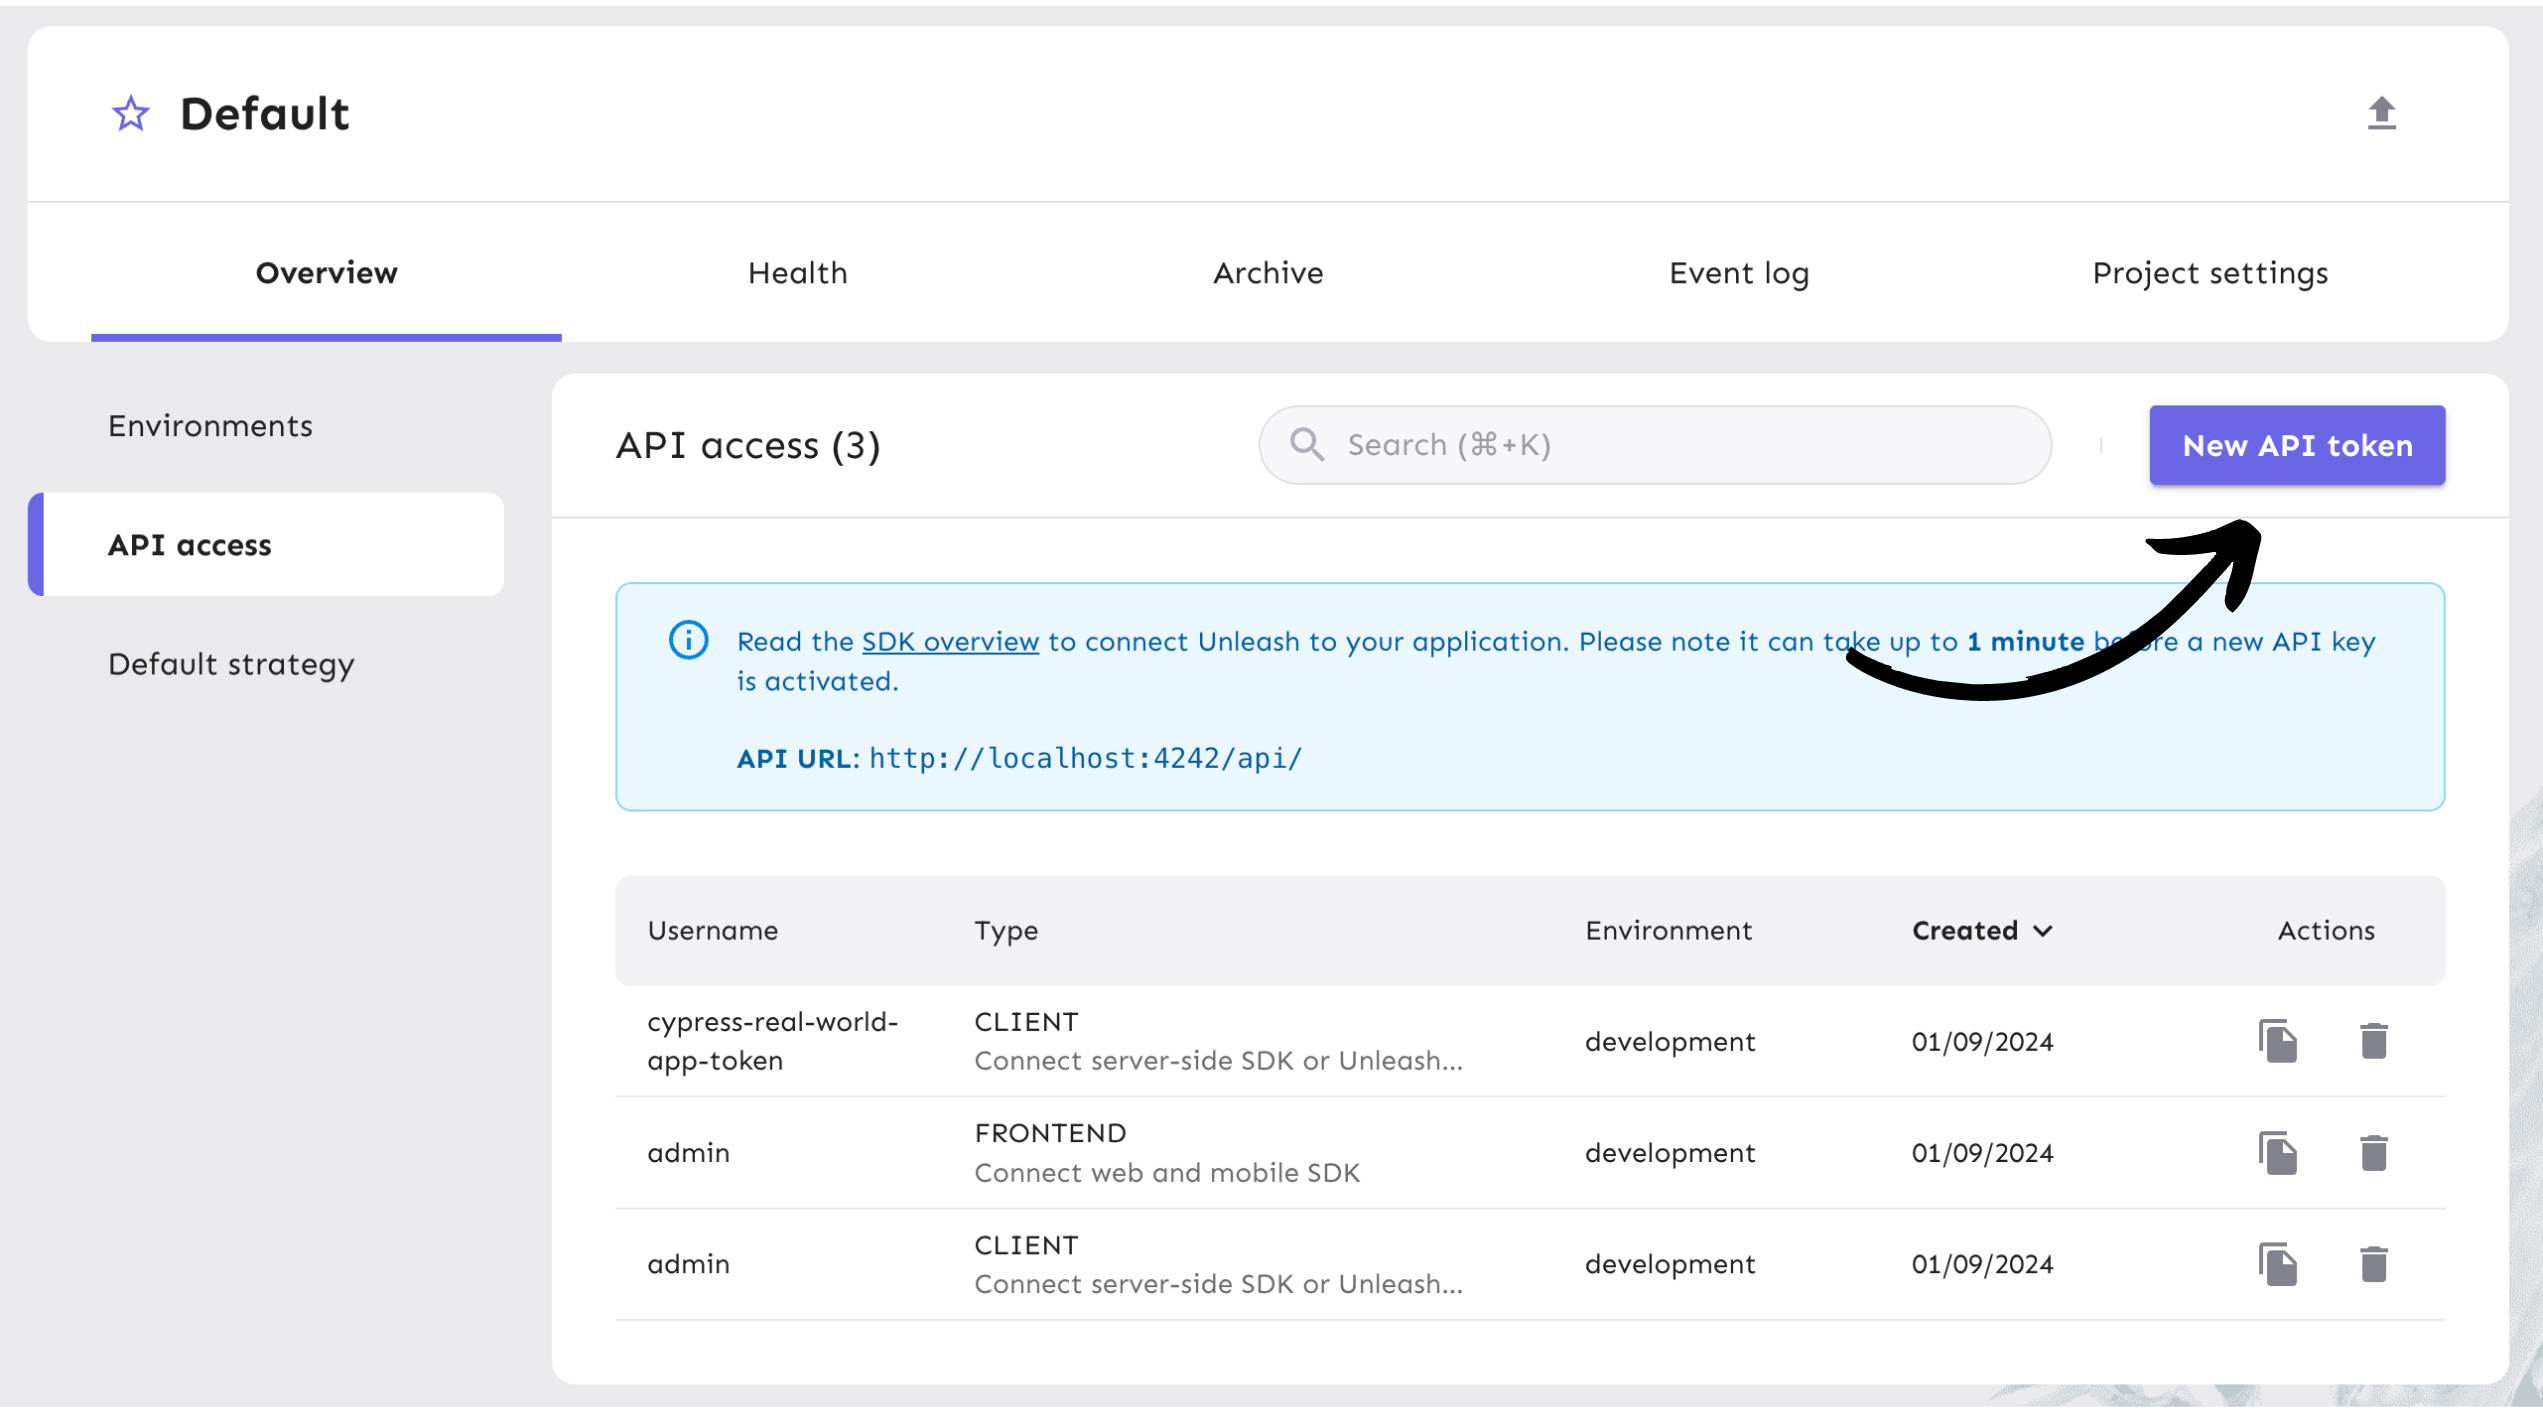
Name the API token and select the “Backend SDK” token type, since we’ll be doing our flag evaluation on the server using the Python SDK. You can read more about Unleash API tokens in our documentation.
The token should have access to the “development” environment, as shown in the platform screenshot below.
The API token you generated can be managed in the API Access view in your project settings. It will become handy in Step 4.
4. Add Unleash to a Python app
In this section, you will clone an open-source Python application called Flask Surveys Container app, which we are using to model a service that provides routing, serves HTML pages, and performs actions against a database. This app uses Flask, SQLAlchemy, and a PostgreSQL database.
Use this command to clone the repository via your Terminal:
Next, navigate into your repository directory and create a .env file.
Copy this code snippet into your .env file:
Next, install the Python SDK. Open your repository in a code editor and navigate to requirements.txt inside the src folder. Reference the Python SDK for installation.
In src/backend/__init__.py, import UnleashClient:
In the same file, call the Unleash client for initialization when the app runs with this code snippet:
The URL will point your app to your Unleash instance through your Docker container for server-side communication.
Replace the <API token> string in the Authorization header with the API token we created on our Unleash instance. This will allow the app to communicate with the Unleash API to use the feature flag we created.
You can check our API token and client keys documentation for more specifics and see additional use cases in our Backend SDK with Python documentation.
Next, go to your terminal and build the app using this command:
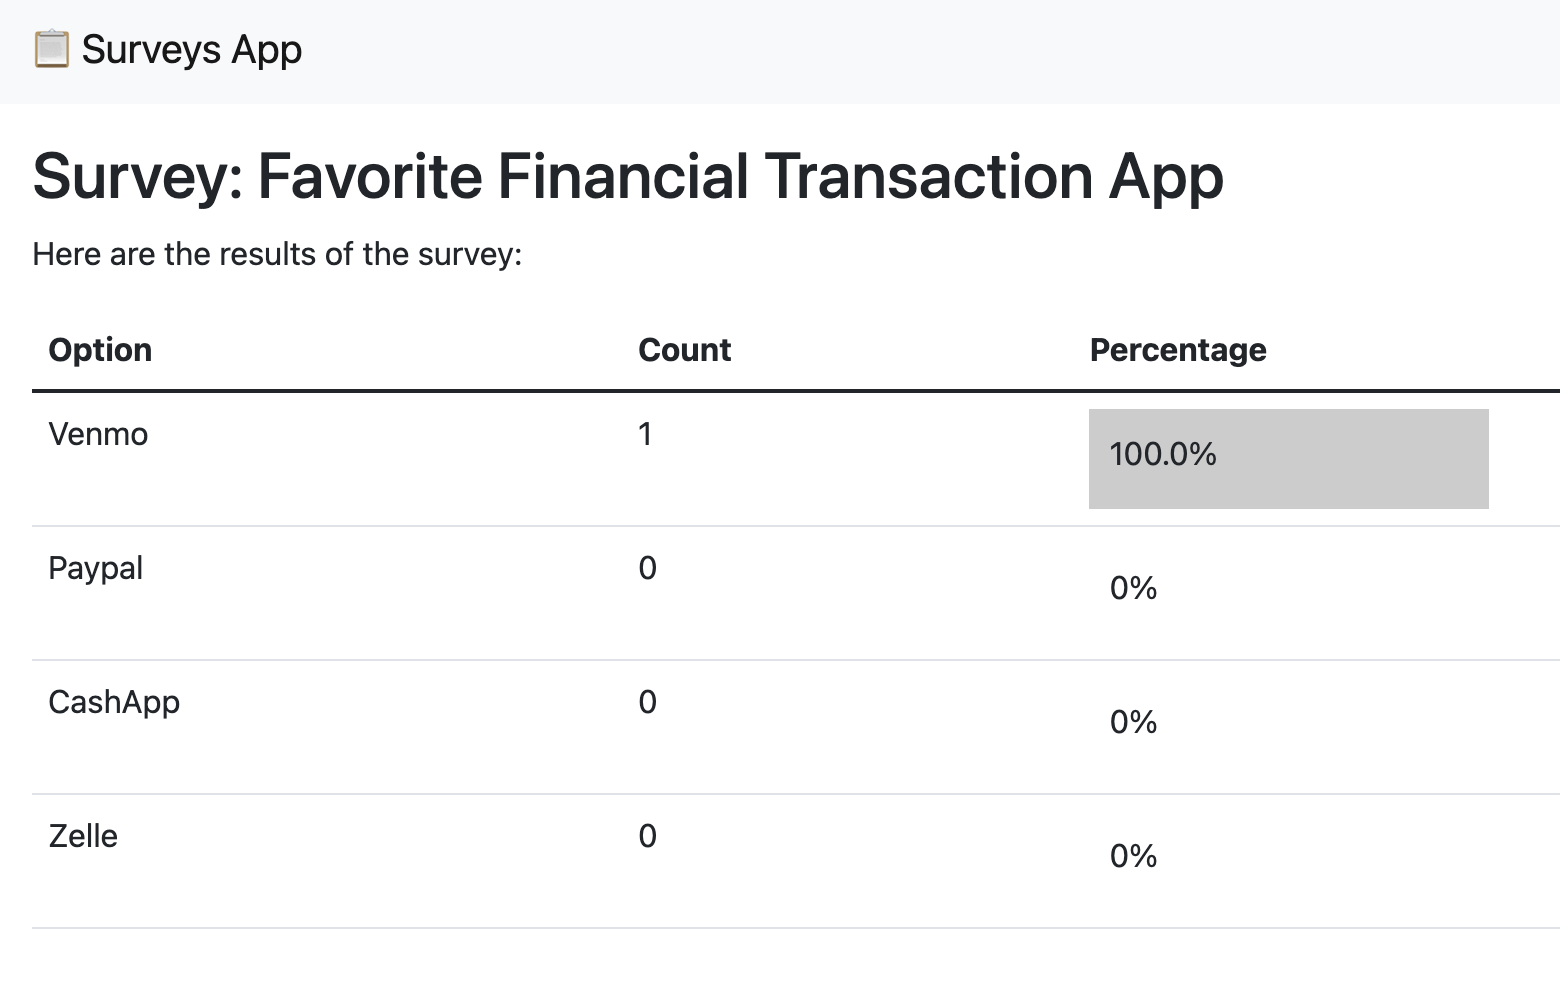
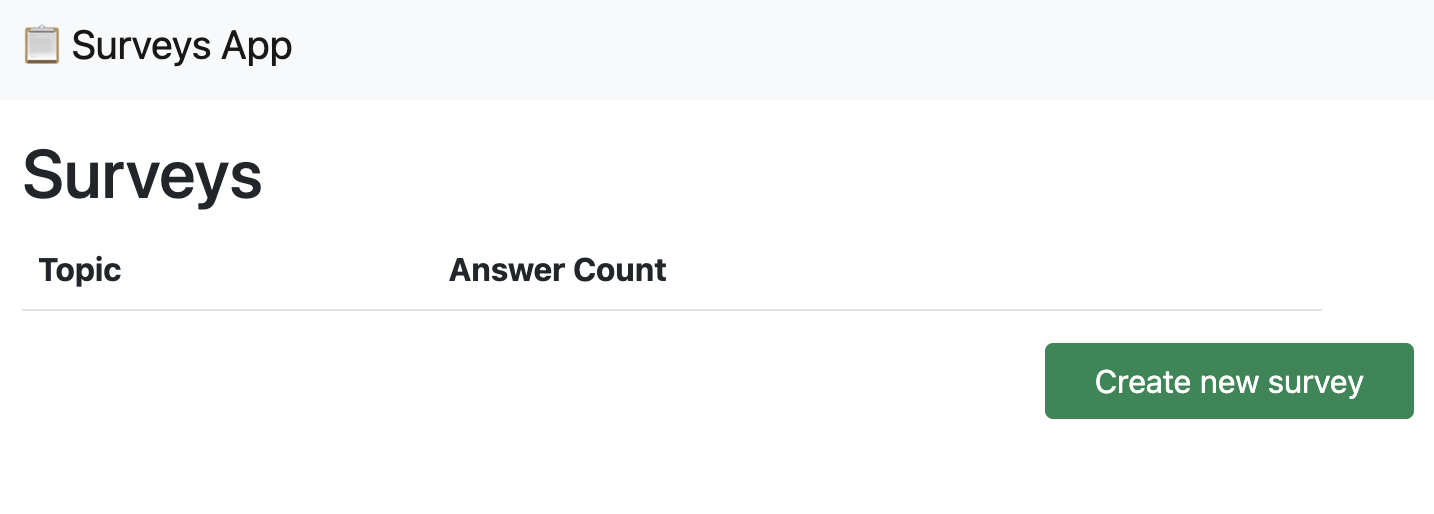
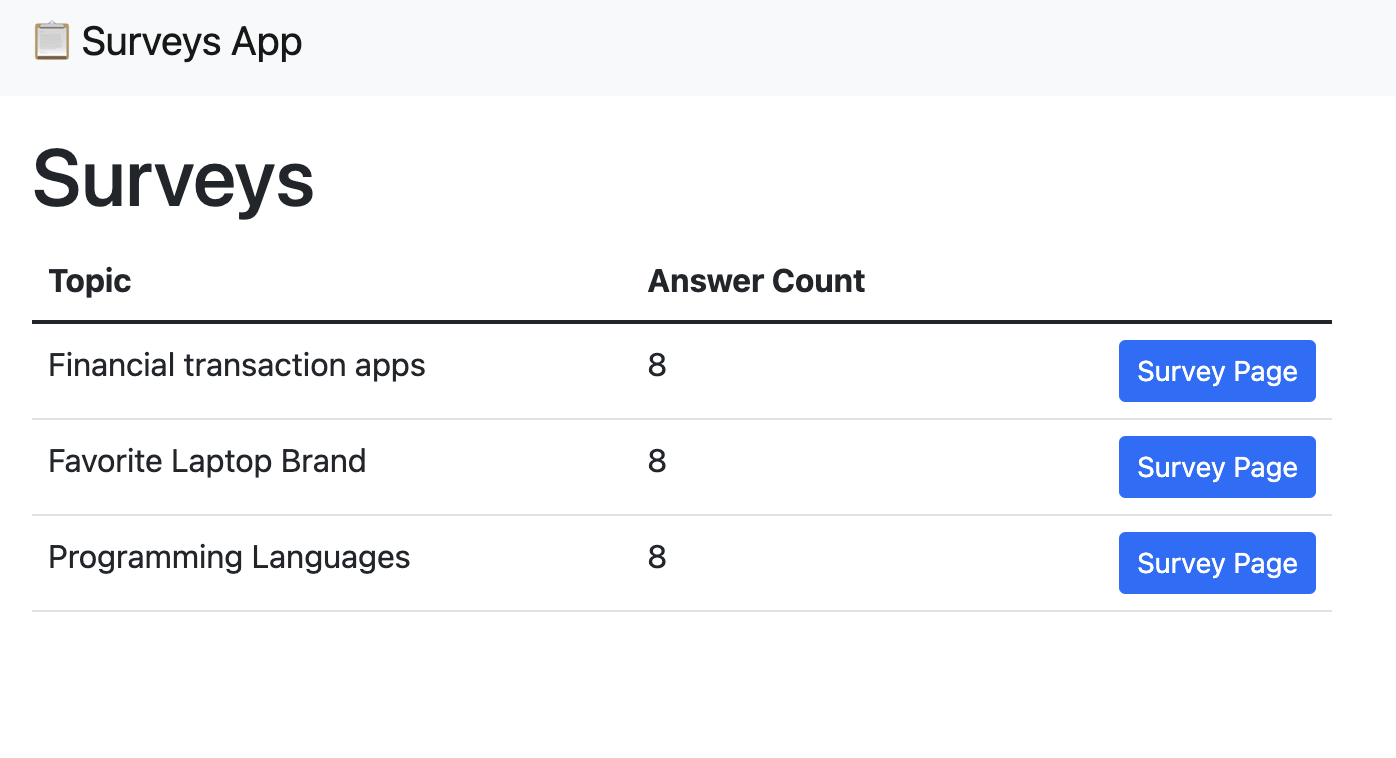
Navigate to localhost://50505 and the Surveys list should eventually display:
Create 1 or more new surveys so they’re populated in your database!
5. Use a feature flag to release a delete method
In a real-world use case for your feature flag, you can roll out new features to users by configuring the flag’s strategy.
In this case, our app currently supports creating a survey, but once we create one, we can’t get rid of it. We want to roll out a ‘delete’ button in our list of surveys to all users so we have the option to remove them from our database.
This will require us to:
- Create a new route in our app
- Create a method that deletes a survey based on survey ID
- Create a delete button
- Map the delete button to the delete method
First, we need an error handler to return a simple 404 page to stop a user from being able to delete a survey when the flag is off. We will use this function in our delete method.
In your routes.py file, import a module from Flask that will support error handling: abort.
Line 1 will now look like this:
Add client to the backend import statement on line 4. The full import line will now look like this:
We’ve imported the initialized Unleash client into routes.py. Now we can use that data to pass into the surveys_list_page method. This will allow us to check the status of the enabled flag to conditionally render the delete button on the surveys page.
Add client as a parameter in the template that we return in the surveys_list_page method.
The modified return statement in this method will now look like this:
In the same file, we will create a new route and a delete method with this code snippet:
The server now has a route that uses a survey ID to locate the survey in the database and delete it.
To make calls to this route, we will create a delete button for each survey on the page.
In src/backend/templates/surveys_list.html, add the following code to your survey table underneath the “Survey Page” button:
This code wraps a delete button in a conditional statement that checks whether or not the feature flag is enabled. This button has a link that points to the delete_survey method we created, which will pull in the survey using an ID to search the database, find the matching survey, and delete it from the session.
Your surveys page will now look something like this:
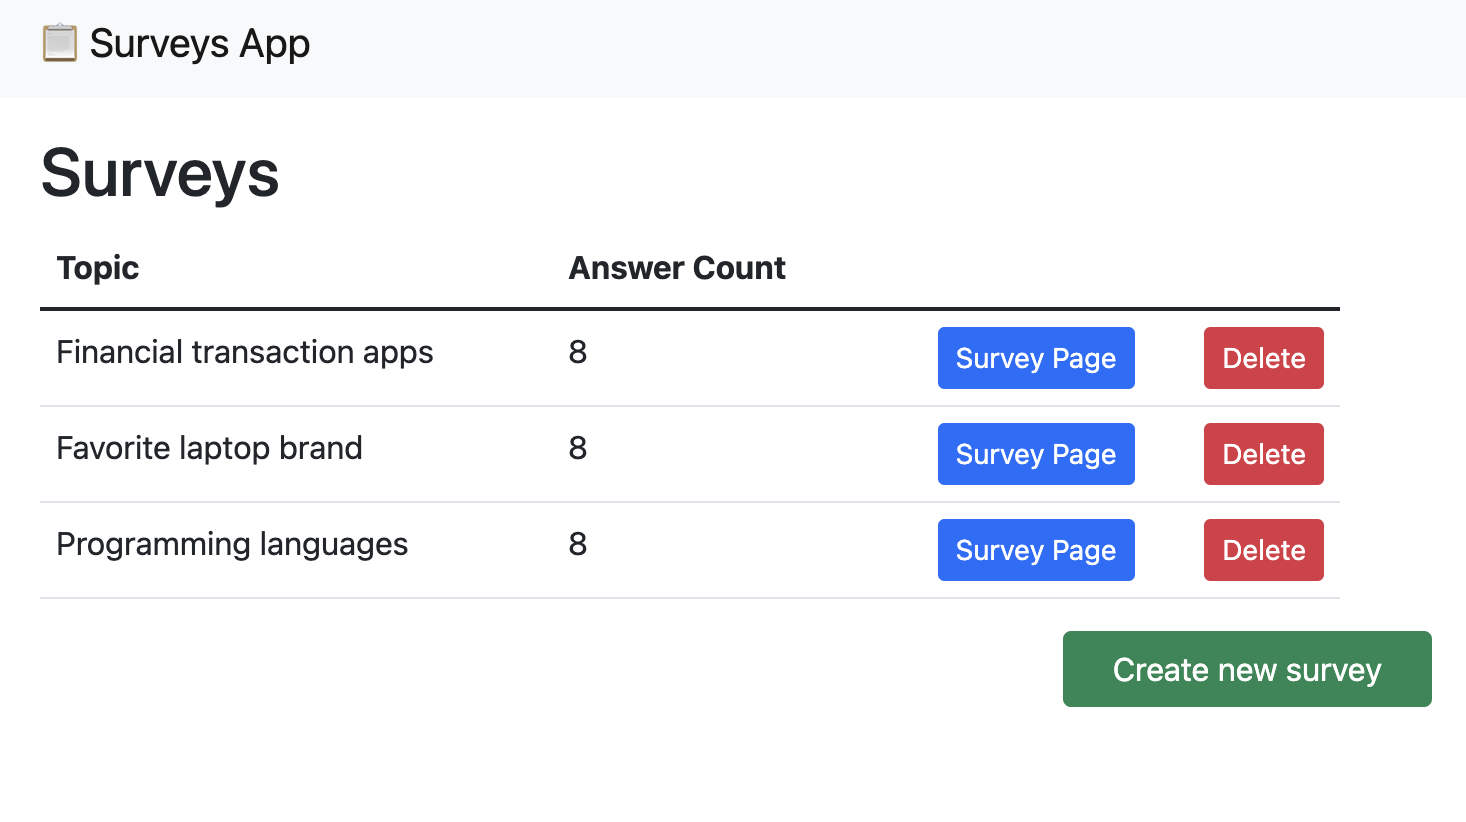
Test the new functionality by deleting one of your surveys. The page should refresh without the survey you deleted.
6. Verify the toggle experience
Now that we’ve added in new functionality and connected it to our feature flag, we can verify that if you disable the flag in your development environment, your Python app will no longer serve an HTML page with the option to delete surveys you’ve created.
In your local Unleash instance, turn off the feature flag by disabling it in the development environment.
Next, return to your Survey app and refresh the browser. With the flag disabled, the delete button will no longer be visible.
Note: An update on the Python SDK may take around 30 seconds.
Conclusion
In this tutorial, we ran Unleash locally, created a new feature flag, installed the Python SDK into a Python Flask app, and toggled new functionality that altered a database with a containerized project!
Continue to our Python Examples docs for more advanced applications of feature flags in Python using our Flask Surveys Containers App!