Set up user group syncing with Keycloack
Plan: Enterprise | Version: 4.18+
In this guide, we will setup OIDC Single Sign-On (SSO) in Keycloak and configure Unleash to automatically sync user group membership from Keycloak.
Prerequisites
The steps in this guide assume you have admin access to a running Unleash instance and to a running Keycloak instance.
Keycloak Configuration
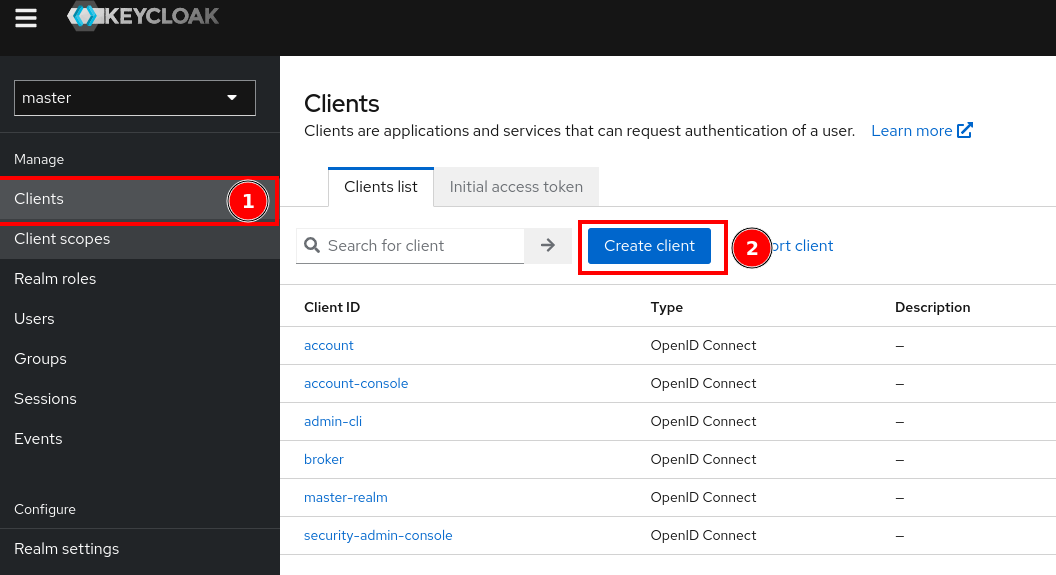
Step 1: Navigate to Create Client
Open the Keycloak admin dashboard, navigate to clients and select "Create Client".
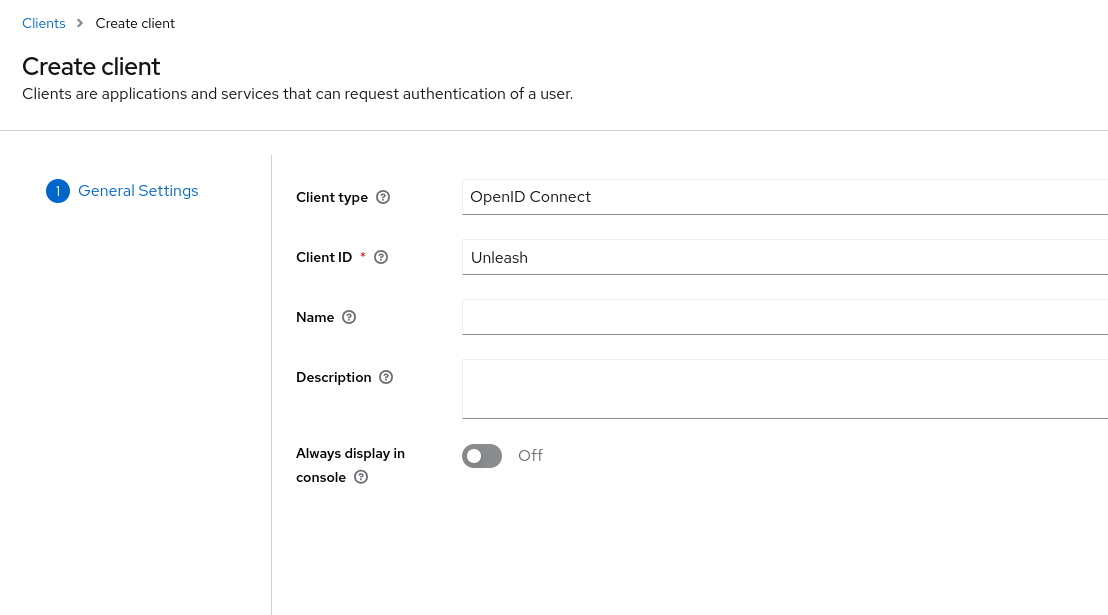
Step 2: Create an Unleash Client
Select "OpenID Connect" as the client type and give your client a name, then save your configuration.
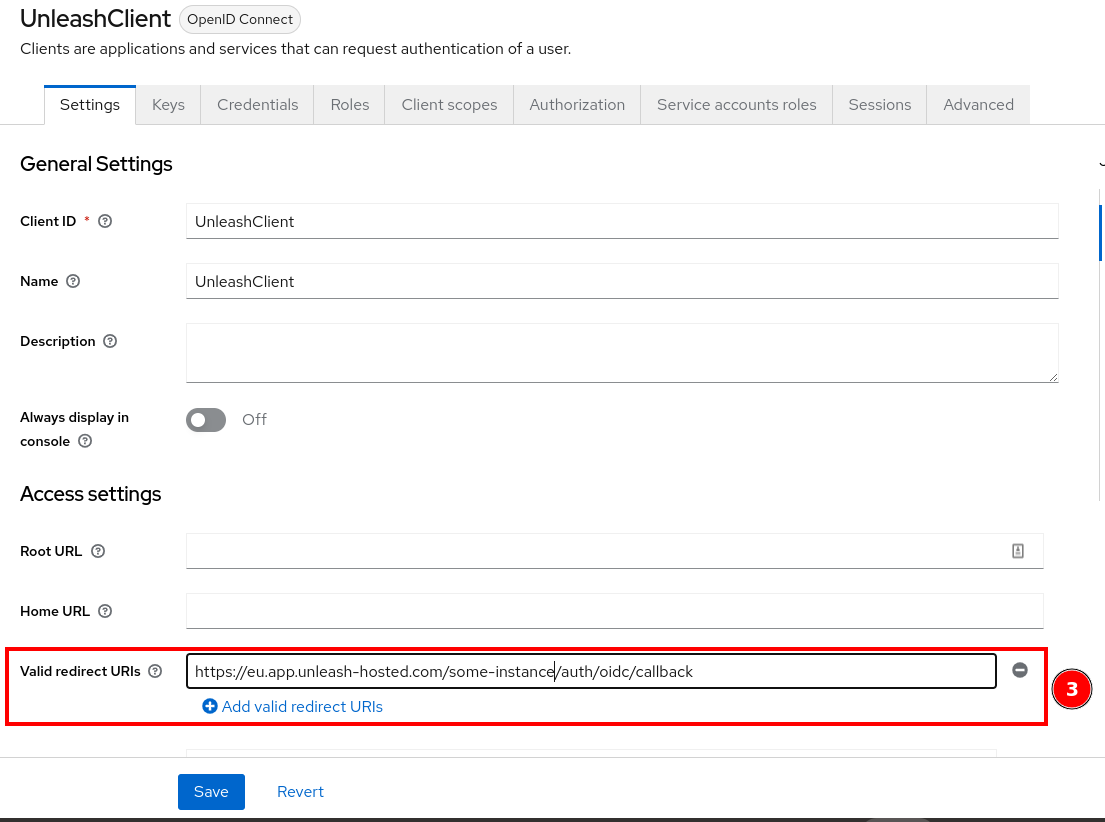
Step 3: Set a redirect URI
Set the redirect URI to:
<base-url>/auth/oidc/callback
For a hosted Unleash instance this becomes:
https://<region>.app.unleash-hosted.com/<instance-name>/auth/oidc/callback
Save your configuration.
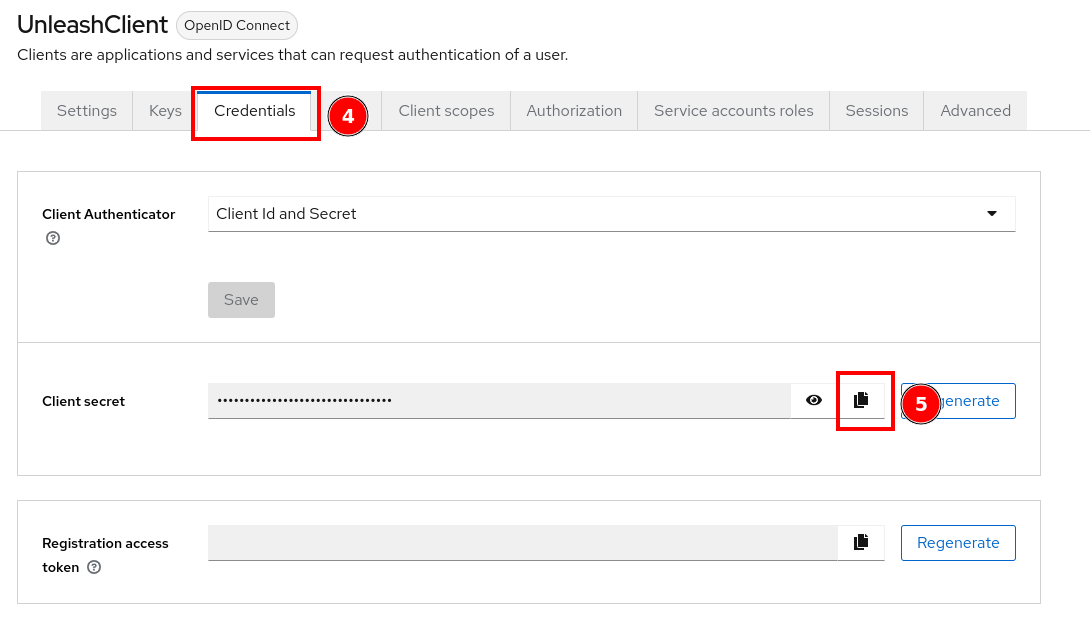
Step 4: Copy your client secret
Navigate to "Credentials" and copy your client secret. You'll need to add this to the Unleash configuration later, so put it somewhere you'll be able to find it.
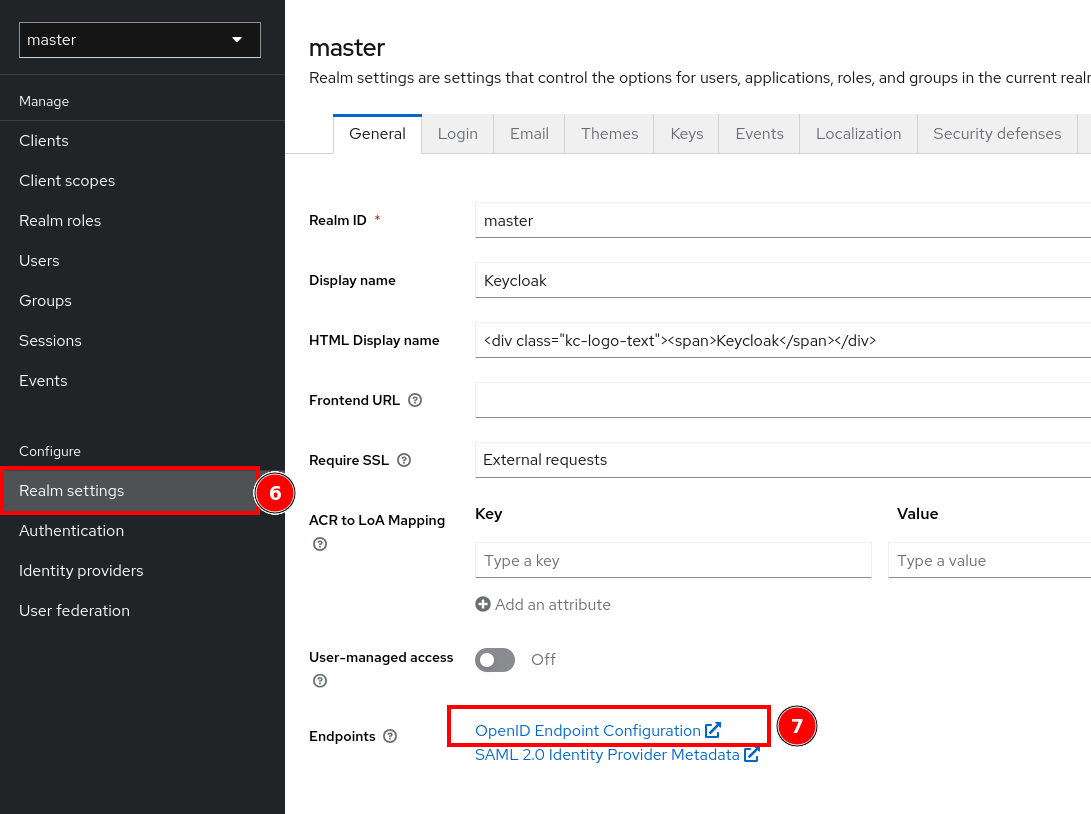
Step 5: Copy your OpenID endpoint configuration
Navigate to your realm settings and copy the link to OpenID endpoint configuration. You'll need to add this to the Unleash configuration later.
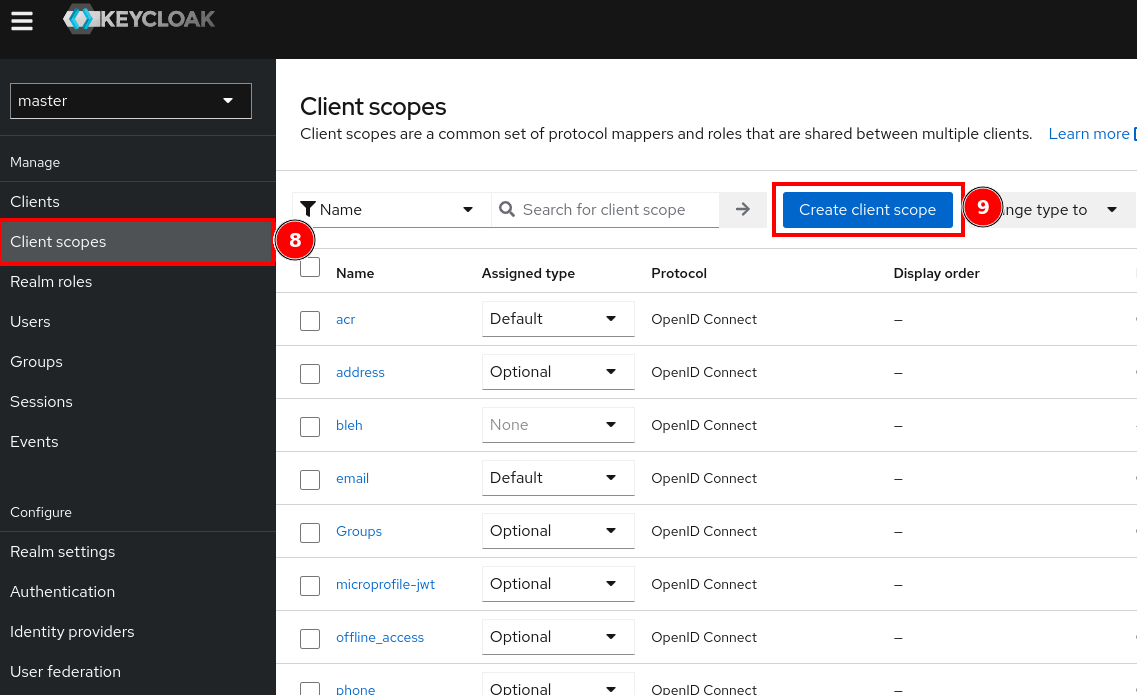
Step 6: Create a new Client Scope and Map Groups
Navigate to the "Client Scopes" page and select "Create Client Scope".
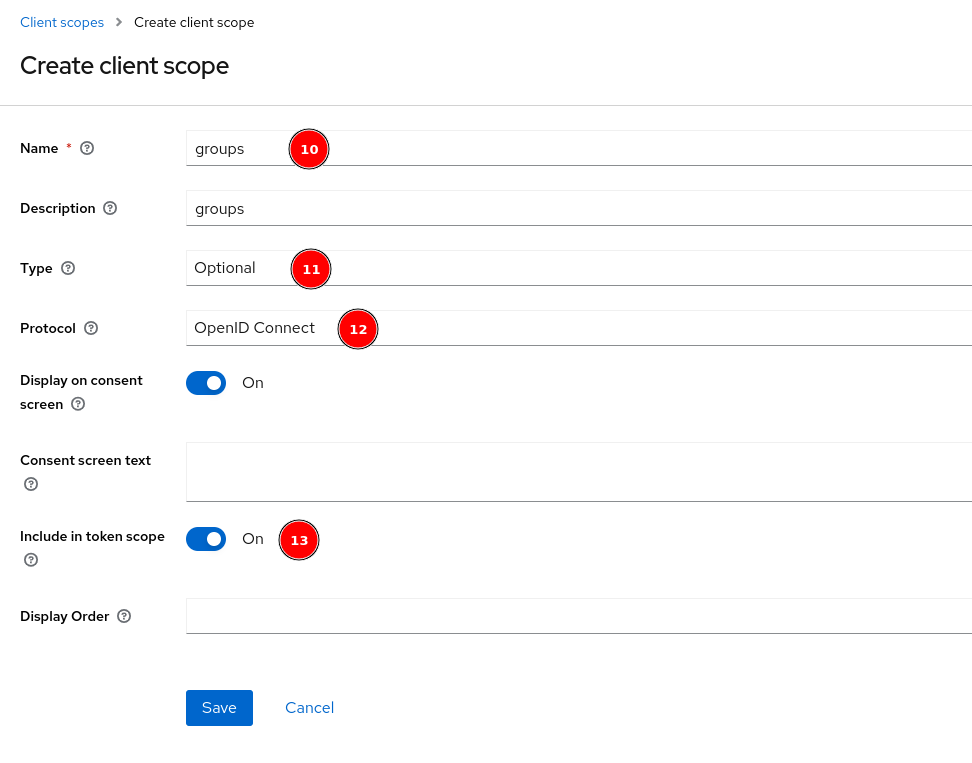
Give your new scope a name. Set the type to "Optional". Make sure the protocol is set to "OpenID Connect" and the "Include in Token Response" option is enabled. Save your new scope.
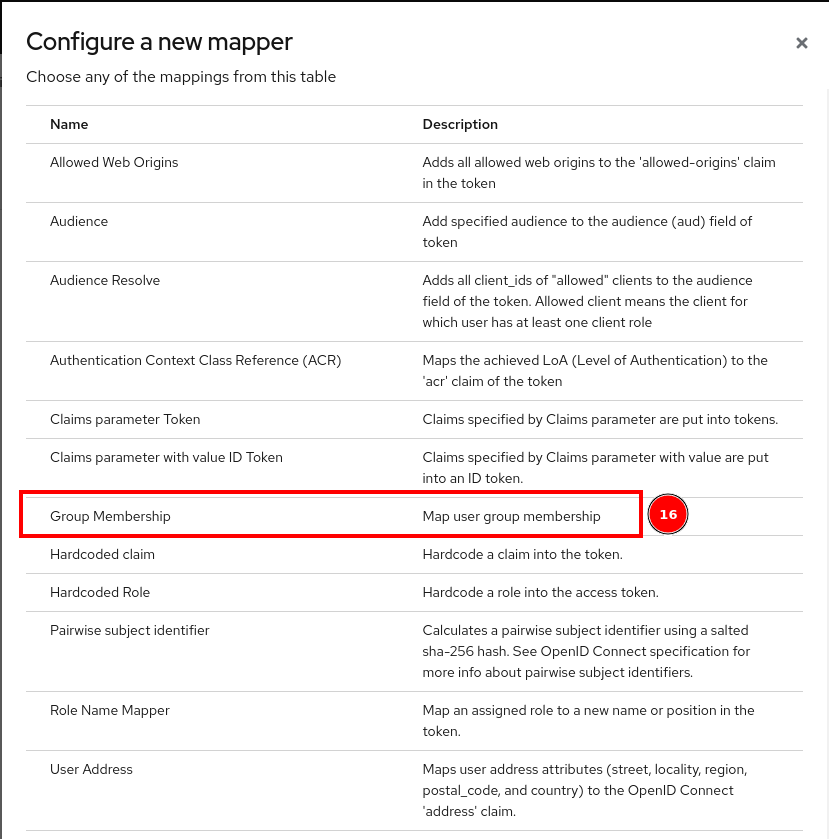
Navigate to the Mappers tab and select "Configure new Mapper".
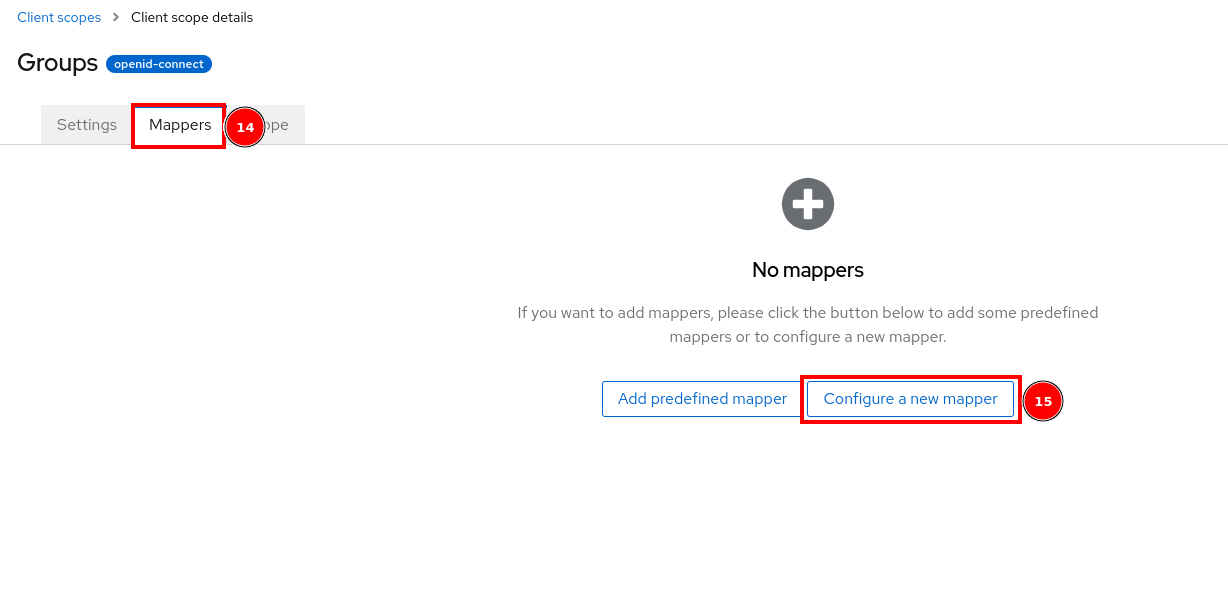
Select the Group Membership mapper.
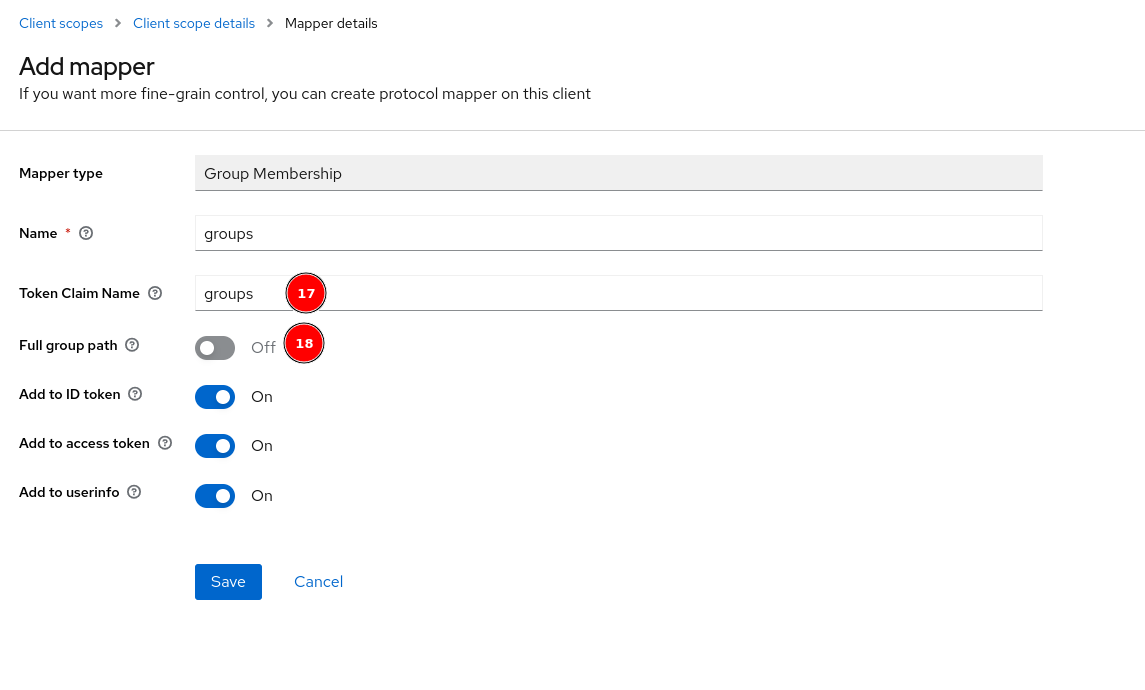
Give your mapper a claim name, this must match the "Group Field JSON Path" in Unleash, and turn off the "Full group path" option.
Unleash Configuration
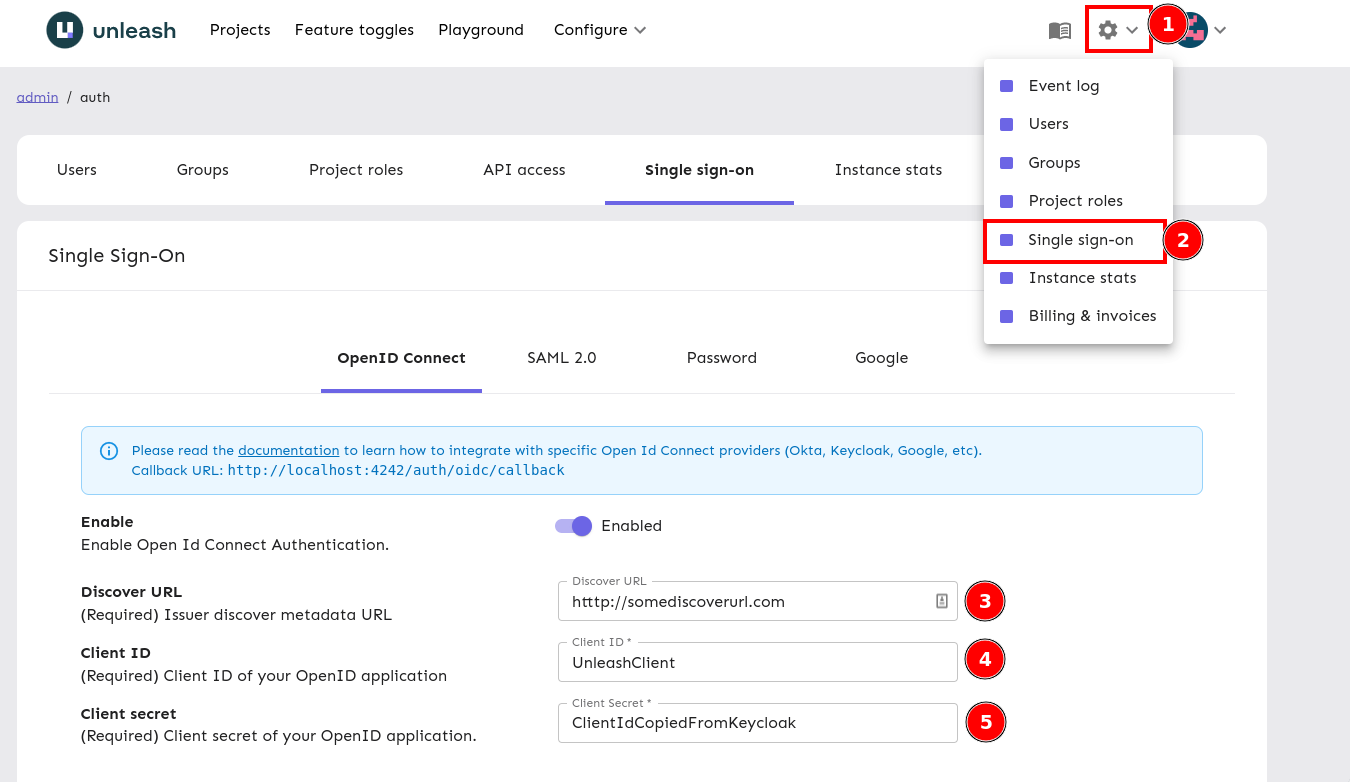
Step 1: Navigate to the Unleash SSO Configuration
Log in to Unleash as an admin user and navigate to the SSO configuration. Input your Client Secret (copied in step 3 of the Keycloak configuration), your Discover URL (copied in step 4 of the Keycloak configuration), and the Client ID (from step 2 of the Keycloak configuration).
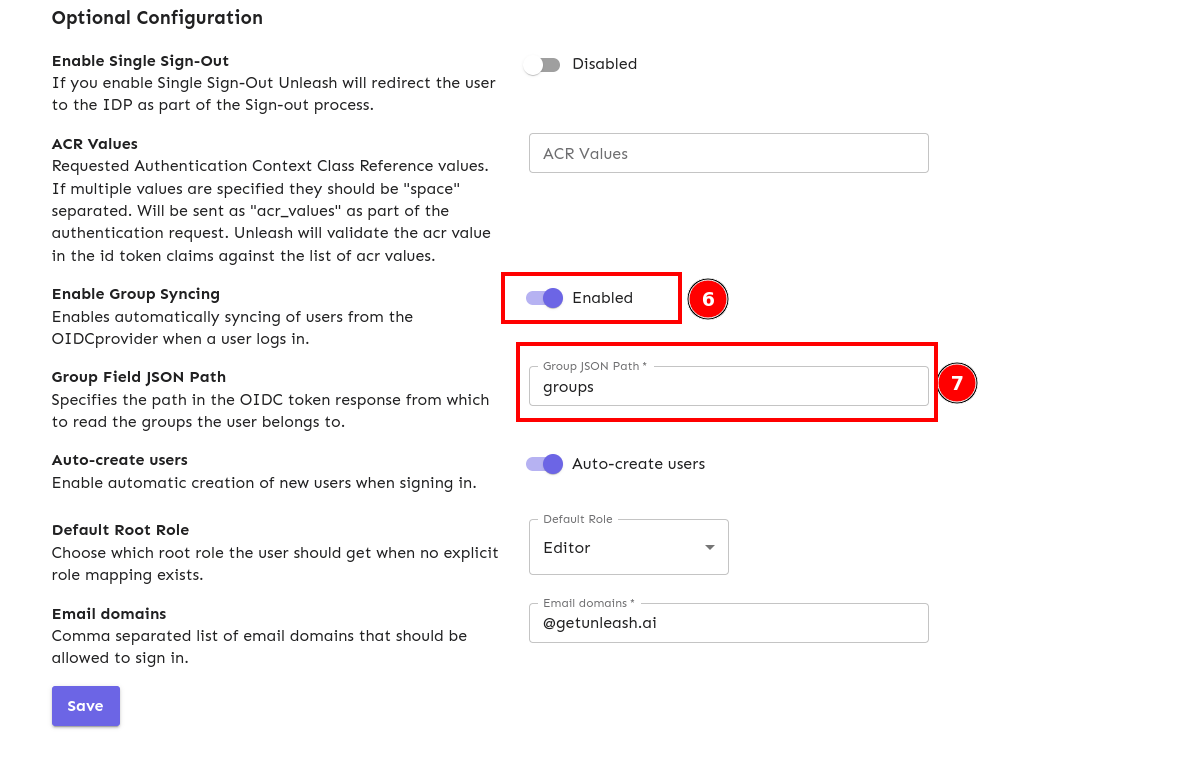
Step 2: Enable Group Syncing
Turn on Group Syncing and set a value for "Group Field JSON Path". This must match the value in claim name in Keycloak exactly. Save your configuration.
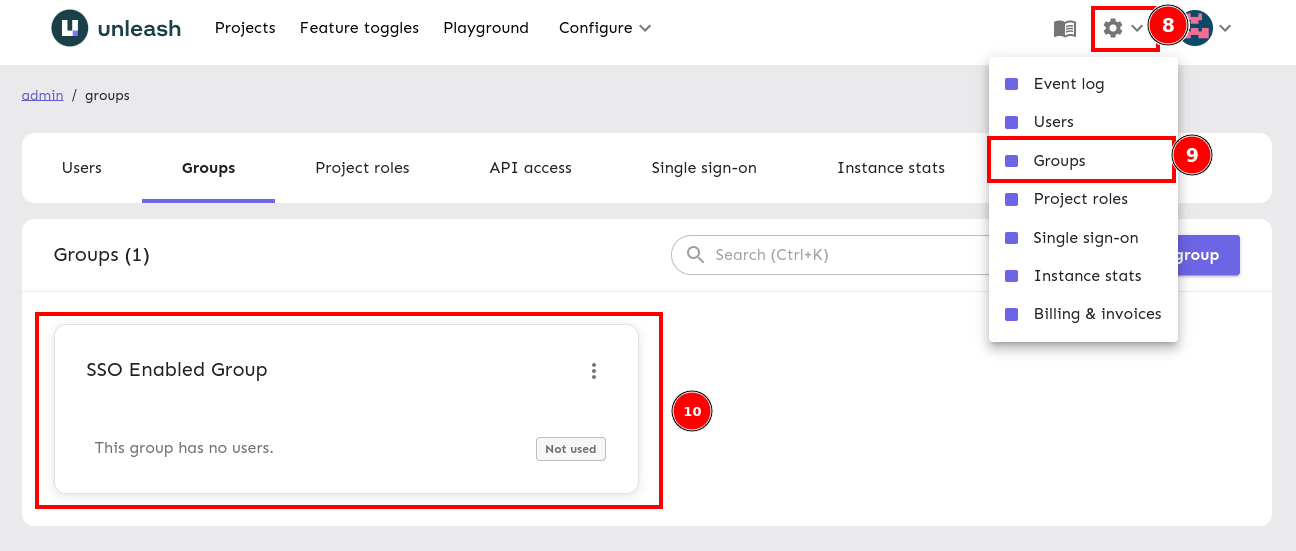
Step 3: Enable Group Syncing for your Group
Navigate to Groups and select the group that you want to sync.
Edit the group.

Add as many SSO groups as you like. These need to match the Keycloak groups exactly.
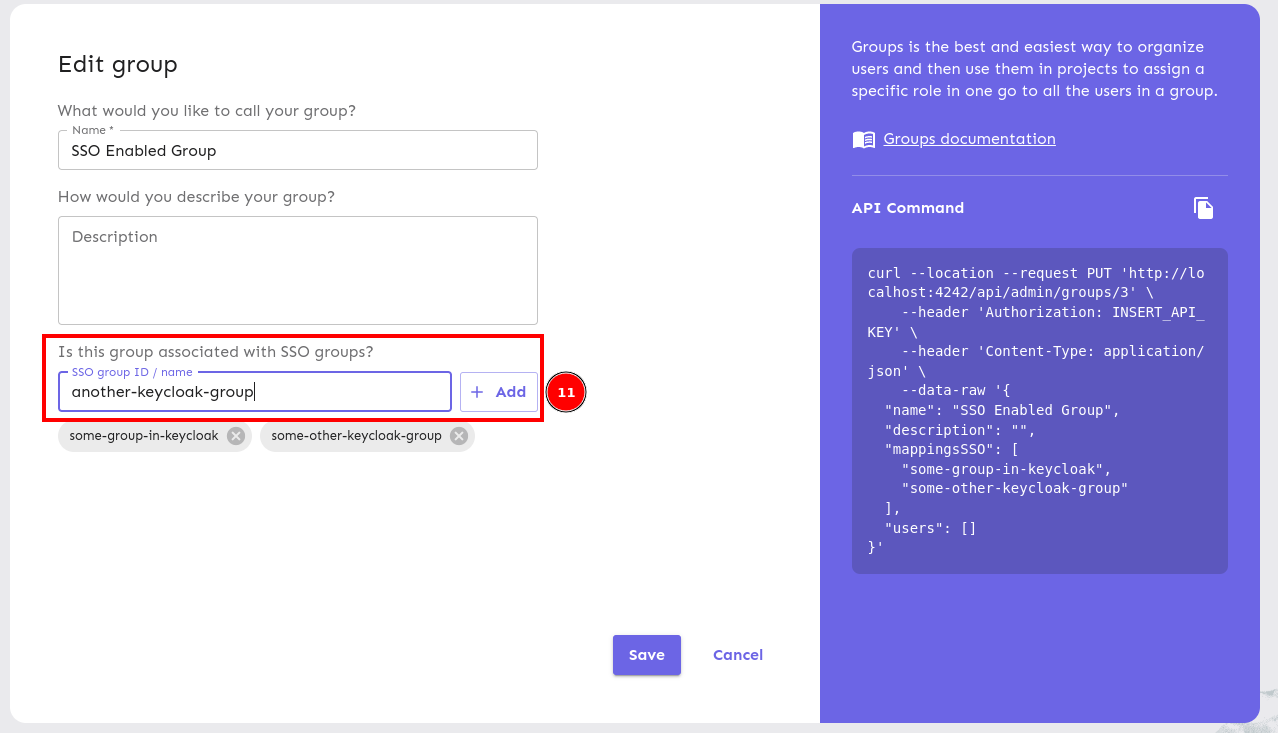
Save your configuration. Once a user belonging to one of these Keycloak groups logs in through SSO, they'll be automatically added to this Unleash group.