Set up SSO with SAML 2.0 and Microsoft Entra ID
Plan: Enterprise
This guide walks you through setting up single sign-on (SSO) using SAML 2.0, with Microsoft Entra ID as the identity provider (IdP). Unleash supports a variety of identity providers and protocols; visit our reference documentation to explore other options.
Prerequisites
To follow along, you'll need:
- An Unleash instance with Admin access.
- Access to Microsoft Entra as at least a Cloud Application Administrator.
Create an enterprise application in Microsoft Entra ID
To create a new enterprise application in Microsoft Entra, do the following:
- In the Microsoft Entra admin center, go to Identity > Applications > Enterprise applications and click New application.
- In the Microsoft Entra Gallery, click Create your own application.
- Enter an app name, select the Integrate any other application you don't find in the gallery option, and click Create.
Configure SAML SSO for the application
Add SAML configuration
To configure SSO for the new application, do the following:
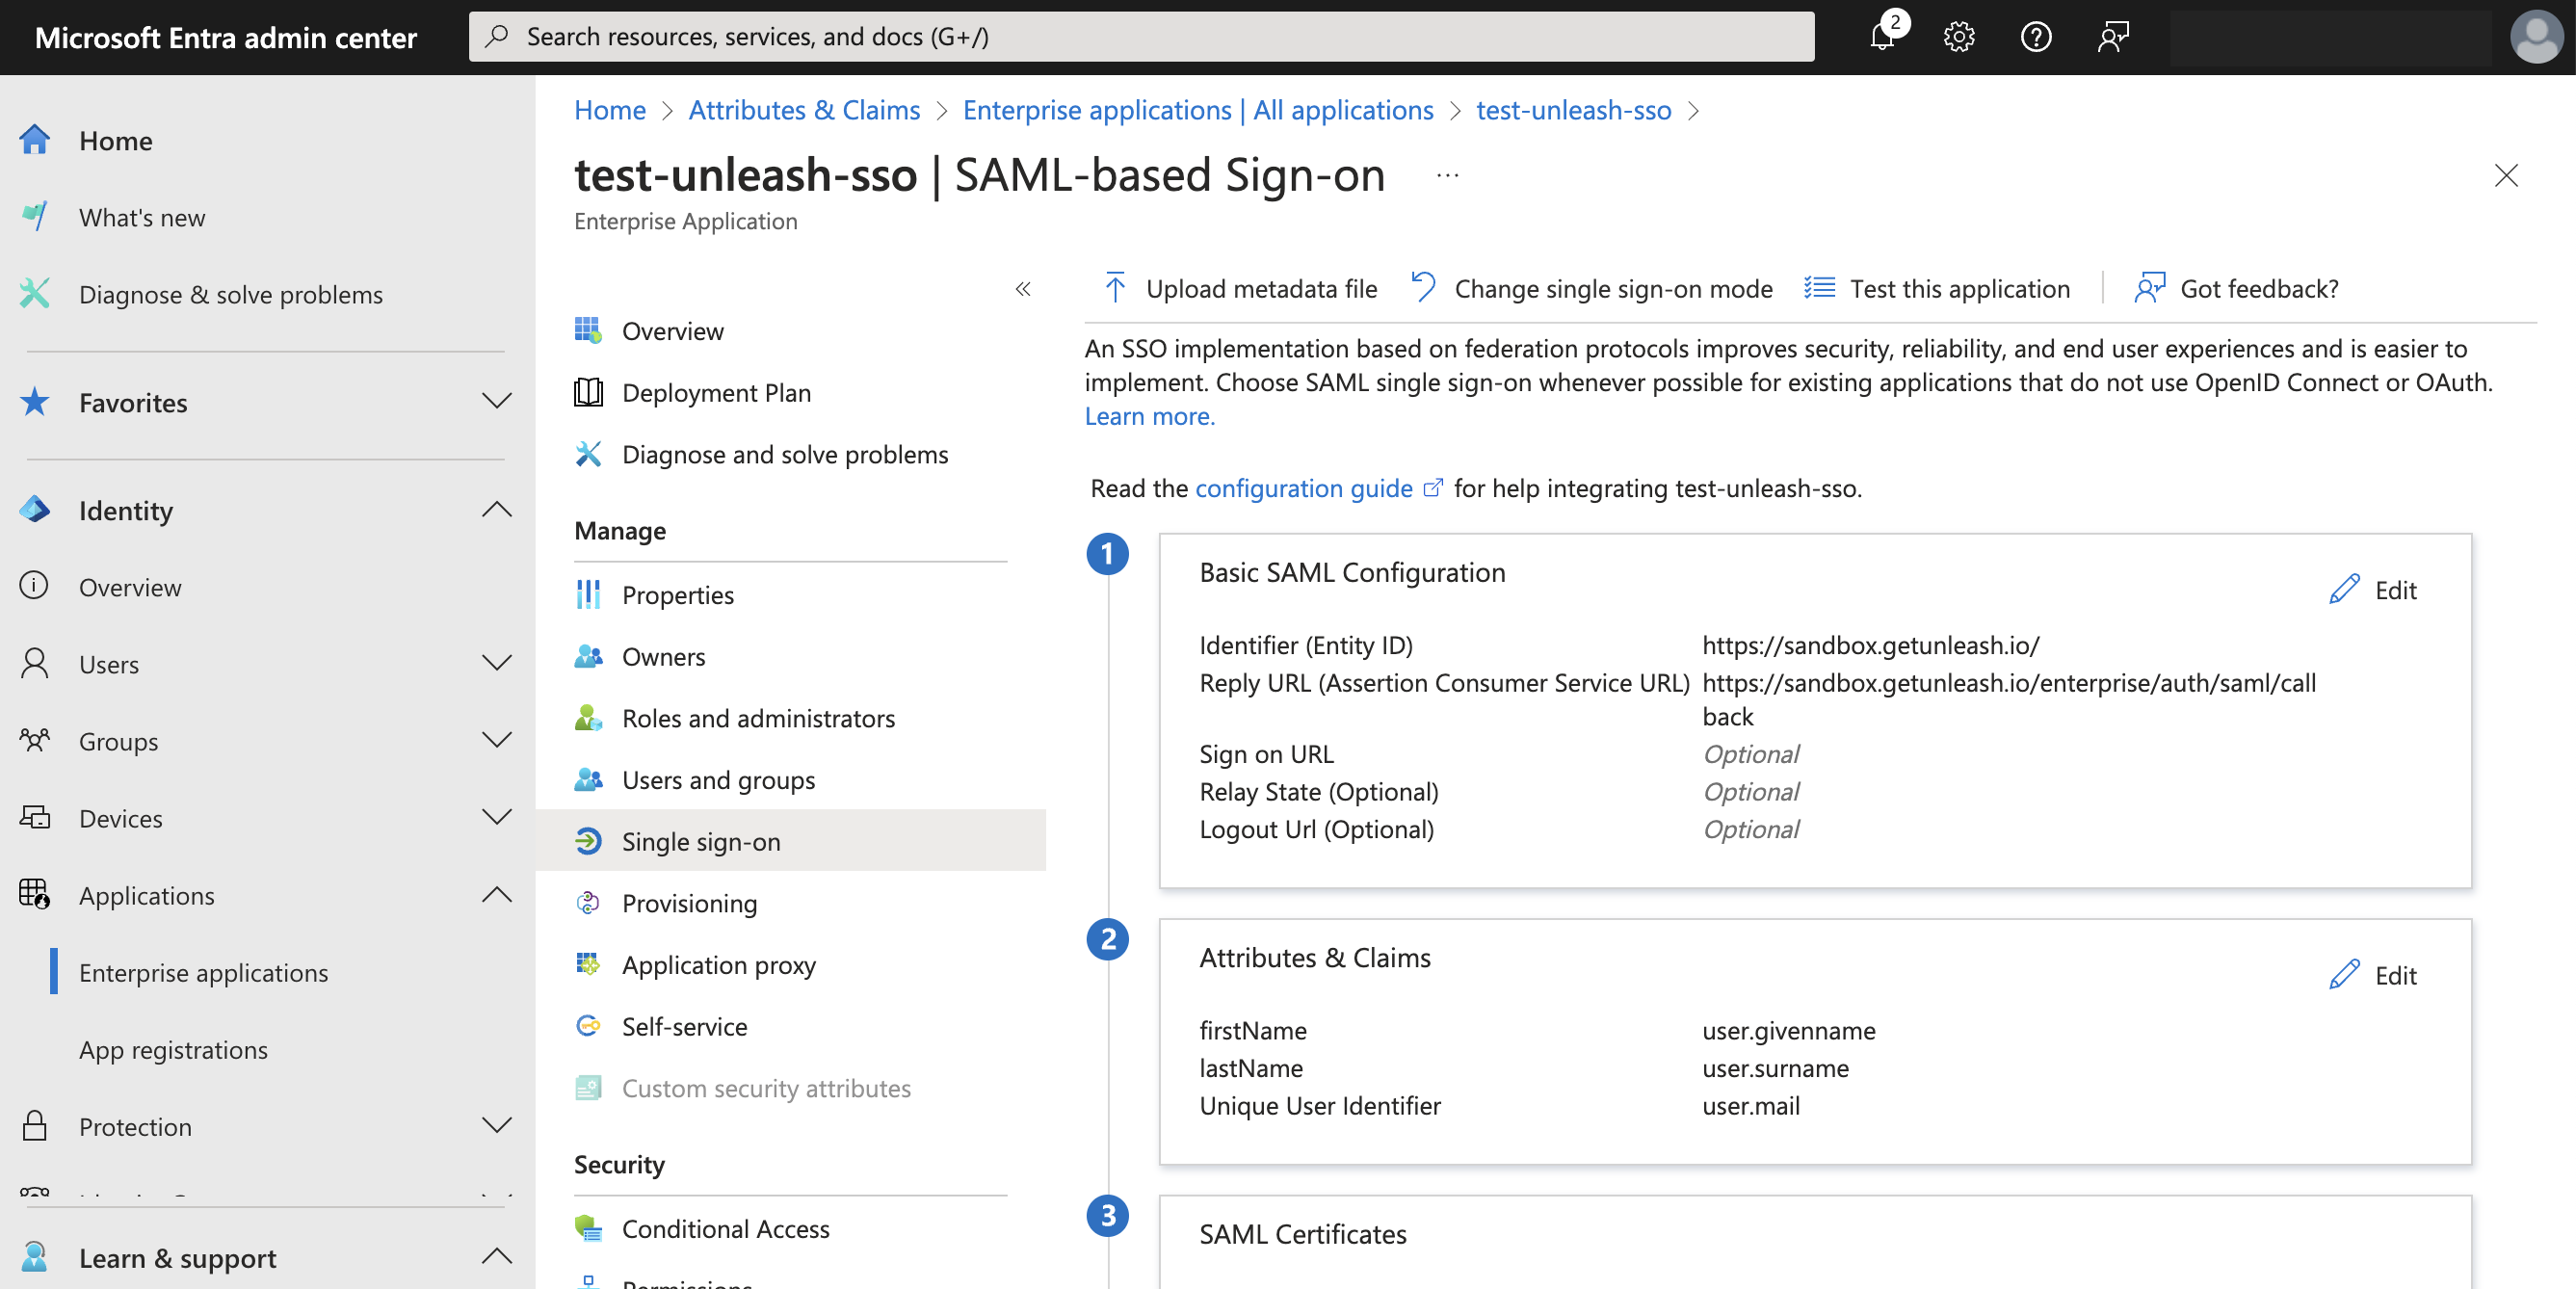
- In the overview page of the application, go to Manage > Single sign-on and click SAML.
- In the Basic SAML Configuration section, click Edit.
- Click Add identifier and enter the Unleash identifier. For hosted instances, that is
https://<region>.app.unleash-hosted.com/<your_unleash_instance_name>. - Click Add reply URL and enter the URL shown in the Unleash Admin UI at Admin settings > Single sign-on > SAML 2.0. For example,
<your_unleash_url>/auth/saml/callback. - Click Save.
Manage attributes and claims
To configure attributes and claims for the new application, do the following:
- In the single sign-on settings of your application, go to Attributes & Claims and click Edit.
- Go to Required claim and click Unique User Identifier (Name ID).
- For Name identifier format, select Email address.
- For Source, select Attribute and for Source attribute select
user.mail. - Click Save.
To populate the first and last names of users in Unleash, configure two additional claims with attributes user.givenname and user.surname with no namespace.
Save SAML certificate, identifier, and login URL
Save the following information from the single sign-on settings of your application:
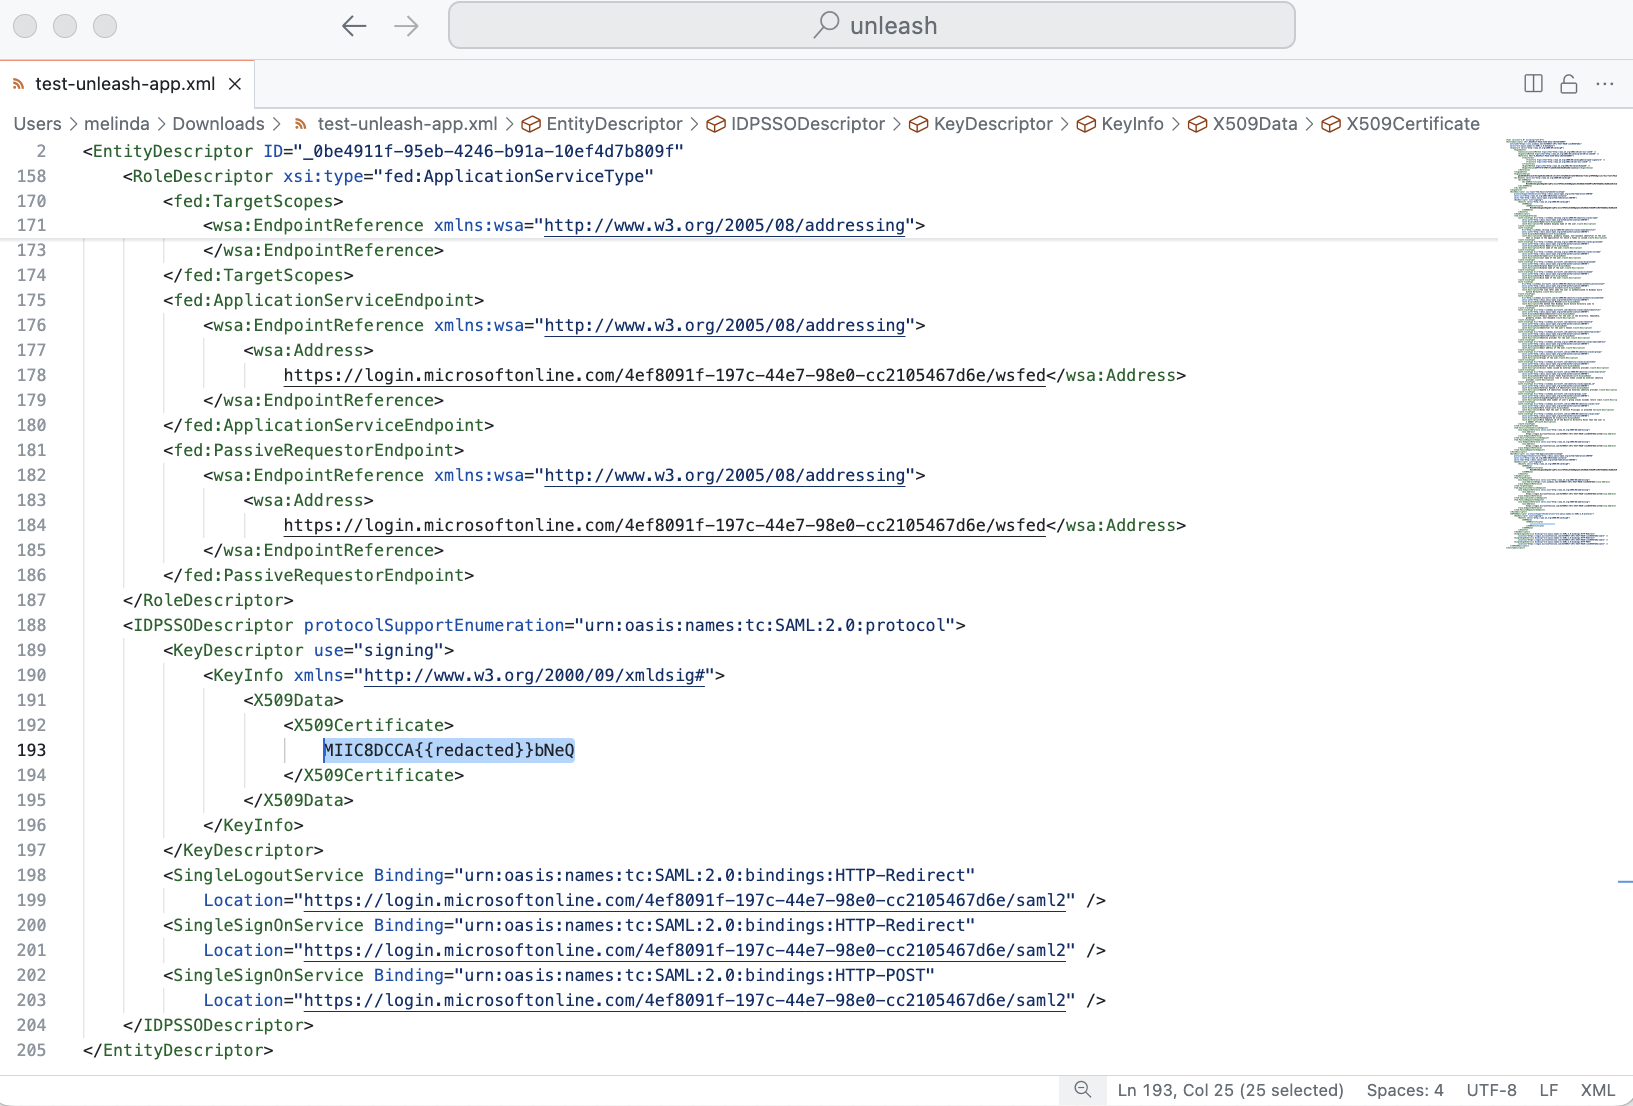
SAML certificate
To save the SAML certificate, go to the single sign-on settings of your application. In SAML Certificates > Federation Metadata XML, click Download. Open the file and copy the contents between the X509Certificate tag.
Login URL
To find your login URL, go to the single sign-on settings of your application. In the Set up <your-application-name> section, copy and save Login URL. For example: https://login.microsoftonline.com/<your_identifier>/saml2.
Microsoft Entra identifier
To find your Microsoft Entra identifier, go to the single sign-on settings of your application. In the Set up <your-application-name> section, copy and save Microsoft Entra Identifier. For example: https://sts.windows.net/<your_identifier>
Configure the SAML 2.0 provider in Unleash
To finalize the configuration, do the following:
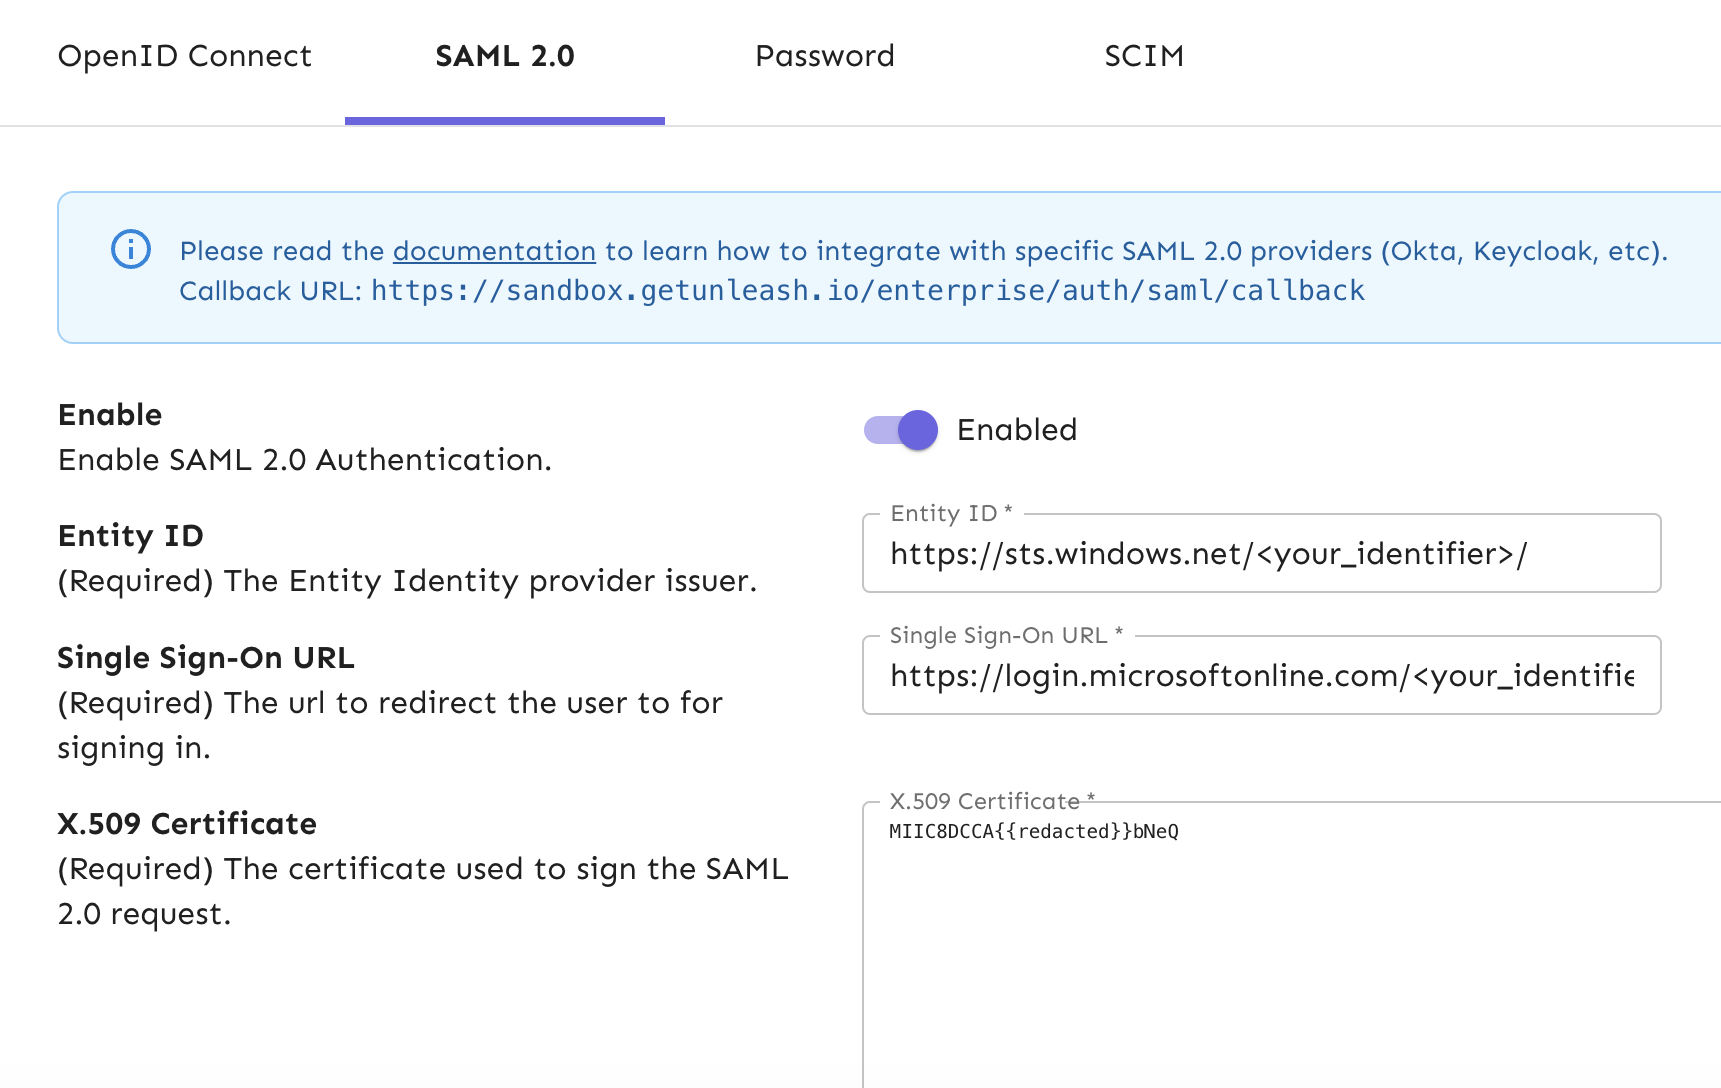
- In the Unleash Admin UI, go to Admin settings > Single sign-on > SAML 2.0.
- In Entity ID, enter your Microsoft Entra identifier.
- In Single sign-on URL, enter your Login URL.
- In X.509 Certificate, enter your SAML certificate.
- Optional: To automatically create users for first-time sign-ins, select Auto-create users. Select a default root role new users should have, and configure the list of valid email domains.
- Click Save.
Test your configuration
To test that things are working as expected, log out of Unleash and verify that the login screen gives you the option to sign in with SAML 2.0. You can also test the integration in Microsoft Entra in the single sign-on settings of your application.
Enable group syncing
Optionally, you can sync groups from Microsoft Entra ID to Unleash to map them to groups in Unleash.
To create the group in Microsoft Entra, do the following:
- In the Microsoft Entra admin center, go to the single sign-on settings of your application, and select Attributes & Claims.
- Click Add a group claim and select Groups assigned to the application.
- In the Advanced options click Customize the name of the group claim, and enter a name.
- Click Save.
Microsoft Entra limits the number of groups emitted in a SAML response to 150, including nested groups. If you have users who are present in more than 150 groups, add a filter in the advanced section of group claims to ensure the response only includes the groups you want to send to Unleash.
To enable group syncing in Unleash, do the following:
- In the Unleash Admin UI, go to Admin settings > Single sign-on > SAML 2.0.
- Select Enable Group Syncing and add the name in your group in Group Field JSON Path.
- Click Save.