Set up SSO with SAML 2.0 and Keycloak
Introduction
In this guide we will do a deep dive on the Single-Sign-On (SSO) integration with SAML 2.0 and connect it with Keycloak as IdP. Unleash supports other identity providers and protocols, have a look at all available Single-Sign-On options
Basic configuration
Step 1: Sign-in to Unleash
In order to configure SSO you will need to log in to the Unleash instance with a user that have “Admin” role. If you are self-hosting Unleash then a default user will be automatically created the first time you start Unleash:
- username:
admin - password:
unleash4all
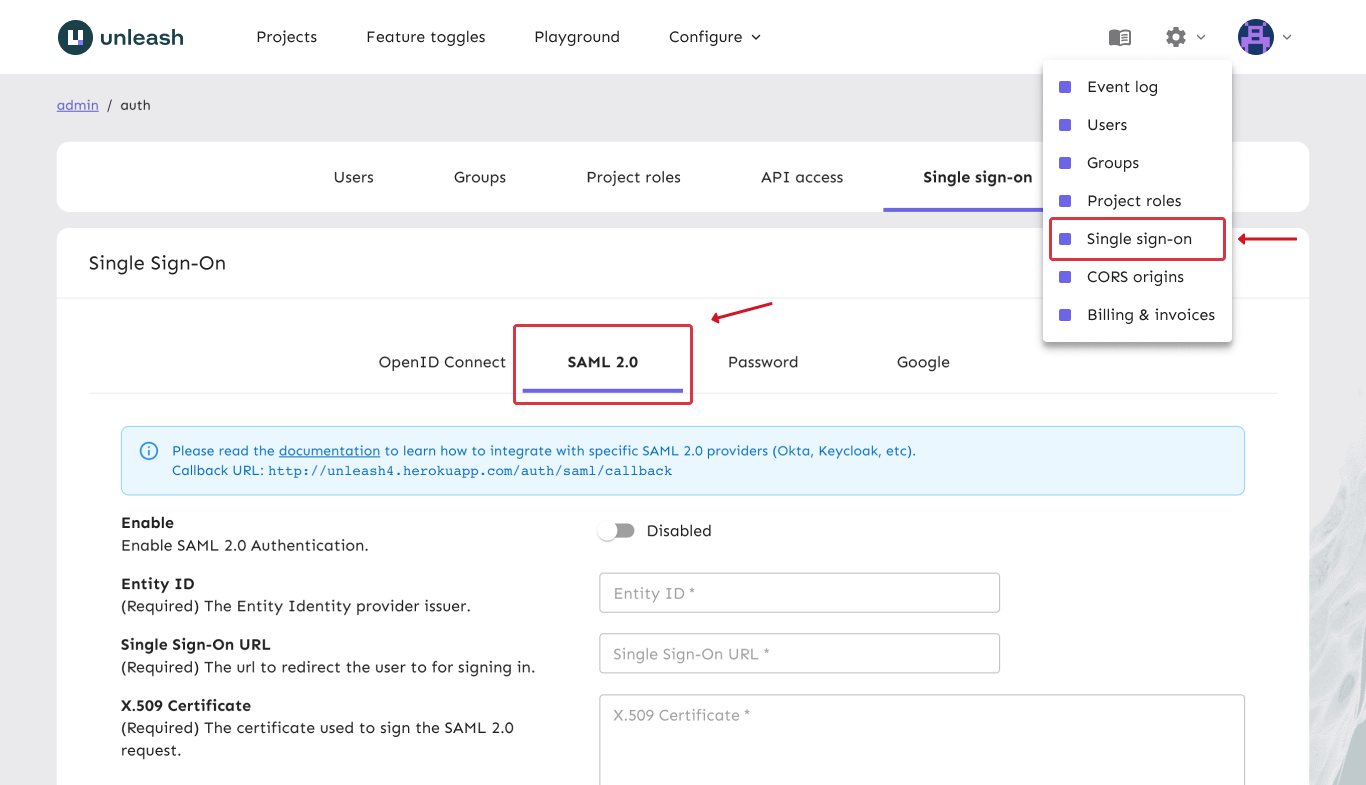
Step 2: Navigate to SSO configuration
In order to configure SSO with SAML with your Unleash enterprise you should navigate to the Single-Sign-On configuration section and choose the “SAML 2.0” tab.
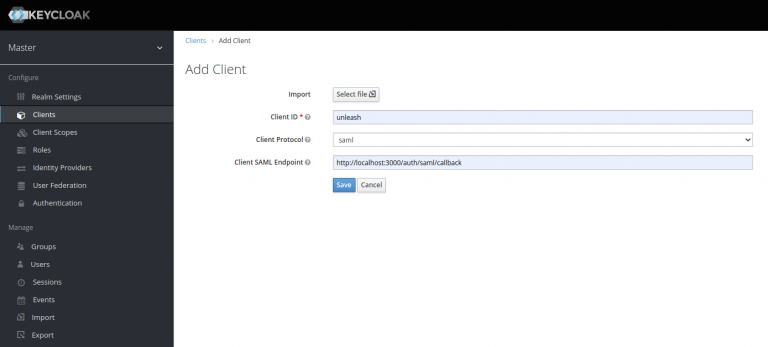
Step 3: Keycloak with SAML 2.0
Open to the Keycloak dashboard and navigate to “Clients” and click “Add Client” button. Give it a unique clientId (e.g. unleash), use the “saml” protocol and specify the following SAML Endpoint:
a) Change “Name ID format to “email” Unleash expects an email to be sent from the SSO provider so make sure Name ID format is set to email, see a). also you must give the IDP Initiated SSO URL Name, we have chosen to call it “unleash”, see 2). This gives us the Sign-on URL we will need in our Unleash configuration later.
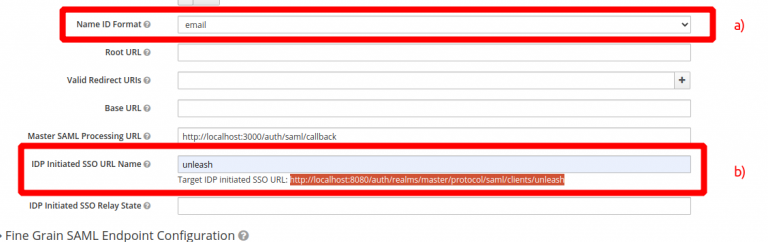
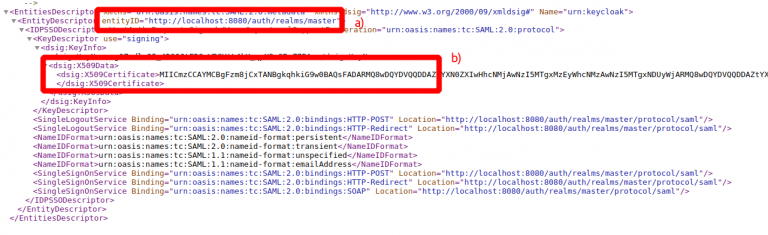
b) Copy the Keycloak Entity ID an Signing key
Navigate to “Realm Settings” and open the “SAML 2.0 Identity Provider Metadata”. You will need copy the entityID (a) and the X509Certificate (B). These will be required when configuring SAML 2.0 in Unleash.
Step 4: Configure SAML 2.0 Authentication provider in Unleash
Go back to Unleash Admin Dashboard and navigate to Admin Menu -> Single-Sign-On -> SAML. Fill in the values captured in the step 3.
- Entity ID (3b a)
- Single Sign-On URL (3a b)
- Certificate (3b b)
You may also choose to “auto create users”. This will make Unleash automatically create new users on the fly first time they sign-in to Unleash with the given SSO provider. You may also limit the auto-creation to certain email domains, shown in the example below.

Step 5: Validate
You have now successfully configured Unleash to use SAML 2.0 together with Keycloak as an IdP. Please note that you also must assign users to the application defined in Keycloak to actually be able to log-in to Unleash.
Try signing out of Unleash. If everything is configured correctly you should be presented with the option to sign in with SAML 2.0.