For AI agents: a documentation index is available at the root level at /llms.txt and /llms-full.txt. Append /llms.txt to any URL for a page-level index, or .md for the markdown version of any page.
13.5kProductPricingSign inStart free trialBook a demo
DocsAPIsSDKsEnterprise EdgeGuidesAcademyRelease notes
    • Home
  • Get started
    • Quickstart
    • Introduction to feature flags
    • Unleash architecture overview
  • Core concepts
    • Overview
    • Import and export
      • Unleash hosting options
        • Okta
        • Entra
      • Developer Toolbar

Unleash reduces the risk of releasing new features, drives innovation by streamlining the software release process, and increases revenue by optimizing end-user experience. While we serve the needs of the world's largest, most security-conscious organizations, we are also rated the “Easiest Feature Management system to use” by G2.

GitHubGitHubLinkedInLinkedInX (Twitter)X (Twitter)SlackSlackStack OverflowStack OverflowYouTubeYouTube

Server SDKs

  • Node.js
  • Java
  • Go
  • Rust
  • Ruby
  • Python
  • .NET
  • PHP
  • All SDKs

Frontend SDKs

  • JavaScript
  • React
  • Next.js
  • Vue
  • iOS
  • Android
  • Flutter

Feature Flag use cases

  • Secure, scalable feature flags
  • Rollbacks
  • FedRAMP, SOC2, ISO2700 compliance
  • Progressive or gradual rollouts
  • Trunk-based development
  • Software kill switches
  • A/B testing
  • Feature management
  • Canary releases

Product

  • Quickstart
  • Unleash architecture
  • Pricing
  • Product vision
  • Open live demo
  • Open source
  • Enterprise feature management platform
  • Unleash vs LaunchDarkly

Support

  • Help center
  • Status
  • Changelog
Made in a cosy atmosphere in the Nordic countries.Copyright © 2026 Unleash
LogoLogo
13.5kProductPricingSign inStart free trialBook a demo
On this page
  • Unleash Configuration
  • Entra Configuration
Integrate and deployAutomatic provisioning

Set up Entra provisioning

||View as Markdown|
Was this page helpful?
Previous

Integrations

Next
Built with
v6.1 Enterprise

Unleash Configuration

Before you begin, ensure that you have a strategy in place to prevent being locked out of all admin accounts.

Step 1: Navigate to Provisioning configuration

First you’ll need to log in to Unleash as an admin user. Navigate to the Single Sign-On section and select the “SCIM” tab. The SCIM API URL will be shown in this section, you’ll need this to configure Entra later.

Navigate to the SCIM Config

Step 2: Enable Provisioning

Enable SCIM by turning on the toggle and keep the token Unleash provides you for the Entra setup below.

Enable the SCIM toggle

Entra Configuration

Step 1: Navigate to Provisioning in Entra

This guide assumes you already have an SSO application setup for Unleash. If you don’t already have an application configured, please see our guide on setting up SSO.

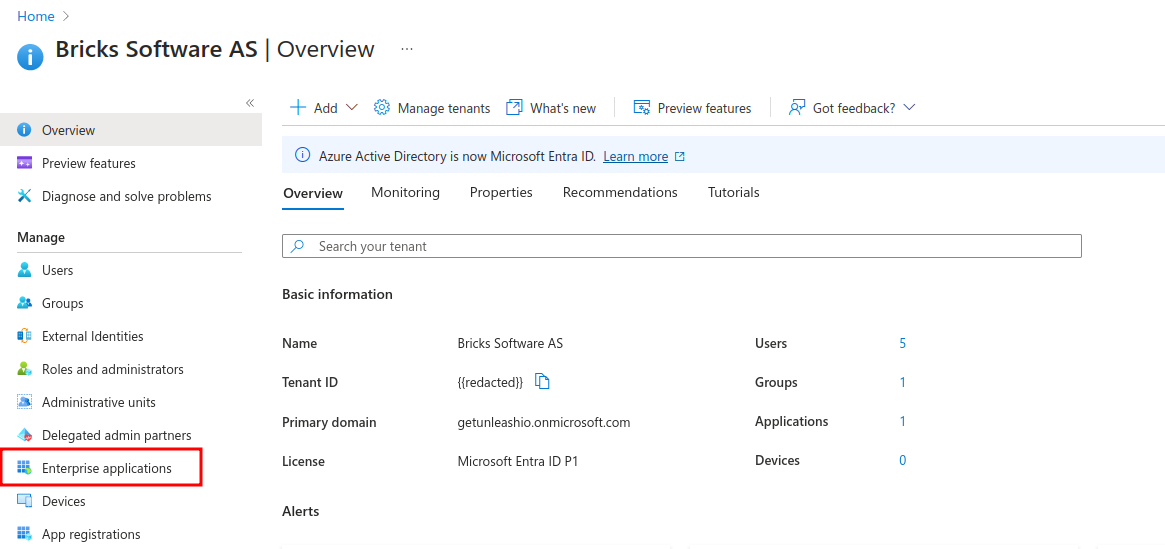
1) Navigate to “Enterprise Applications”

Navigate to Enterprise Applications

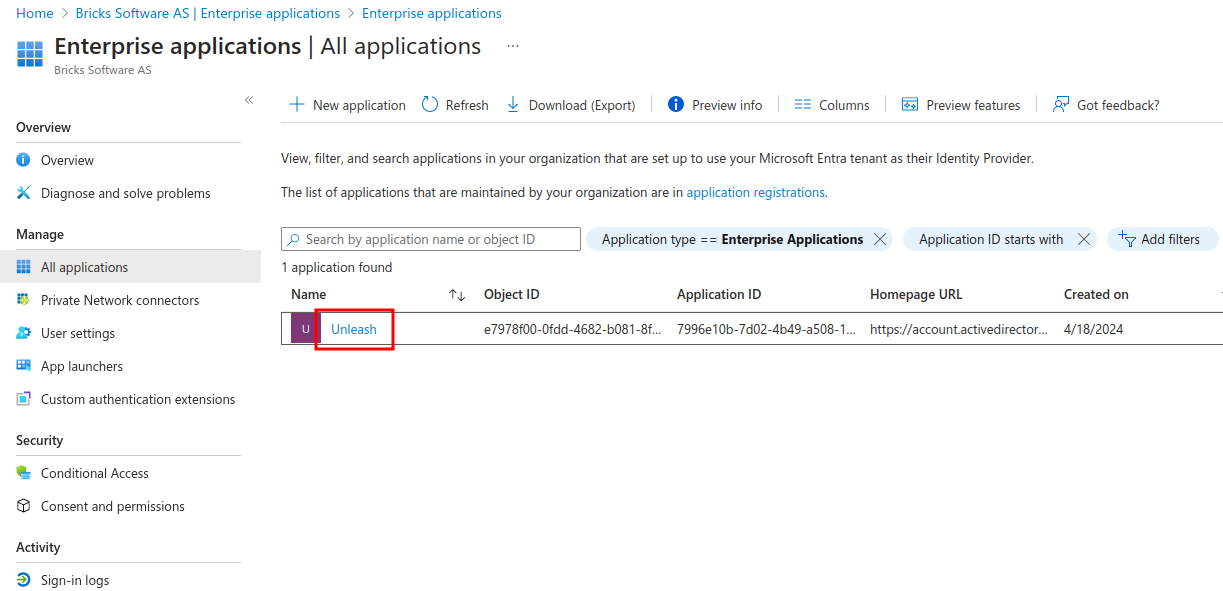
2) Navigate to your SSO Application

Select your Application

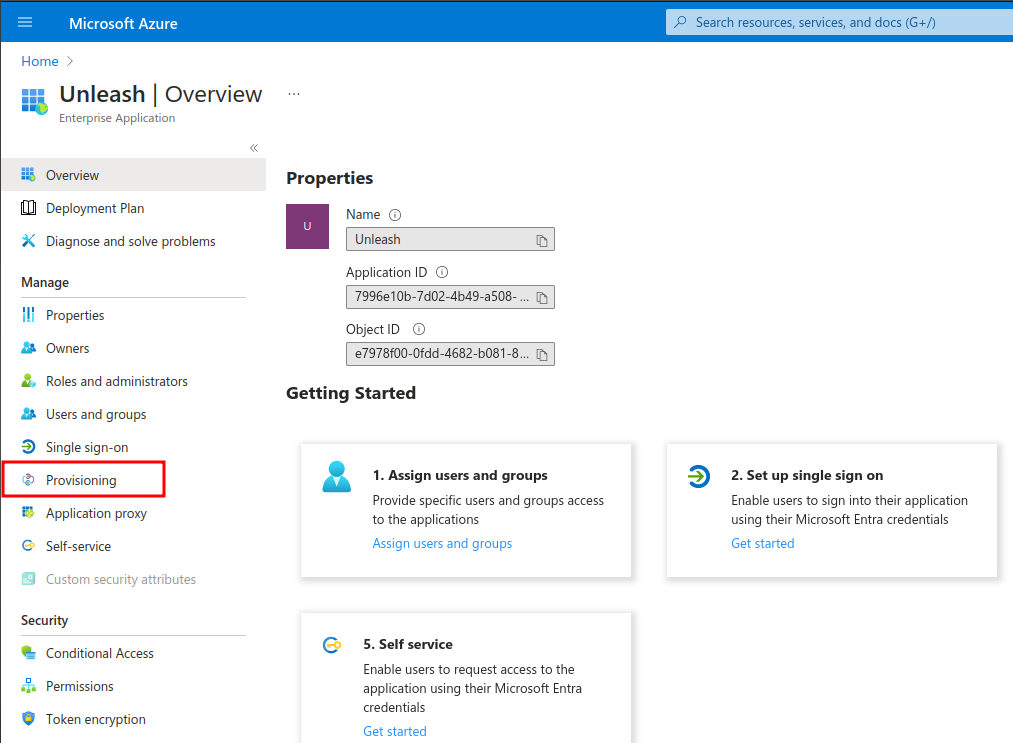
3) Navigate to provisioning

Navigate to the provisioning overview menu item

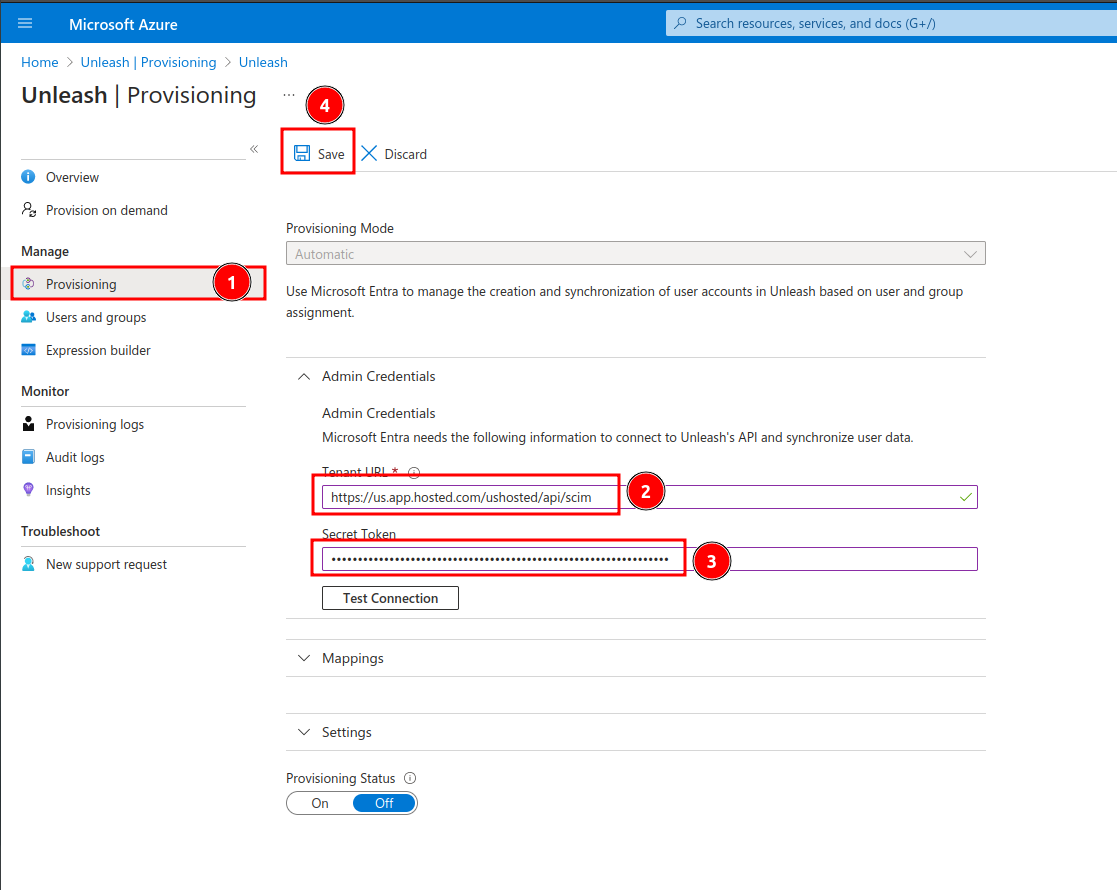
Step 2: Connect Unleash to your Entra Application

1) Navigate to the Provisioning overview

2) Set the Tenant URL

This the SCIM API URL provided by the Unleash UI in the configuring Unleash section.**

If you plan on deprovisioning users at any point with SCIM, you’ll also need to enable the SCIM compliance flag on Entra. This can be done by appending ?aadOptscim062020 to your URL.

3) Set the Secret Token

This was provided by the Unleash UI in the configuring Unleash section.

4) Save

Setting up SCIM credentials

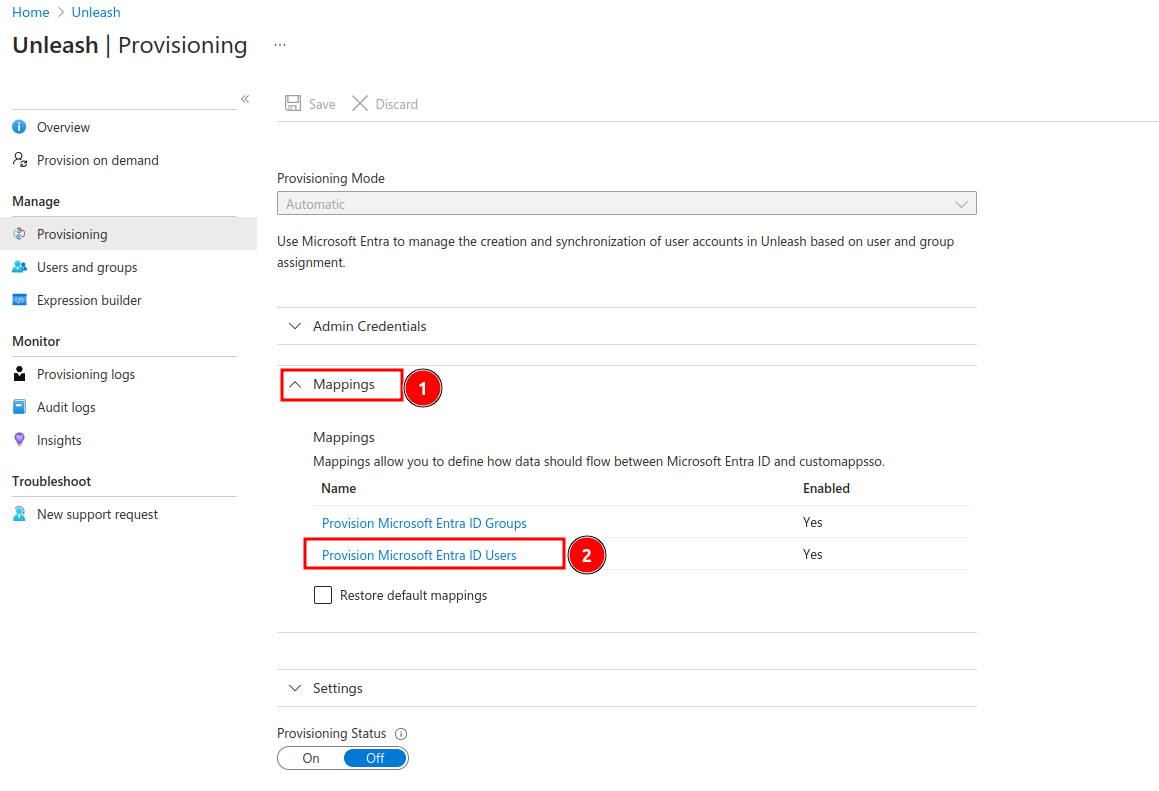
Step 3: Configure Provisioning

1) Expand the mappings tab

2) Navigate to “Provision Microsoft Entra ID Users”

Navigate to user provisioning setup

This was provided by the Unleash UI in the configuring Unleash section.

Connect Unleash

3) Remove unneeded properties

You should remove all unnecessary properties. This ensures that Entra will reach a steady state when synchronizing. The properties that you must retain are:

  • userName
  • displayName
  • emails
  • externalId

4) Update the email property to “userPrincipleName”
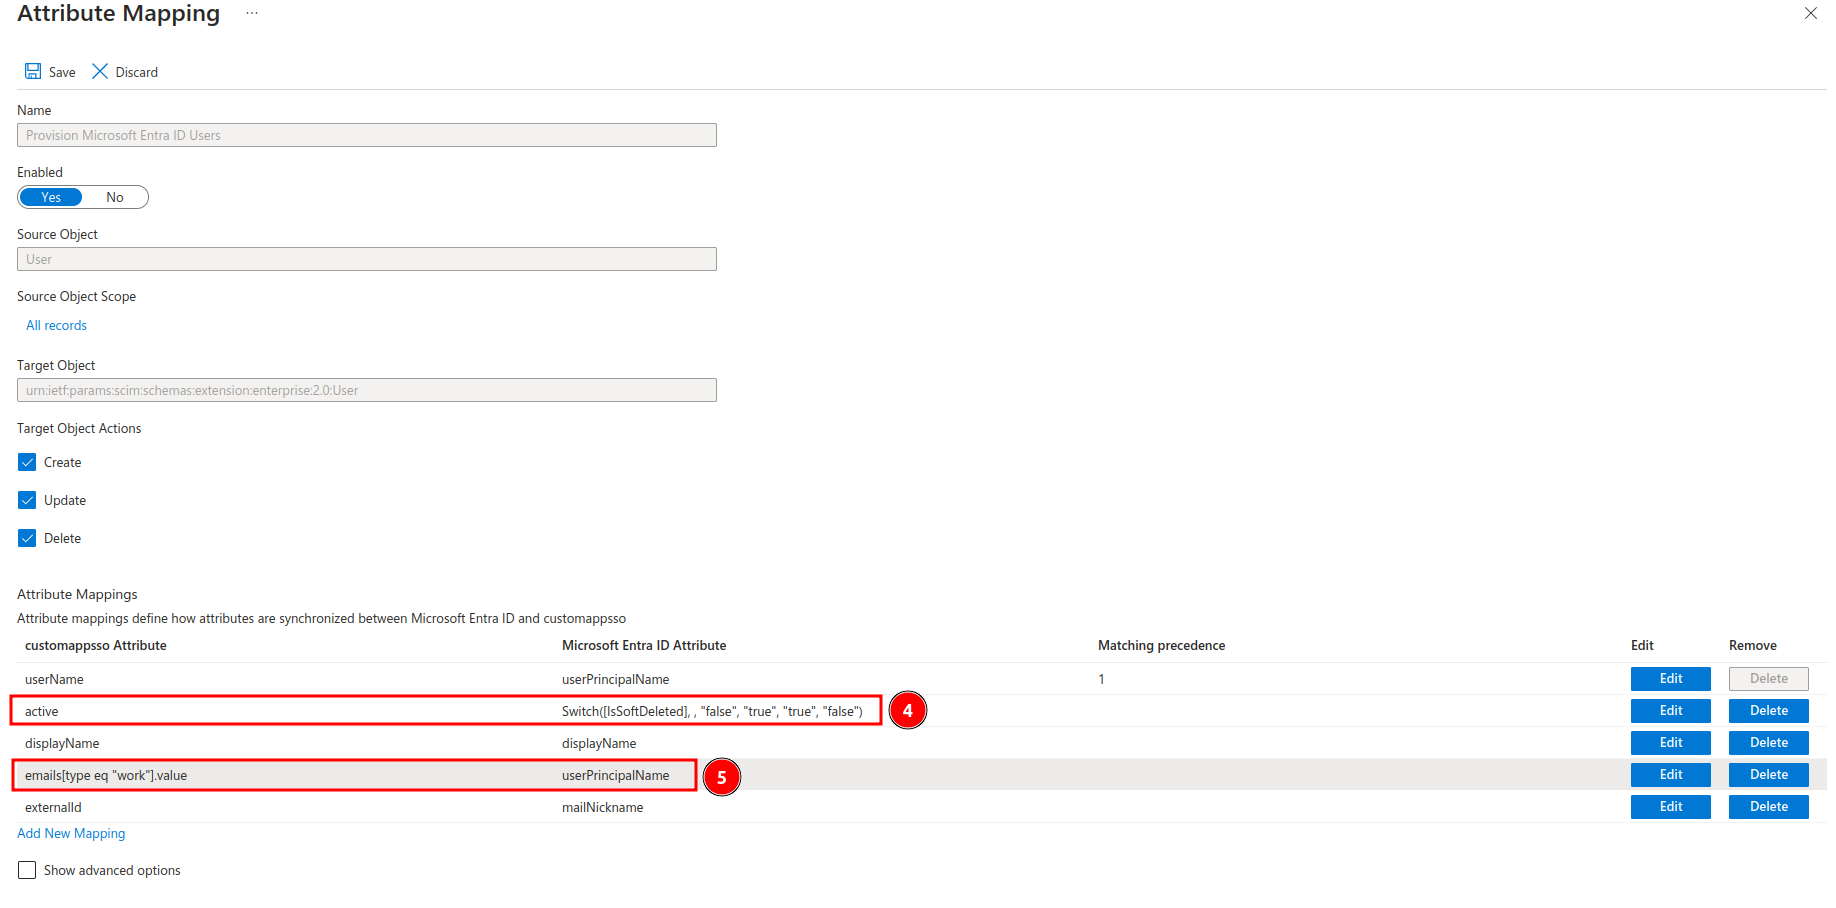
Update provisioning properties

5) Save

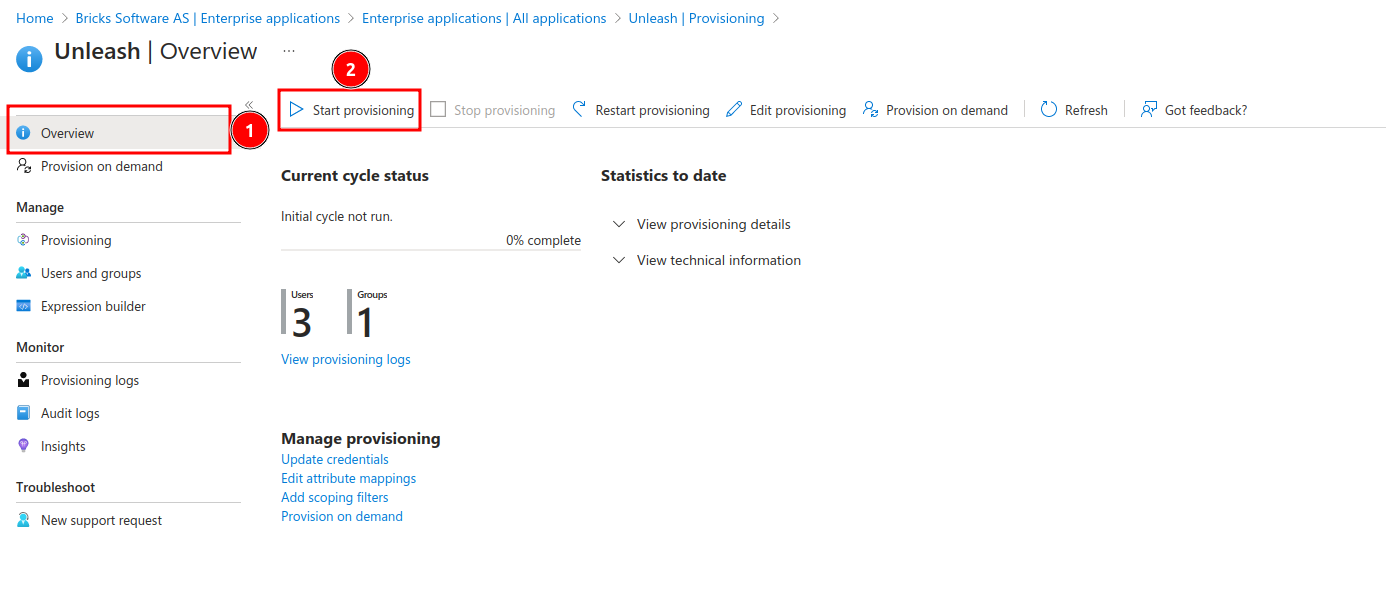
Step 4: Enable Provisioning

1) Enable provisioning

Enable provisioning

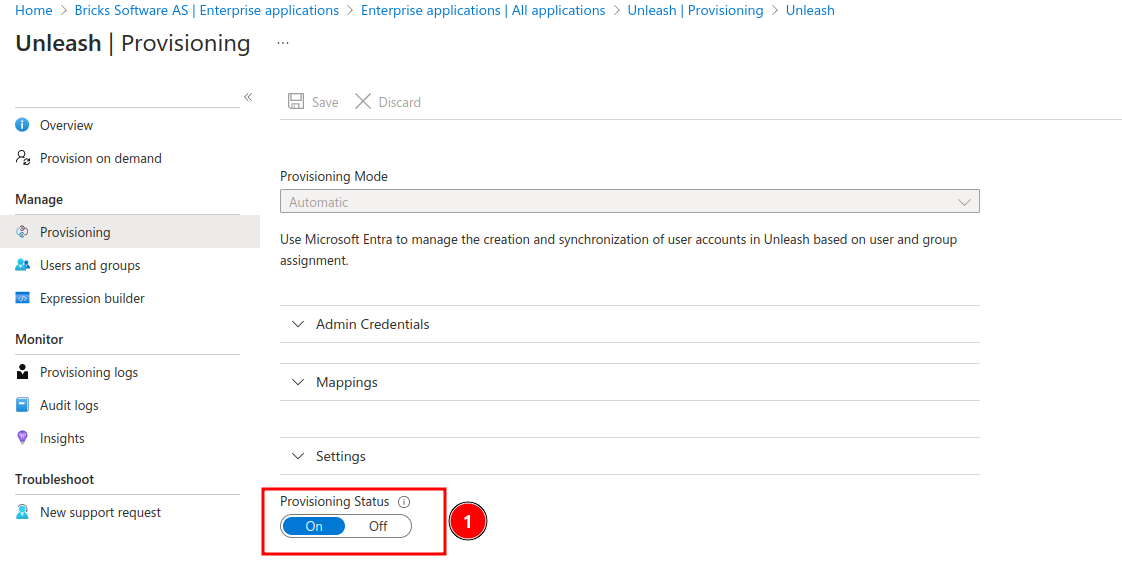
2) Enable automatic provisioning

Enable provisioning